All posts by Tom

I'm the guy who writes the blog...

You’re helping me, smalls

I love to quote movie lines. Ask Rhonda. She’ll tell you.

  • Open the pod bay door, HAL.
  • We have both kinds of music – country and western.
  • We’re going to need a bigger boat.

After a while, she will just roll her eyes and walk off into another room. Good for her!

One of my favorites to throw around is from the movie The Sandlot. Whenever someone is giving me a hard time at work, I always have to counter with the line made famous by the movie’s character Ham Porter:

SMALLS

I usually mutter this under my breath whenever I mess up in the shop. But, there are times when working on smalls – or small projects, in this case – can help keep you sharp, even in the middle of a big project.

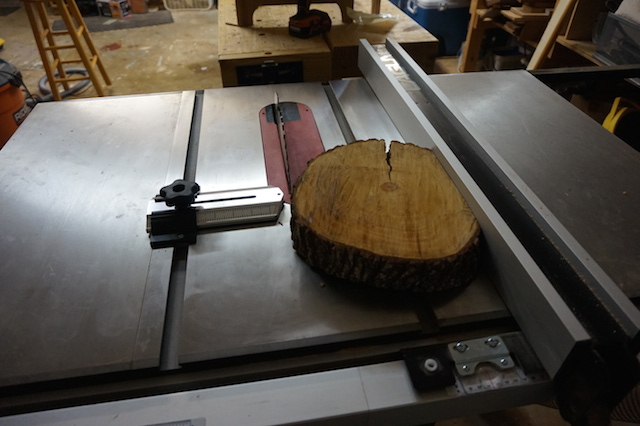
We are flying up to visit my nephew for his first communion, and I wanted to make him one of my small wooden crosses to commemorate the occasion. Moving the hope chest to the side of the shop, I grabbed a piece of walnut and a piece of zebrawood I had been holding on to for close to a decade now.

Glue applied

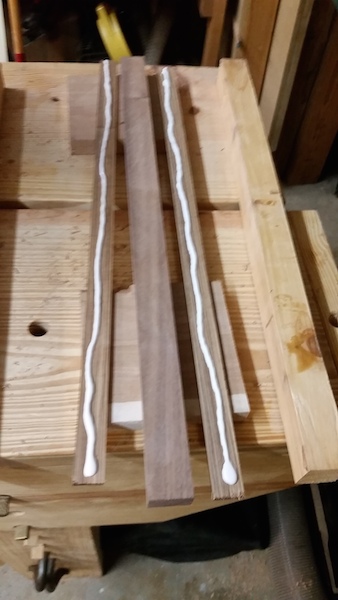
I ripped a few piece, got everything nice and true and slathered a little glue on the pieces to prepare them for glue up. Glue up?  How was I going to accomplish this? After all, I would probably need about two dozen clamps to evenly distribute the clamping pressure along this long stick I was trying to make… or did I?

Caul of the wild

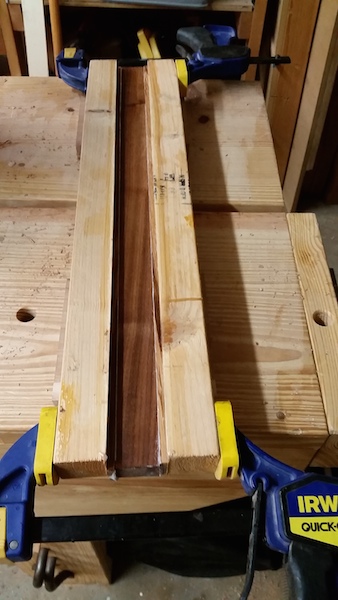
Turns out, the cauls I had made a few years ago were perfect for this application. With a hump planed into the middle of the cauls, two clamps – one on each end – were more than enough to bring sweet, even pressure along the entire piece from top to bottom. Easy peasey.

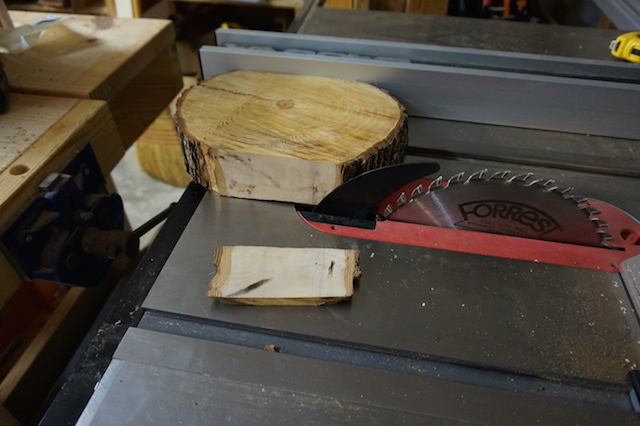
Once glued up and out of the cauls, I turned my attention to joinery. Since the cross project needs only a simple half-lap, I turned to my table saw and used my regular combination blade to nibble out the material to make the cut. It took a little fussing, but the joints came out looking great.

Half laps

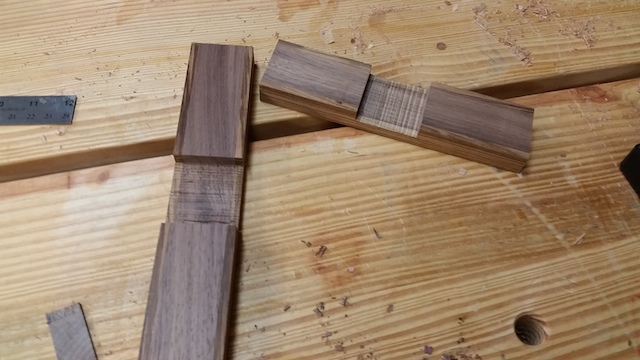
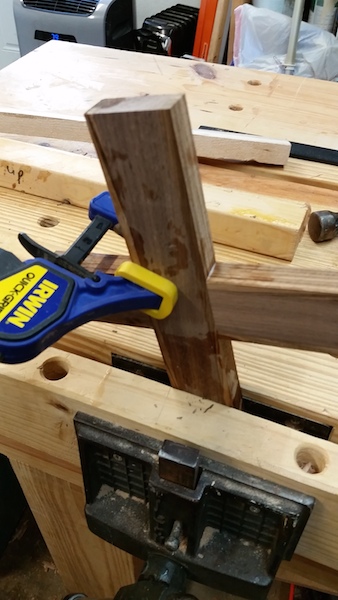
The half lap joints were nice and tight when fit, and a little bit of glue is all it required to get the pieces together. A single clamp on the piece held everything together until the glue dried.

Clamped

With the glue now dry, it took just a few minutes to sand the piece down nice and smooth, ready for some finish. I went with the Rude and Crude method, starting with a coat of dewaxed shellac.

Ready for shellac

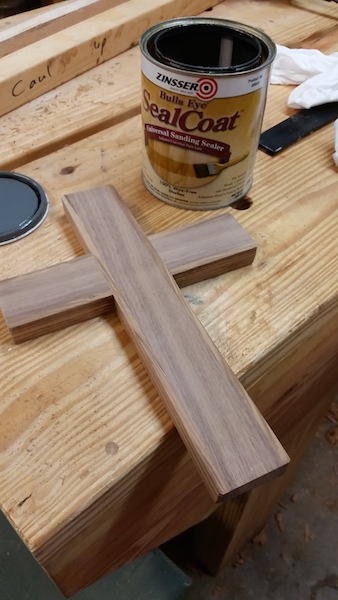
Once that cured. I sanded it down with some 320 grit paper (the finest grit I had on hand) and wiped on two coats of my home brew finish.

Et finis

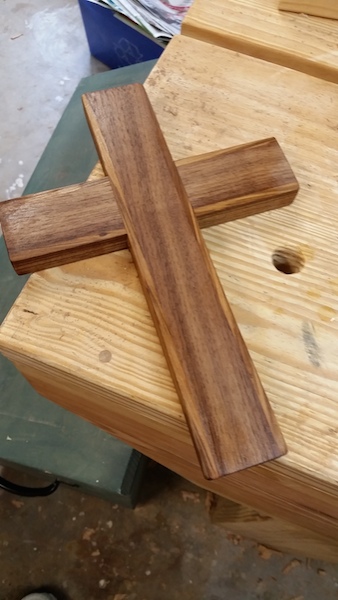
Now that it’s dry, it’s ready for Uncle Tom’s signature and some wrapping paper.

There’s nothing quite like the smell of a successful small project. It smells like victory….

The weekly plan

Build a wooden pinhole camera

OK, so the folks at Geek Squad said my camera is fixable under the warranty and it should be back in my hot little mitts by May 4. So, I will be treating it with a TON more care.

A wooden pinhole camera

In its absence, I got to thinking. Could you build a wooden camera? The answer is yes!  This week’s plan from DIY Photo shows how to build a wooden pinhole camera that you can use to create some wild photographic effects.

Oh, for you photo geeks, it’s actually an anamorphic pinhole camera, which allows you to capture some wild images, such as this one.

Sample anamporphic image

If you want to try your hand at this, have fun with it!

Murphy is in charge

Bread lands buttered side down.

If everything is going well, you have obviously overlooked something.

And, when you have your sweet compact body camera in your shop while trying to take a picture for an article on your blog, it will invariably find some way to fall to the ground and fall with a sickening crack.

That’s exactly what happened when I was shooting photos for today’s post (which will appear next week, trust me). I had everything I needed – the board, the tools, the idea, the right lighting and – of course – the camera. And, the second I set that camera down on my workbench and turned my attention to moving the board to get a better shot, I could hear the impact.

Crap.

Now, the camera looked OK. Seriously. I held it in my hands, flipped it on and hoped for the best.

crap

Dangit. The camera won’t pair with the lens, which means something went kerfluey when it went kerplunk.

Geek Squad

Fortunately, at the time I bought the camera, I had the foresight to buy the extended warranty from the folks at Geek Squad. Whew. The sales guy told me that it covered just about anything I could do to the camera, and after a few minutes of chatting with the agent online, I discovered that yes, they do stand by the guarantee.

Whew.

This got me thinking… what about warranties on tools? I know that I often buy Ridgid tools because they have lifetime warranties, and yes, I have used the warranty to get my corded drill repaired. Should I be looking to get the extended warranties on bigger tools? I don’t know. Maybe tools are built a little tougher than electronics.

Oh, well, this is a learning experience, and one I’m glad I’m not having to cough up another $300 to fix. Whew…

You gotta have heart …

We are rounding the clubhouse turn on construction for the newest hope chest, and there is a special embellishment I wanted to add to the piece. Unfortunately, it was going to require an inlay, something I really REALLY have a tough time doing.

It’s not that I am a dunce (well, I am), it’s just that when it comes to routing patterns with even my trim router, it takes me a little bit of time to get the feel of what I’m doing. Which is a nice way of saying I waste a lot of material to get one good inlay.

The cut rig

But, first, let’s take a look at what I am inlaying.  This is a special piece of wood I was asked to include, and I wanted to get some nice slices out of it for the inlay process. So, I started by making a cut on one side of the board with the band saw so it would ride against the rip fence. I set the ripping ball bearing guide for a 3/16″ cut to peel off a few nice slices from this well-seasoned board.

Slices

As you can see, the first couple of whacks on the board really made some nice slices, perfect for cutting into inlay pieces.

The inlay kit

The next thing I had to do was rig the router for inlay work, which involves a special router guide bushing and a very fine 1/8″ router bit. With this attached to the trim router, I was ready to take my first tentative steps toward cutting the inlay.

The rig

I had to really secure one slice of the special wood in place to ensure it wouldn’t move. At all. So I secured the pattern to the piece and a plywood backer board with a screw. Then I tacked the piece down with a few brads. Then I stuck a few spare pieces as spacers under the sides of the pattern so it wouldn’t move.

Then I flipped on the router switch and prayed.

And, on my fourth attempt, I got a great cutout!  Woo Hoo!

Rout that lid

The next step was to put a special bearing on the guide bushing and clamp the same pattern down on the lid of the chest. This was going to be a little easier, since I had more space to work with. A few clamps, a little bit of router application, and blammo, I had the recess routed to take the inlay.

Now, for the moment of truth. Would the stupid thing fit?

The inlay ready to be driven home

Hey, I didn’t mess up too badly!  I glued the piece, smacked it down with a mallet until it fit the recess and broke out the belt sander to flush everything up. To get a real feel of what it looked like, I wiped a little mineral spirits over the board.

Awww

Woah. I’m going to say that went better than I expected.

Now, for the sanding and finish, and this baby will be ready to get off to the recipient and I’ll be ready to move on to the next project.

###

MicroJig Art

The weekly plan

How to build your own bar

How would you like to come home after a hard day’s work, pull up a stool at a comfortable bar where everyone knows your name and enjoy a frosty beverage?  What if I told you that you could have that luxury in your own home.

The bar that started it all

This page, offered by Milligan’s Gander Farm, shows you the basics of how to build a bar in your own home. In addition to providing the basic measurements and tips on materials, it shows detailed construction drawings that can help you make an area that is perfect for entertaining guests.

Whether you choose to tap some adult beverages or want to become your own barista, you will will have a lot of fun with this project.

I cut the line

So, this year, I have finished one large project that required me to make accurate cuts on plywood. Now, you can try to do this on a table saw, but I will warn you that a 4 x 8 sheet of 3/4 inch plywood tips the scales at a hefty 80 pounds – give or take.

That's one way to carry plywood...

And, it’s pretty cumbersome to maneuver around on a table saw top, so maybe that’s not the best way to go for breaking down the panels. Unless, of course, you build a set of infeed and outfeed tables, work holding devices and other items…

Table saw cutting

To defeat this problem, you can go with a portable tool. The easiest way to do this would be to either strike a line and try your skill, use a batten to cut against or build a jig like the sawboard I built a few years back.

My old sawboard

Those are swell, and certainly easy on the wallet, but unless you are super duper careful, your hand can wander.

That’s when the track saw was invented. Introduced by Festool, these babies are awesome, and can break down sheets of plywood with ease and no splintering.  In fact, when my friend Paul and I built his home office, we turned to a Festool track saw for all of the critical cuts, making building all those boxes a breeze.

Paul working the track saw

However, are those babies ever spendy. Fortunately, other companies have jumped into the fray, offering high quality track saw systems at a fraction of the price of the originals.

But, what if you don’t want to go uber cheap, but still want to get the best cuts possible? Or, maybe you want to build a track setup for a battery operated circular saw?  What then?

Sawplate

How about something simple like this Bora saw plate?  This baby will set you back about $30, but gives awesome results, especially when paired with one of the company’s guide track clamps. It’s easy to set up on a circular saw – it took me all of five minutes – and gives surprisingly good results for the money.

Adjusting the width

First, you have to set the width of the clamp setup, which is a piece of cake with a built-in edge clamp. Just snug the right edge to the clamp’s right side, then slide the adjustable left jaw until it just touches the left side of the clamp.

Ready to go

The saw fits in nicely with a few screwed down clamps on the front and side of the base plate of the saw.  This baby is now ready to cut, and you can line up the edge of the clamp with your marked line to ensure an accurate cut time after time.

As you will also notice, this saw is battery powered. Again, can’t stress that enough. If you find yourself away from your shop trimming things down to size, this thing could be worth its weight if not in gold, then certainly in Oreos. And cold milk.

Mmmm….

Climate change

So, does anyone remember this?

A little snowy?

Hard to believe it was only a few months ago when many states were piled under by feet of snow and people were begging for mercy.  Well, here in the Tampa Bay area, we’ve had the opposite issue to contend with. Our temperatures have been pretty well above average, making April feel more like July. Well, almost everyone has it right…

Wintry mix?

This was a big oopsie from one of the local TV stations. A wintry mix at 90 degrees? What, was this April 1?

OK, so now that we have established it is getting hot, I also had to address the 800 pound gorilla in the middle of the shop – my old air conditioner had reached the end of its life.

The old ACYup. R2D2 had gasped and wheezed through last summer, but the fan would no longer switch to high, and the unit was already woefully underpowered at 8,000 BTUs. But, I can’t complain, it served me well for nearly nine years, and it helped keep the shop tolerable where I built many summer projects which would have been impossible otherwise.

The new cooler

So, now we’re talking about a new system. I picked this baby up at the local home improvement center, and believe me, it’s a major improvement over what was here. First, the fan goes all the way to high. Kinda like a guitar amplifier that goes to 11…

Just like the previous model, this one displays the current room temperature, but the new one displays it in big numbers on the front, making it easy to see the current temp across the room. It’s the small things in life that make me excited.

Check out that temp

Oh, did I mention that this is a 12,000 BTU unit?  That’s going to help get the garage just a little cooler during the heat of the long Florida summers.

My biggest fan

Of course, my trusty old box fan will be helping with the cooling duties, circulating the cool air through the shop while I work. That will certainly help things, but I have a feeling that sometime in the not to distant future, I am going to have to install some type of garage door insulation kit to help keep some of the heat out of the shop and the cool inside.

The setup

With that, I hope that I can affect a positive climate change in my garage for the summer woodworking season.