
For all you children of the 1990’s – STOP! It’s hammer time!
Hammer veneering is actually not all that tough. This was my first time trying it, and I was pretty impressed with the results. In fact, for an initial investment in a veneer hammer and some hide glue, I feel I am well on your way to making some pretty sweet veneer layups!
Here’s what I needed to start – A veneer hammer, hide glue and a way to mix it up, some veneer, substrate (which can be MDF, particle board, plywood or the like) and veneer softener.
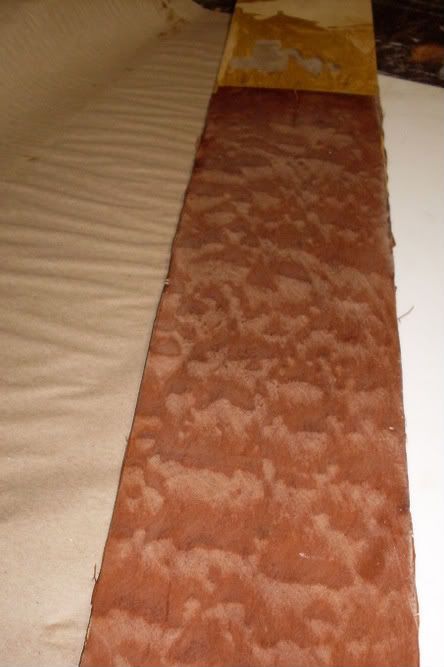
 I picked up my veneer and some Super Soft 2 veneer softener from Joe Gorleski over at Veneer Supplies. The veneer is some flat sapele pomelle… some cool stuff. Since the veneer is already flat, it’s easy to just spray on the Super Soft, let the surface dry and stack the sheets overnight between some brown building paper under a piece of Corian as a platen.
Meanwhile, I whipped up a batch of hide glue, letting the granules soak in water overnight and later heating them in a hot pot to 145 degrees F.
 When I was ready to start the process, I brushed off the piece of 1/4″ plywood to get any dust off of it, and slathered a liberal amount of hide glue on the piece, making sure I got a nice, even coverage on the substrate’s surface. You shouldn’t have to race from here, but hide glue’s legendary quick setting time means now is not the time to make a sandwich, call your bookie or ‘answer the call of nature.’
I retrieved the sheet of veneer and simply laid it down on top of the glued surface. I tried to keep it roughly centered, but I knew I could still shift it around.
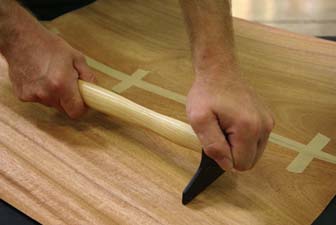 Now comes the fun part – I took the hammer and used the broad ‘blade’ end like a squeegee (Don’t beat on the piece with the ‘hammer’ – that’s not what it’s used for!), pressing the veneer down to the surface.
Sure, there were gushes of glue coming from under the veneer. Seemed normal. I got some glue on the surface of the veneer. Not only did it seem normal, but the glue helped the hammer’s blade glide over the surface. The piece did slide initially. Again, it seemed totally normal. After a while, I could start to feel the veneer ‘grabbing’ the substrate.
I kept working from the middle to the outside. Remember, I was pushing air bubbles and extra glue out from under the veneer so the bond would become even stronger.
Here’s a hint – push gently when going across the grain of the veneer. The piece may split of you push too aggressively. I saved the final firm pushes for along the grain.
 When I was done, I had a gloppy mess and a veneer that had a few ‘bubbles’ under the surface. Seemed normal to me. What I did was get a wet cloth and started mopping up the mess, rinsing frequently. Then, I started wiping off the veneer surface, getting the majority of the glue off. Sure, it looked like I was making a mess, but that wiping will help make finishing easier and it made the veneer just a little more supple so it wouldn’t split the drying process.
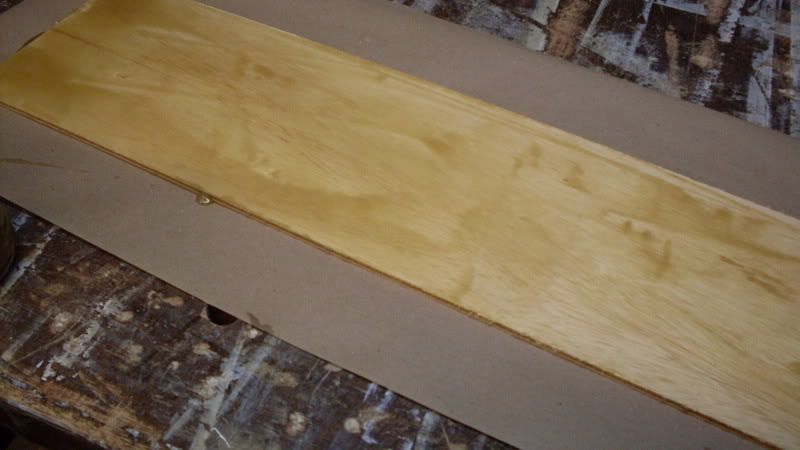
After I cleaned up, I repeated the process and veneered the other side (the piece is going to be a lid and a bottom for a box I’m making – I wanted both sides covered).
After the last clean up, I wrapped the piece in more brown building paper and put it under the platen until it dried.
In the morning, I had a perfectly veneered piece of plywood, ready to be gently sanded, cut to size and put into the project.
Did I make mistakes? Heck yeah. I still have a lot to learn. For a first attempt, it was faster than I expected and the results were pretty cool. No doubt I’ll have to improve my technique, but I’m liking this new skill a lot.
And, I didn’t have to wear those throwback baggy pants…
 When you think about woodworking tradition, thoughts often turn toward the masters who worked years ago with hand tools and an eye for the craft. One very talented woodworker who comes from that lineage is Bob Smalser, a frequent contributor to
  The shops that Bob’s relatives worked in did have power tools – band saws, planers and jointers. But, the hand tools were – and still are – some of the most important tools in any boat builder’s arsenal. Bob has taken his years of working with these tools and can finely tune any chisel, plane or saw to do its best work. And, while premium tool makers such as Veritas have brought the quality of today’s tools to a new level, it’s the lack of basics that leave Bob puzzled. “I remain gobsmacked that sharpening tools the way their grandfathers did – without power tools or training wheels – is so difficult for so many to master. Don’t Cub Scouts learn to sharpen pen knives anymore? And looking at their work, it suffers for it. If you can’t look at the flat you made on the bevel with the stone and change your hold to move that flat where you want it on the blade, how do you ever expect to do the same thing with the cutting edge on wood? Sure, we can talk about coaches who can help guide us along, but in the end all of us are really self-taught by trial and error and practice. Do what’s necessary to acquire this most basic of skills, as it will positively effects every aspect of your woodworking.”
 Bob has worked very diligently through the years, and the variety of jobs he has held has helped to improve his woodworking skills. “I’ve restored antique furniture, reproduced it in various styles and restored antique firearms for museums. I can consult on forestry, land and habitat management, and I grow, harvest and mill my own wood. Custom sawyering alone could easily be a full-time job if I let it, and I often turn down work to maintain the variety of jobs I prefer.”
 Experience is the best teacher. After all, unless you actually get out and practice karate, fishing, kite flying, golf or some other activity, you can’t develop the skills to get better at your avocation.
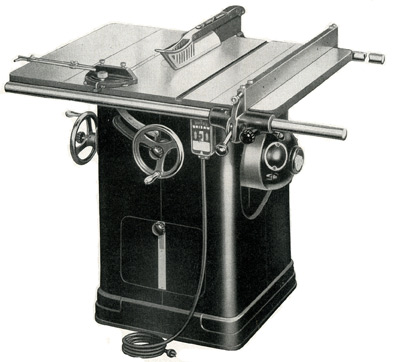 So, you scored an awesome 1950’s vintage Delta Unisaw from grandpa before he headed off on his around-the-world travel extravaganza. But, the saw didn’t come with a manual. And the fence is out of alignment. And, you’re not 100% sure how to align the trunnions…