The weekly plan

Skil Tools’ porch swing plans

Summer is right around the corner, and if you plan on spending any time outside, a well-built porch swing will help make those lazy summer hours a whole lot more pleasant.

Skil Porch Swing

This plan, offered by the folks at Skil Tools, can be built quickly with common lumber and a simple kit of tools. Shortly after you enjoy a little shop time, you’ll be out enjoying the balmy summer breezes on your own front porch.

Small size, big grip

I never owned a G.I. Joe action figure. Seriously. We had the Adventure People, but our friends who lived down the street, they had the G.I. Joe action figure.

G. I. Joe, Homes

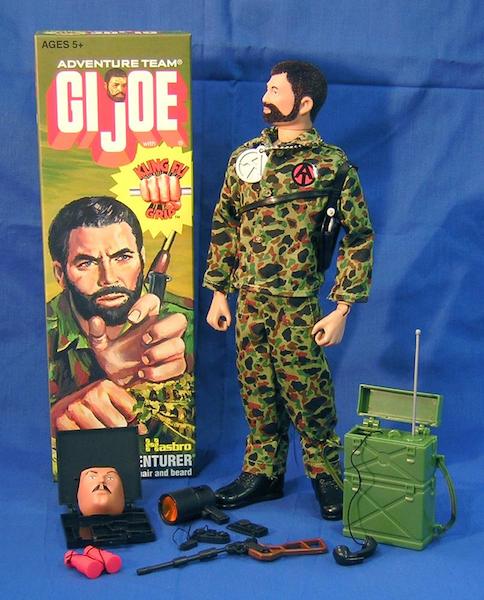
Notice I said action figure. Not doll. That was out of the question. We’re talking ACTION FIGURE here, people!

Now that I got that out of the way, our friend who lived down the street had their G.I. Joe action figures, and those action figures were small at only 12 inches tall, but boy, did they ever have their mojo. They wore camouflage. They had weapons. They had fuzzy beards. And, most importantly, they had Kung Fu Grip.

What did that do? Heck if I knew, but the Kung Fu Grip was awesome for having Joe hoist himself up on a rope and climb to the top of a dresser to get a better position. You could fight an entire war in a bedroom and be done before dinner. Those were the days…

Don't touch my toys!

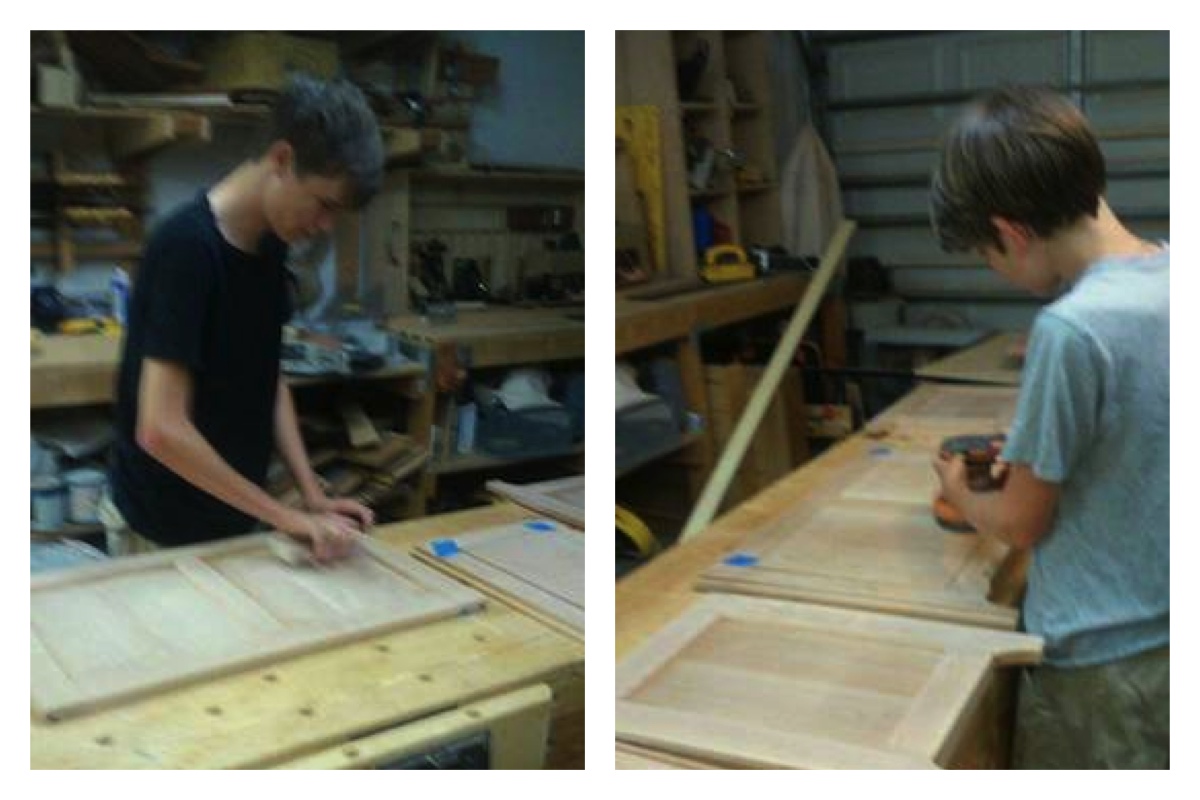
Now that I have my head out of the 1970s, I have turned my attention to other toys. In my shop. That I build with. I love my shop. It’s got plenty of size and space for a workbench, a table saw, a band saw, tool storage… a ton of stuff.

But, I do know some folks who work in much smaller spaces like a spare bedroom in an apartment or on the kitchen counter. What about them?  You know what they need? The equivalent of a G. I. Joe doll action figure that can be small enough to tuck away but strong enough to hold their work.

The smart vise

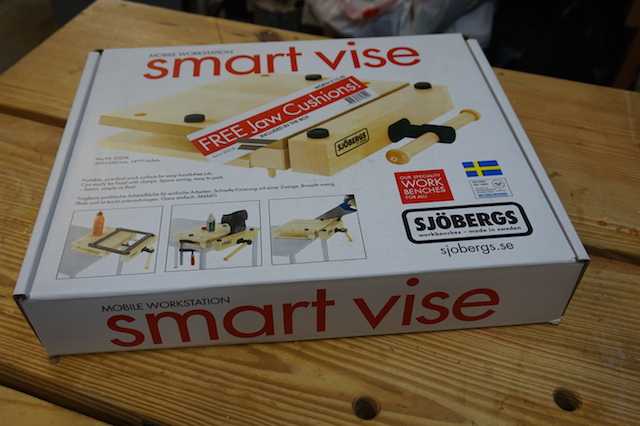
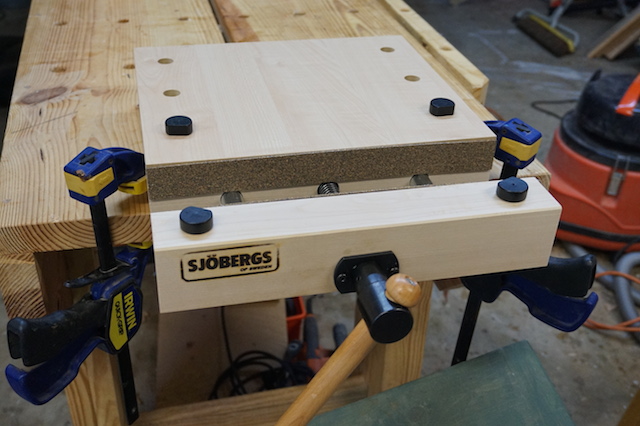
I think the folks over at the  Sjoberg’s Workbench company may have found the answer. This is the Smart Vise, and it makes quite a bit of sense for all shops, but especially small ones.

Pieces parts

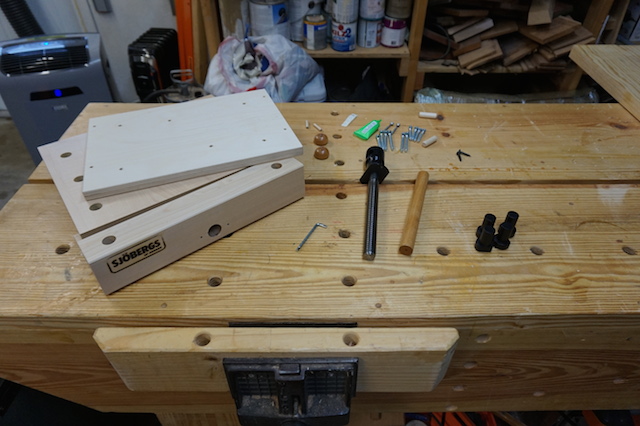
As with that other Swedish company that makes furniture for the house instead of the shop, some assembly is required. Mostly fasteners, the vise body, the screw mechanism and the dogs you will use later to help hold work.

The body assembly

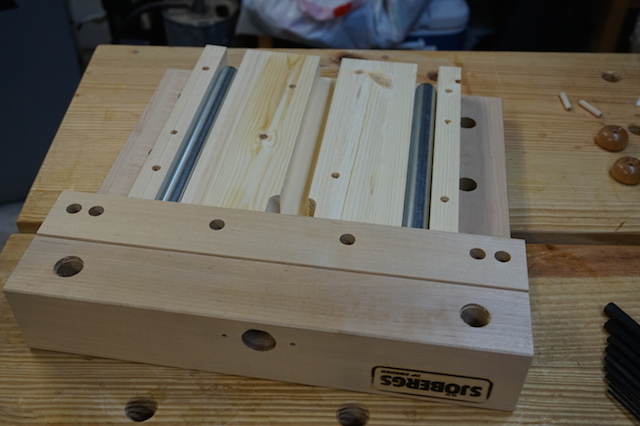
To put this sucker together, you flip it upside down and attach the lower jaw to the upper body section with glue and some fasteners. It’s very simple, and in about five minutes, it was all buttoned up, ready for some serious steel.

A turn of the screw

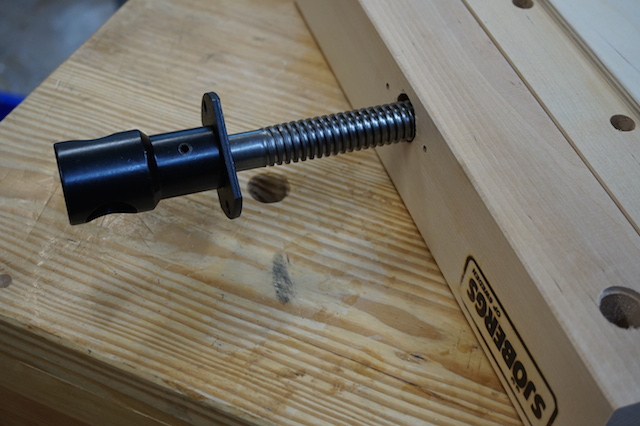
This is where the Kung Fu Grip comes in to play. This heavy screw goes into the middle hole, where it engages the threads inside. Simply screw it all the way home, set the garter into the front block with a pair of screws and put on the handle. Easy peasey lemon squeezie.

Secure that vise

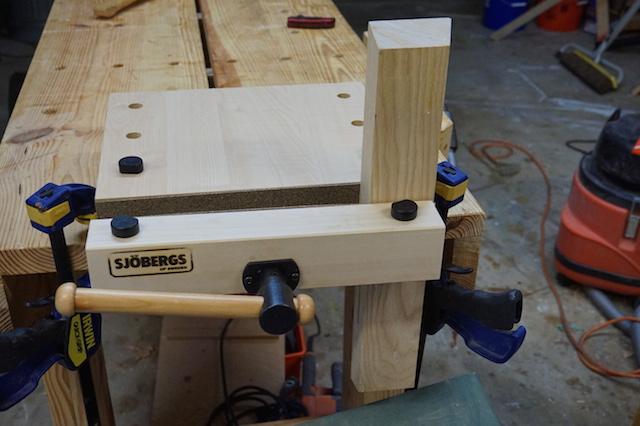
Flipped up onto its feet, the vise can be secured to a table (or workbench) with a few squeeze clamps or a few screws. What can you do with it? How about cut a few dovetails? Tenons? Maybe a little mortising?  And, it can be done in a very small area.

Get a grip!

Now, here comes the fun part. The folks at Bora Tools wanted me to give away one of their new Smart Vises to one of my readers. So, here’s how it’s gonna work.  I want you to shoot me an e-mail showing me just how small your shop working area is. I will take a look and have my Trained Shop Monkey select the smallest looking shop from the entries as our winner. Be sure to send them to Iggy@tomsworkbench.com.

You have until Saturday, June 13 to get them in, so don’t delay!

The coffee table begins

True to my word, yesterday, I started working on the rustic pine coffee table for the family room in the back of my house (Hey, Ian MacKay, is that worded properly for you?). I figured it would be the best one to start with, because it was easy, and I knew I was going to go to the home improvement lumber rack for the material. Easy peasey.

Wrapped and ready

But, first, I had to pack up Katie’s hope chest to clear the deck. With a lot of bubble wrap, cardboard and some flat twine, I made it all happen. Now, hopefully it won’t get all banged up in transit.

So, off I went to the home improvement center, and picked up a pair of 2 x 12 eight footers. I am always amazed at the quality of the wood you can find there – these two boards were nearly blemish free, with absolutely no knots and mostly rift grain along the edges. they were something to see.

The boards

So, I set to work on the top first. I knew I wanted to rip out the flatsawn grain in the middle to get the rift edges for the top, and that’s just what I did. I knew I wanted to do this in two parts – since the top was going to measure out to about 24 inches wide, I wanted to glue up each half, run them through the thickness planer, then assemble the final piece.

After crosscutting the boards on the miter saw, I set to work at the table saw, culling the nicest looking stuff. Wow, was this really nice!

The halvesI got a fairly good looking grain match after juggling the boards, and then set up to glue everything together to make the two sides. It was easy with a few cauls and a couple of clamps.

The glued halves

Once the glue was dry, I headed over to the thickness planer to get the sides planed down nice and flat and a uniform thickness. Since the widest half was 12 and a half inches, any my planer has a 13 inch capacity, this was a piece of cake.

The top, without glue

Now, how about that look?  The joint is tight without a single clamp. When that happens, you know you have done something right… The last task for the night was to glue the two halves together, which was insanely easy given the condition of the joint.

Top glue up

Now, back to work tomorrow, but I hope to be able to bang out some more work on this piece in the coming days. Wouldn’t it be great to put together a handmade table in less time than it would take to assemble an Ikea model?

The weekly plan

Ana White’s rustic X-brace coffee table

No, this isn’t some finely-crafted piece made of the finest Cuban mahogany. Nope.

xbrace

Instead, this is the plan that Rhonda saw and loved, which means that this is the coffee table I’m going to be putting together for our living room.

Just as I had done with my work trestle base table, I am going to go into the construction lumber pile at the local home improvement center to pick up a 2 x 12 and build the piece out of that. I have a feeling this may be one interesting project to build.

Stuff I’ve built: Katie’s Hope Chest

I knew this was coming up a while ago, and I couldn’t be any happier than I am with how this came out. This past weekend, the hope chest for my niece Katie achieved the state of substantially complete, and I think it came out looking pretty darned nice.

The hope chest

As I had mentioned before, it is a simple cherry frame and panel chest that I hope she will love once it is at her house and assembled. Yes, that’s the reason why I went frame and panel – so I can flat pack it and ship it off to her dad so he can do the final assembly at their house.

Dem boys

Before I could get the finish on it, though, I had to enlist a little help from Dominic and Steven with the sanding. Those guys, they can do their magic. Rhonda managed to snap these blurry shots of them moving a lightning speed as they sanded away.

I wanted this chest to be all about the little details. For instance, in order to ensure there wouldn’t be any cupping or warping of the top, I could have gone with a batten, but I thought that a breadboard edge would look more classic. I dunno, it does give a lot of personality to the piece.

The edge

As with many of the other pieces I have built, I like to inlay a penny from the year the piece was built, And, one day after buying lunch, I finally saw one … a 2015 freshly minted baby that just had to go into the piece. I dunno, it’s a nice look in the middle of the underside of the lid, so she will always know what year the piece was built for her.

The penny

And, as I had mentioned, there is an inlay of a heart. Well, here’s the story. When Katie, her sister and her brother moved into their home in Maryland, there were three trees in the front of their home. Each child had his or her tree to call their own. It turns out, though, that Katie’s tree was planted too close to the driveway, and it had to be cut down. She was crushed.

The inlay

Well, her dad thought ahead and had a chunk of the tree saved for some project in the future for Katie. Of course, with just a single round of tree, what could he do? Once I started the tradition of building the hope chests, Larry knew where it could go.

Since the inlay is some type of pear and the main field is cherry, the inlay will stand out more over the years as the cherry darkens with exposure to light.

The only things left to do are to finish the drilling the holes for the hinges, then pack the piece up and ship it off. I can only hope that she enjoys it for years to come.

The summer commences

Here in the United States, we are commemorating Memorial Day, the day we set aside to remember the ultimate sacrifice paid by the service men and women of our armed forces who fought to defend the freedoms we hold so dearly. While the day was officially named in 1967, its presence as Decoration Day stretches back to the American Civil War. Few words ever captured the spirit of this solemn day better than those spoken by President Abraham Lincoln at the dedication of the cemetery at Gettysburg, Pennsylvania in November of 1863.

It’s also important that I highlight some heartwarming stories that I had written from Memorial Days past, which showcase how woodworkers are helping to respect the memories of those who have served with distinction:

While we do take time to commemorate those who paid the ultimate price, we also take Memorial Day to be the start of the summer vacation season. From now until Labor Day in September, people make their plans to visit relatives, take a little time off and decompress from the serious, dark winter season.

Annette Funicello

And, just like some type of an Annette Funicello beach party movie, I plan on getting into the action… but, without all of the fun you would expect at a beach blanket bingo party.

You see, as the final finish dries on the hope chest for my niece, and the first communion cross hangs in my nephew’s room, I thought I was going to have a little down time to build something artistic. Maybe break out a few tools I hadn’t used in a few years to try my hand at a chair or something I had always wanted to.

But, then I was reminded by my long suffering wife Rhonda that I had promised – a while back – that I promised to build not one – but TWO – coffee tables for the house.

Round Table

The first one is going to be for the front room in our house. There, we have a couch and a pair of leather chairs with a big screen TV up front. Rhonda would like to see something round there, and this is the sort of look I am going for. A simple base, a few legs, something clean looking.

Rectangular

For the back room, where we have a sectional sofa, we are ditching an old Ottoman which has seen much better days, and Rhonda was thinking something rectangular. Here, she told me, was my chance to really go nuts. So, I was thinking something where I could do a little more decorative of a piece. Maybe show off some joinery, maybe something like this. I dunno.

While the mind boggles at the possibilities, one thing is for certain, there will be lots of fun on the sand… paper, that is!

The weekly plan

The New Yankee Workshop’s sheep shearing coffee table

Oh, that wacky Norm, taking the design of a sheep shearing table and converting it to a coffee table. Can you blame him, though?

Sheep Shearing Table

I mean, the guy did a full 20 seasons of projects, and you knew that folks were going to seek out different looks that would fit their decor. Plus, wow, it’s a handsome looking table, something that makes me think about possibly what I might want to build this summer …

part of the Wood Talk Online community