The 2 x 4 box takes shape

As you can see from my past few posts, I have become fascinated with this whole 2 x 4 challenge the St. Petersburg Woodcrafters Guild has going on.  I really didn’t have a chance to work on it last week, so when the weekend rolled around, I knew I was going to have to jump on this one with two feet to make it a reality. After all, the deadline is tomorrow’s guild meeting.  Yikes!

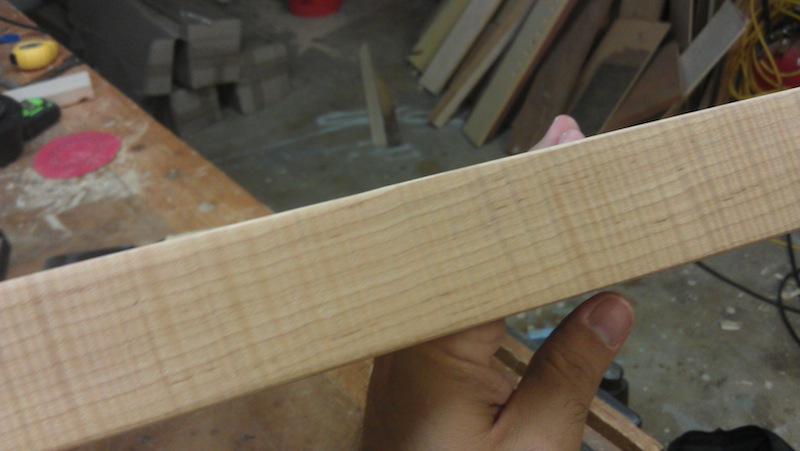
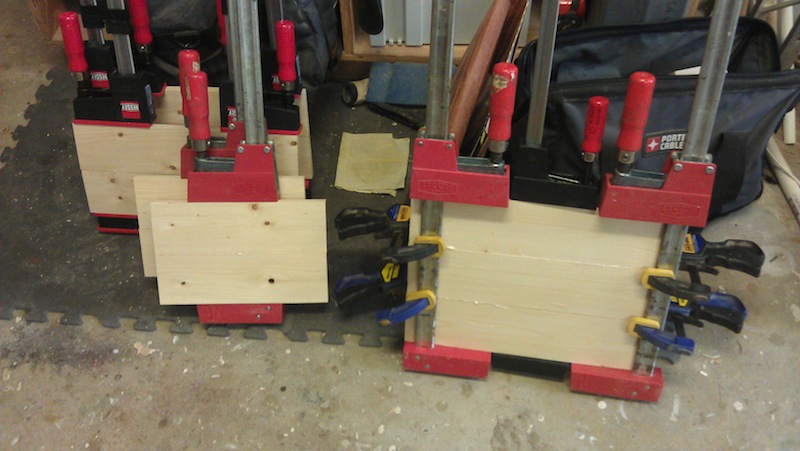
So, I measured out the size for the box and the lid. My initial plans were to build a dovetailed box, but I thought that since I had so little time, I would opt instead for a splined mitered box. That was great, but first I had to joint, resaw and mill all of the pieces that were going to go into the project. Obviously, you don’t want to build this thing with inch and a half thick walls. Once I had everything milled up and good to go, I got everything glued up. My friends at Bessey Tools were nice enough to send me a great care package of clamps, and I put them to good use gluing everything up.

Cooking in the clamps

Cutting the pieces required a great deal of thought – after all, I was limited to the wood I could get out of a single 2 x 4 – not a whole lot available for boo-boos… I took my time and made sure that the cuts and glue ups were handled accurately.

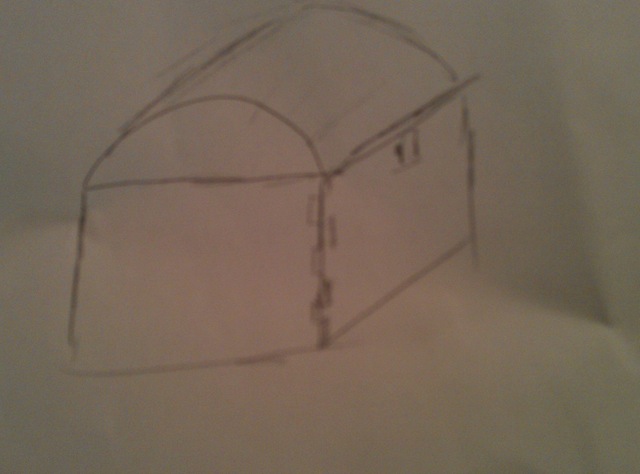
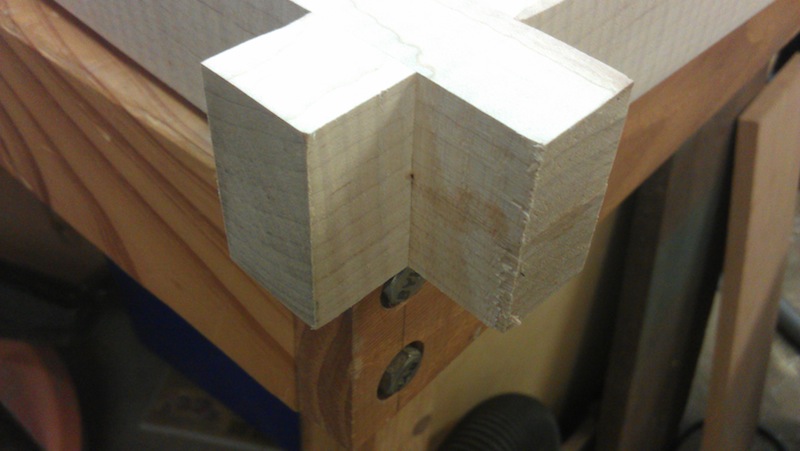
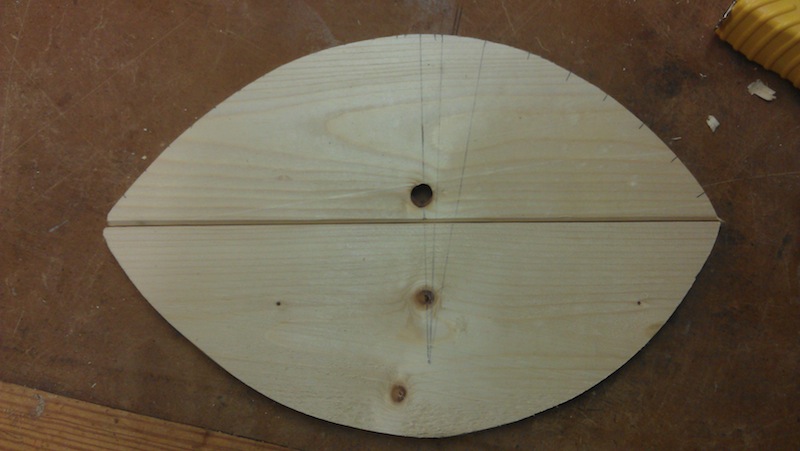
The main body of the box was like many other projects I have built in the past. The top – completely new to me. I had never built a domed lid before, so I wanted to make sure that I did this right.  The first thing I had to do was to calculate how high I wanted the arc to rise. Since the height of a 2 x 4 is 3 1/2 inches, that was a good amount. I also calculated the length of the base of the arc, and figured that the arc was part of a circle with a radius of 5 1/2 inches.  I also took the time to rout a simple rabbet on the top edge of the arcs to receive the slats.

The calculations

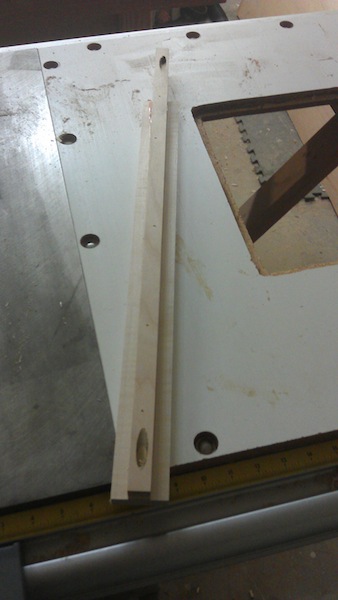
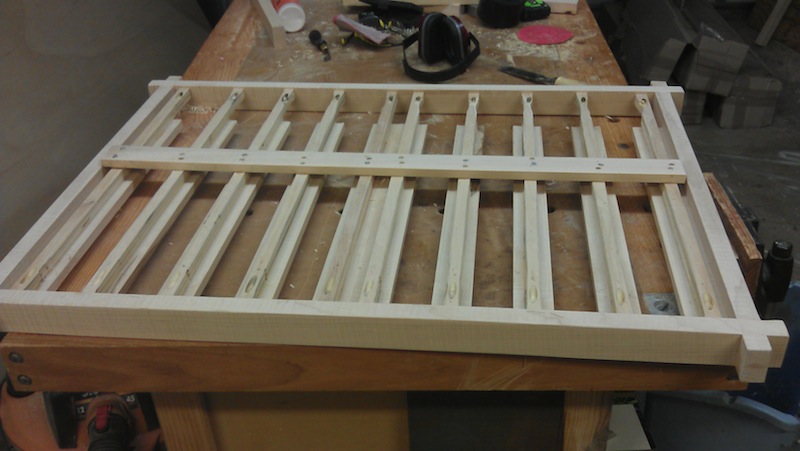
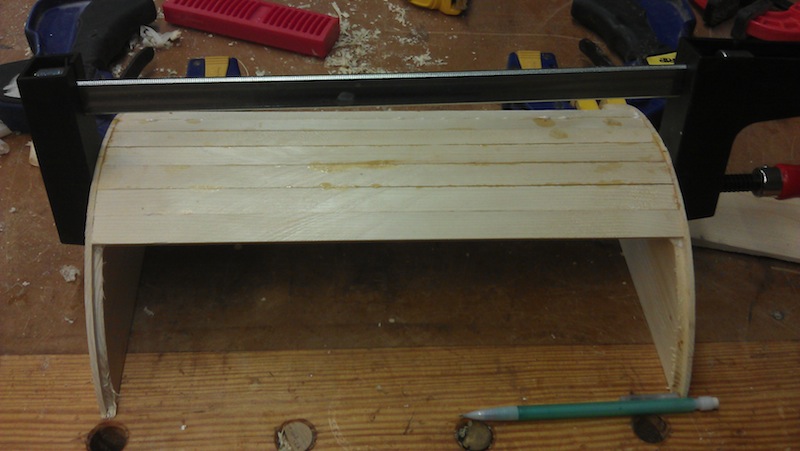
I measured how wide the slats were going to be approximately 3/4 inch wide and 1/8 inch thick – so I marked the width with the center of a slat at the apex of the arc. Once I determined the angle between the center and edge of that slat, I marked it out with my bevel gauge, and bingo – I set the table saw blade to that angle. I then ripped the slats out of a piece of 2 x 4 and glued them in place. Because the pieces were so delicate, I couldn’t use nails to hold them. I considered using super glue, but then I remembered that hide glue has great initial tack. That stuff did the trick, and I was able to place all of the slats around the arc to form the lid.

The slats being installed

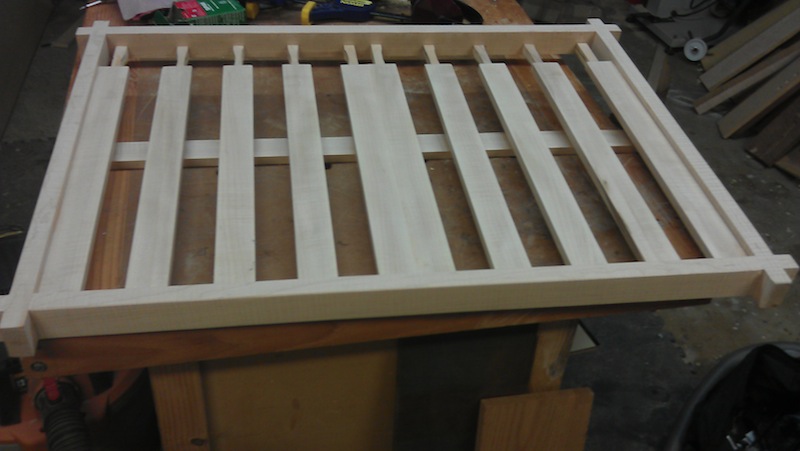
I drilled a pair of holes on the sides to add a pair of rope handles to give the piece a more nautical look.

Rope handles

All that remains is sanding and a finish.  I will try to find some way to make it look a little aged, and I have to get that done tomorrow so it will be ready to go for Tuesday.

How it looks so far

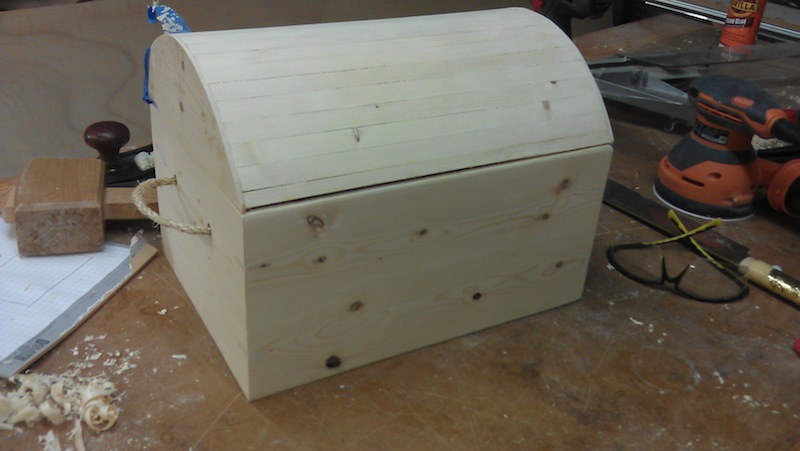
All in all – not a bad way to spend a summer day…


Quick Poll

Sorry this post is late today, but I have spent all day in the shop working on my 2 x 4 project, and it has been an eye-opening experience. Who would have guessed all of the things you can do with a simple piece of construction lumber?  I mean, this project featured over at Lumber Jocks really opened my eyes to the potential out there.

A sweet bandsawn box made of a 2  4

This week, tell us if you have ever participated in a 2 x 4 challenge, and what you thought about it.


 ###

Laguna tools

Link of the week

Woodworking by Hand

Ciao!  For today’s link of the week, we’re crossing the Atlantic and headed to beautiful Naples, Italy where a woodworker named Guiliano has been running a hand tool woodworking blog since 2010.

Guiliano in his shop

His blog is in English, so it’s easy for folks to navigate. And, what you can see!  His posts cover everything from woodworking projects built primarily by hand to more advanced repairs on metal and wooden bodied planes. Saws, chisel work, sharpening… it’s all in there. Definitely a feast for the eyes.

Bel lavoro, amico mio.


You never forget your first…

The first time I rode a bike. The first time I drove. My first date. The first night I spent away from home at college.

You really never forget your first time doing something memorable. And, yes, I am about to experience a new first.. my first 2 x 4 contest with the St. Petersburg Woodcrafter’s Guild.

I know. “Tom,” you must be thinking,”How on Earth are you going to contain your excitement?”  Easy there, Sparky. It’s a big deal, but not a life changer.

The real challenge with a 2 x 4 contest is coming up with something inspired. I mean, there’s only so much inspiration you can get from looking at an eight foot long piece of construction lumber. Well, maybe you can envision a room being studded out in your home… but a furniture project?  Hmm….

So, I tottered over to the local big blue home improvement center and saw the stack of  2 x 4s to pick from. They all seemed to look the same to me.

The stack

But, just as all the dogs look the same at first glance when you go to the kennel to get a new pet, a little bit of looking around will help you find the differences between the tail-wagging future four legged friends. After sifting through the pile, I found one that caught my eye. Very straight, just a few knots and not containing the pith of the tree.

Awwww, look how cute...

OK, this one looks nice. Into the car with you!

Now, to think up a little inspiration… think.. think…think… A quick internet search shows some clever ideas out there floating around, and each of them is positively imaginative. Tables. Toolboxes. Toys. And boxes. Lots and lots of boxes.

Wait a minute. What about a little box?  Maybe built with a technique I haven’t yet tried before? A small box built like a pirate’s chest.. with a domed lid.  I mean, even if the thing falls flat on its face, I am only out the $2.50 I spent on one stud. A few minutes with some pencil and paper and voila…

My sketch

I can see this thing with some dovetailed sides, a coopered top and an inset bottom.  Maybe I can even cut a fakie keyhole in the front to look like a lock goes there.  I know if I am going to build this, I had better get a jump on the building.. since the meeting is June 25 – giving me a little less than a week to work on it.

Guess I know what I will be working on this weekend!


Tool review: Bora’s wide-track router plate

Abbot and Costello. Peanut butter and jelly. Rum and Coke.

Some things just go together beautifully. One complements the other so perfectly, it is like they were made for each other.

And, when tools complement each other, that makes things a whole lot more enjoyable.

Wide track router plate

Case in point, the Bora wide-track router plate. My friends over at Bora sent me a copy to evaluate, and this thing is going to become a regular player in my shop.  It is basically a thin plate of clear plastic that you custom mount your router to. The key to the system, though, is how they ride on the Bora Clamp Edge cutting guides.  The cutting guides have this track on the edge that I have often wondered about, and it seems as if the clamp was just waiting for the right interlocking tool to make it complete.

The interlocking guide

The guide slides smoothly across the track back and forth. Now, imagine, you are building a bookshelf that needs dadoes and rabbets to hold shelves and a top.  Simply clamp the two sides together, and clamp the wide edge clamp across both pieces. Simply plunge the router down and get accurate cuts across both pieces – without having to worry if you are drifting away from the cutting edge. Which is much easier to do than you might imagine, given the rotational cutting of the router bit.   And, if you are looking to stop your rabbet – it’s easy to do with a plunge router.

Throw a router on it

If you can dedicate a fixed base on a multi-based router to this jig, imagine how quickly you can change your router to work with this plate – and you can also use the plate for times when you need a wider base to ensure the router doesn’t drop into an opening you may have cut on a jig.


Link of the week

Make a pole lathe

It’s one of the oldest woodworking ‘machines’ ever invented. It can be made quite simply, and yet turn round stock or other spindles out of square blanks.

A pole lathe

It’s a pole or treadle lathe, and in the UK, the Association of Polelathe Turners and Greenwood Woodworkers has a great plan on how to build one of your own. The plan goes into great detail about how to build the stand, the stocks and centers and how to select wood for the pole.

Building your own pole lathe may be just as impressive as the projects you turn on it.


Stuff I’ve Built: Bob’s wine glass holder

So, as you know, I’m friends with a guy named Bob. Not only is Bob a great public information officer, he also loves wine.

Yeah, you can say that Bob is a wine kinda guy. So, when he asked me to build a wine glass holder for his family’s collection of stemware, you knew I was all over it.  Working with some rough dimensions, I decided that I was going to build the piece with some gorgeous soft maple I had gotten from my friends over at Bell Forest Products. This stuff is beautiful, but I ran into a problem. At 8/4, there was no way I was going to rip this stuff on my contractor’s saw. I would push the board a few inches, and I could stop the blade.

So, I had to do a little work around.. I turned to my Laguna band saw to do the ripping. Now, I’m not going to say that I have that saw tuned to the nth degree, but it was more than capable of ripping the boards with minimal drift. A few passes with a hand plane and a few runs through the thickness planer, and I had the pieces cut and ready to go.

For the frame, I decided to go with a half-lap joint at the corners.  The half-lap joint

I figured this would be a tight joint that – if properly fitted and arranged – could provide a lot of strength. It was an easy one to cut on the table saw with some stops. Yes, the table saw could handle this shorter crosscut…  Once I had it cut to size and ensured the joints were snug, I glued them up and tapped them into place with my mallet. A few clamps while the pieces set was all that was needed…

Once I got the frame done, I had to start thinking about how the wine glasses were going to stay in the rack. I puzzled with the idea for a while, until I hit on something… What if I created a rib with a t-shaped profile that could be attached to the frame, but would give a lot of support to the glass base?  So, I hit on this idea…

The T-rib

The top of the rib is a piece of 3/4″ maple plywood ripped to 3/4″ . It is glued down and bradded to the top of a 2 inch wide maple slat. Properly spaced, these would allow enough room for the glasses to be raised into place and slid forward onto two adjacent slats.  This is what the top looks like:

The top of the rack

Those ribs are pocket screwed fore and aft into the long rails of the frame, and a stabilizing bar of maple is glued and screwed into each of the ribs to ensure they wouldn’t rotate in use, and to help spread the load of the weight of the glasses. While this isn’t the pretty side to look at, the underneath looks pretty streamlined:

The underneath

Remember when I said that the wood looked good when I jointed it? After some sanding and a quick wipe with some mineral spirits, well, it looks AWESOME.  Tiger throughout…

Grrrr... Tiger!

I realize all of this talk about up and down can be confusing with this piece on the bench.  What exactly will you be seeing from the ground? Well, I decided to hold it up in the right orientation to give you a better look at it.

The Italian forklift holds the rack

No, the unshaven woodworker will not be holding the rack in its final position. It will be held up with some type of cable or chain attached to the ceiling. But, as you can see with the one wine glass in the holder, it seems to be working as advertised.  Now, just a little more sanding and a coat of finish, and I hope to deliver this to Bob this coming weekend. Look for some complete pictures soon…

After we toast to the wine glass rack!


part of the Wood Talk Online community