Link of the week


Kurt Raschke Woodworking

Deep in the heart of Tampa works a talented woodworker. His name is Kurt Raschke, and if you haven’t heard of him yet, now is a really good time to look him up.

Kurt's elegant boxAfter working the daily grind, Kurt decided he had enough of the rat race and started his woodworking career. Since then, his work has been presented in galleries across the country, he has spoken at several conferences and workshops and is now currently the artist in residence at Infinity Cutting Tools. At Infinity, he also teaches the woodworking classes offered a the company’s woodworking laboratory.

Kurt’s approach to projects is they should be as fun to build as they are to look at in their final location. I think you will find his work entertaining.

It’s good to have options

If I have said it once, I have said it a thousand times – the most fun thing about woodworking is how there are many different ways to get something done. And, when it comes to joinery,the options are nearly limitless.   That’s why one of my favorite books in my woodworking collection is this one – Good Wood Joints by Albert Jackson and David Day.

Joints CoverThis book is a little older, released in 1995, and the two authors were from the UK, meaning that they used funny (for me) terms to describe different things – such as calling C Clamps G Cramps – but, I think I can interpret.

matrixThe fun thing about this book is the wide variety of joints you can use. How many? Well, there is a matrix spread across four pages offering the book’s entire array of joints with such information on how difficult the joints are to produce, how effective they are in different materials (solid wood vs. plywood vs. particle board) and if they are easier to cut with machines or by hand.

Even better, across the top of the matrix, there are drawings of different places where joints could be used, and which joints could be appropriate for the application.

Joint

Of course, each page goes into nice detail about how to cut these joints, most of them with instructions on how to cut them by hand and by machine.

Sure, you may not use all of the options in the book, but it’s good to have the options.


The big mo

On most days in the shop, getting stuff done isn’t a big deal. Honestly. I normally cruise out into the shop, get to work for several hours, then come back inside, celebrating my productivity.

That day wasn’t yesterday.

Oh, sure, I had big plans. Making progress on Kevin’s project. Planing. Gluing. Possibly cutting some joinery.

Instead, I was introduced to the force called the Big Moe.

Hey, Moe!No, not that Moe, famed in the Three Stooges shorts. The big mo I am referring to is momentum, which is the force that gets you out into the shop and keeps you there until you experience a totally productive day.

Things that can break your momentum, as you might imagine, can slow your work down to a crawl. That’s not necessarily a bad thing…

So, I woke up, bright and early on a Sunday morning. Once breakfast, catching up on sports scores and the other various and sundry things I had to accomplish, I decided to go out into the shop. Oh, yeah, there was that little laundry thing I had to do. So, I shuffled around the wash, remade the bed and got ready to head out into the shop.

The master PIO reunionOh, yeah, I remember that several friends of mine were in town for a conference over on Clearwater Beach. So, I quick got changed into presentable clothes and headed on down for a very enjoyable lunch, catching up with folks I haven’t seen in more than a year. And, that was VERY cool…

So, once I got home, it was time to get back into my shop duds and get some work done. But, there was another problem – the place was a mess. OK, I was willing to overlook that, and got to work on resawing another board for the project. The band saw cut well, and as I started planing the boards down, the wood chips started flying out of the machine instead of going down the hose to the collector….

A bucket full of sawdustDrats. Time to empty the collector. So, I popped the lid to the can, then walked next door to my neighbor’s house to ask if he wanted the sawdust for his garden. Sure he did. And, we caught up for while. And, then I went back home, hooked everything up, then noticed that there was still a load of laundry that had to be dried again because it got wrinkled in the dryer…

Well, you get the idea. Every time I started, there was something that distracted me from the task at hand. Add to the fact that the shop is very hot (even with the a/c and fans running), and, well, before I messed something up too much to recover from, or I hurt myself, I decided that the time was at hand for me to clean everything up and call it a night.  After all, my momentum couldn’t even get started…

Steven working the broomI got some help from my youngest son Steven, who really knows how to handle a broom. I also took the time to put some of the tools away I wasn’t going to need again for a little while, making the space a little less cluttered and ready for the next shop session. And, I went inside to have a beer, kick my feet up and relax.

20130825-204807.jpgAt least it beats a double eye poke…


Quick Poll

There are many tools that started off in general carpentry that were later adopted by the woodworking community. Table saws. Nail guns. And, the powered miter saw.

Working the miter saw

Originally identified as the chop saw, manufacturers have added more features to their tools – sliding heads, compound miter cuts, laser guides and the like. As these saws became more powerful and capable, woodworkers have moved these saws into their shops for the mundane tasks (cutting boards to length) all the way to the trickiest (cutting joinery, making complex miters, etc.)

Today, tell us what you think about these powered miter saws. Are they critical in your shop, or just a waste of time?


Link of the week

Photographing your work

Since the invention of photography, woodworkers have wanted to take pictures of their projects and show them to prospective clients, friends and family or for other purposes. And, with the advent of camera phones and social media, it’s easier than ever to share a few snaps.

A light box set up for a woodworking project

But, what’s the best way to get your projects looking great when you snap the shutter?  Three Seasons Woodturning offers this great tutorial on composition, lighting and photo editing software to give you the basics on how to to make those photos real show-stoppers.

After all – you have spent a lot of time building and finishing your project. Why not take just a few moments to learn how to make the pictures of it look their best?


They can help…

I have already alluded several times on this blog to my love of music from the 1970s. So, it should come as no surprise that on my iPod is a copy of Billy Swan’s I Can Help. This one-hit wonder was released in 1974, and it features some really cheesy-sounding early synthesizer work, a catchy hook and a round of applause at the end.  When I record my only chart-rated hit, I’m doing that, too.

Billy Swan's I Can HelpIf I may be so bold to suggest this, perhaps Laguna Tools should adopt this as their theme song. Maybe their on-hold music.

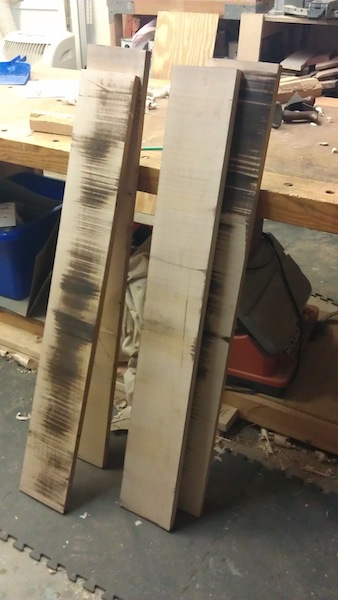
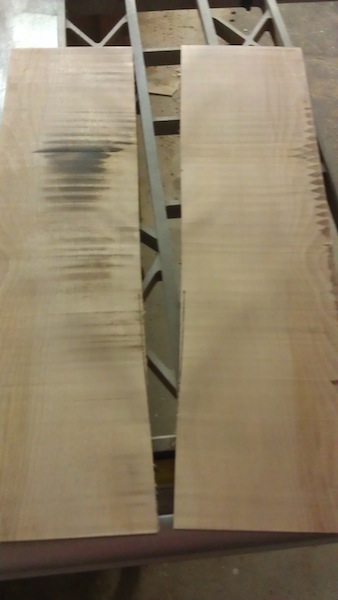
You see, I have this problem. The band saw they sent me is awesome. I have cut curves, ripped strips of thick wood for projects and done other tasks on the saw for nearly a year now, but the one thing I was never able to master was resawing wide boards. They just bedeviled me. Here is a shot of some wood I mangled a few nights ago. Avert your eyes if you are easily upset by wood abuse:

Oh, the HUMANITY!Oh, I watched the videos. Read the manuals. Visited the message boards.

Wanna know what I discovered? There are as many opinions on how to have success with resawing as there are woodworkers. Some say to crank the tension on the blade as high as it will go, while others advise keeping it as slack as possible. Some offer eloquent lessons on blade drift while others insist that your saw should cut straight as an arrow.

What’s a dope like me to do?

Well, I decided I would get in touch with the folks at Laguna. Why didn’t I do this earlier?  Within 24 hours, I was in touch with Brian Bennett, one of the company’s reps. He assured me that no, I’m not a dope, but there are some common things that could happen with the saw that could cause this. And, more importantly, they could be corrected in short order.

Test that tension
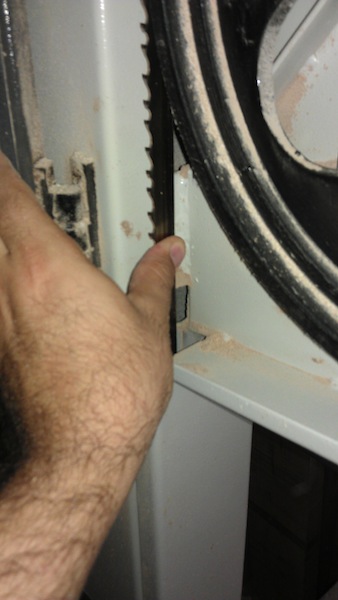
First, he told me to ensure the blade rested with the teeth at the front edge of the tire. Now, I know this is contrary to other bits of advice (center the blade, center the deepest part of the gullet on the wheel, etc.), but this is a Laguna, and I had the tech on the phone, so I’m listening to him.  He also told me to tension the blade until, while pressing on it with moderate pressure, I was able to deflect it no more than 1/4 of an inch.

The belt and drive pulley
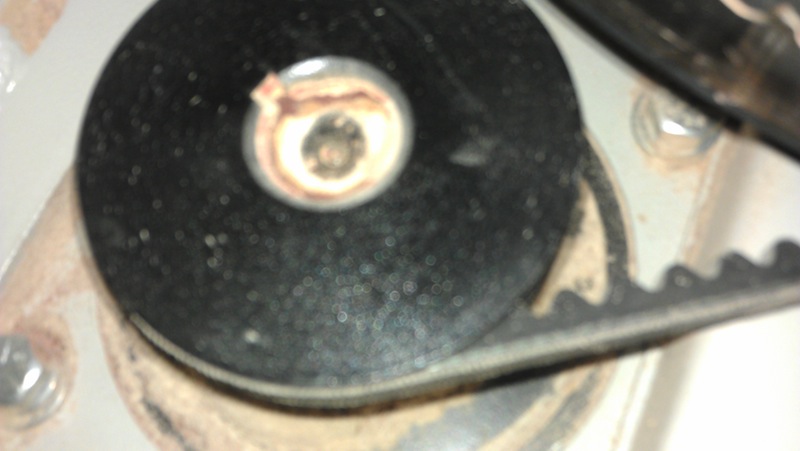
With that done, he told me to go below on the saw and check my old nemesis, the belt tension. You know my history with belt tension on band saws, don’t you?  He said with firm pressure, there should be no more than 1/4 inch of deflection on that either. Well, I had considerably more…so, that was an issue. Fortunately, these belts tend to stretch over time, needing adjustment from time to time. Whew, it wasn’t operator error!

The drift test

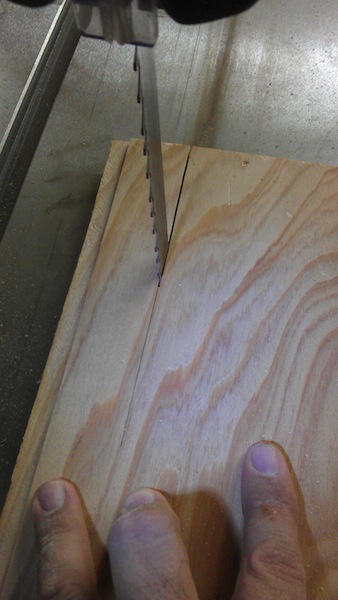
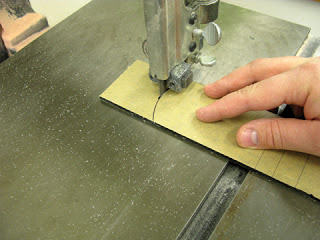
Now, for the first test.. the drift test. Brian told me to get the guides out of the way, draw a straight line on a board, then attempt to cut along that straight line. How much did the board have to twist to ride that line? For my saw, just a hair. That was good, because if I had to angle the board too much to stay on the line, the blade was surely dull or the teeth bent. This baby was working fine, so I knew that couldn’t be the problem.

Looking at the blade in the kerf
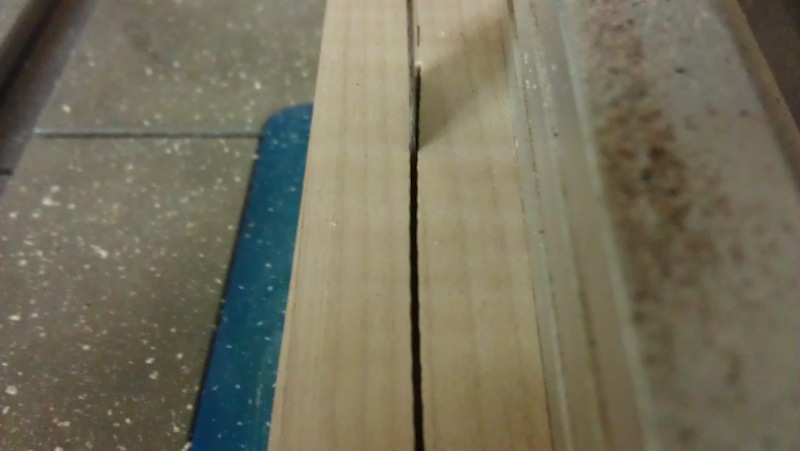
The next step was to set the fence about 3/4″ from the blade, ride a sample board against the fence for a few inches, then stop the saw dead and don’t move the board. Go around the back of the saw and see where the back of the blade is resting in the kerf. If it’s riding against one side or the other, you have to adjust your fence incrementally to get the blade back to ride in the middle.  Once you get there, you are pretty much spot on.

Resawn birchBrian and I stayed on the phone for close to an hour, and he thought I was doing well enough to give it a whirl. OK, so I grabbed a birch board and got to work. The results?  Well, I could certainly do some more tweaking, but I’d have to say that the results are considerably better than anything I could have gotten before.

So, as I move ahead on this project (still with lots more wood to resaw), I feel a whole lot more confident in my abilities and the tool to get the job done.


Scrollin’ for ideas

There are lots of different types of woodworking out there. Cabinetmaking. Furniture making. Turning.

And then there is scroll saw woodworking. I mean, it seems like magic watching a talented scroll saw operator (Verna Schulz and Bill Murphy are two friends who are very talented with these saws) take plain old pieces of wood and turn them into gorgeous works of art with impossibly small, fine details.

Verna working with Iggy at her scroll saw

Well, with my new project, there will be a deal of scroll work. I am planning on cutting out Sydney’s (yes, I spelled the name wrong in my sketch) name and other decorative details on a piece of contrasting wood to glue to the face of the medal rack.

The only problem is that I don’t have a scroll saw.

Should have thought this out before I came up with the idea, right?

A scroll saw doing its thingOK, I’m looking over my options on how to make this happen.  The first thought would be to stroll down to the nearest purveyor of tools and land myself a new model. From what I have heard, the new scroll saws on the market are tricked out babies, with air vents to blow the sawdust out of your way, easy blade change features and a wild assortment of blades.

The problem with this idea, though, is that from what I have been told, a quality scroll saw that is a joy to work with could easily run me in excess of $500. There are a bunch of scroll saws available for $200 or less, but they are sorely lacking in the power and precision department.

Fine bandsaw cuttingWell, I do have a sweet Laguna band saw. Equipped with a narrow blade, the band saw is an excellent tool for doing scroll cutting – on the exterior of a project. Unlike a scroll saw, the blade can’t be threaded through a starter hole, meaning that interior cuts are a big no-go.  However, I will be using the band saw for the exterior shapes for sure.

Jig Saw ScrollingA jigsaw can do that kind of work. Some jig saw blades are made narrow enough to fit into starter holes and maneuver pretty deftly, and high-quality blades can make very clean cuts. It’s just that the jigsaw’s reciprocating action can shake thinner pieces of wood to the point where they break apart, and I plan on doing the scroll work on a piece of wood probably no thicker than 3/16″.

A fret saw can do the job...Another option that would be open to me would be to get my hands on a fret saw. These saws look like coping saws with a very wide frame. Their blades are held in quick-release holders, which allow them to be unhooked from the frame, threaded through a starter hole and then reconnected to do the inside cuts. Many of the newer saw frames actually use scroll saw blades, giving you all of the options that scroll saw operators have available to them.

A router with a milescraft design kit can cut scrollworkOne other thought that I could use would be my small trim router. The DeWalt I bought earlier this year is very small, maneuverable and I have a 1/8″ down spiral router bit. That should be able to do the job for this design. Paired with a Milescraft router design kit, a router can cut some fretwork-looking projects… Of course, since the bit is round, I won’t be able to get sharp corners, but I would hope I could do a little bit of hand filing with some tiny needle files to sharpen up any points that I miss.

Of course, that design cutting part is still a little ways off. But, it pays to start thinking about this in advance, and, of course, if you had any suggestions, I’m all ears.


part of the Wood Talk Online community