The weekly plan

The Not-So-Rustic Outdoor Table

Woah… what happened?

No, you aren’t seeing things. This is the first post I have made in a week. I wish it was due to some type of family vacation, but, instead, it was health-related. I had a bit of an issue that needed to be addressed, and I was unable to get to the blog.

The not-so-rustic table

But, I’m back in the proverbial saddle, and here’s that post that I owe each of you.

Today is Father’s Day, and with summer just around the corner, outdoor dining is in the cards for just about everyone (unless you are in Florida, where we tend to hold off on our outdoor dining plans until October).  And, for all of those cookouts, crab feasts and barbecues, you will need a place to sit the guests to do the dining…

The Wood Whisperer Marc Spagnuolo offers this free plan to build a not-too-rustic outdoor table to make your outdoor dining plans complete. So, if you are looking to enjoy more summer outdoor dining, this is not a bad plan to follow!

The weekly plan

Homemade kayak storage

Sorry today’s plan is a little late. Rhonda decided that with the bright sunshine and relatively cool temperatures, it would be a great day to kayak to a breakfast place for a little Sunday brunch. That’s exactly what we did.

The view this morning

As we were dragging the kayaks back to their storage place after our trip, I had remembered that I was supposed to be building her a rack to hold our two boats. Oops…

Well maybe today’s plan could work.

The kayak stand

This plan, created by Korey Atterberry, is simple, efficient and can hold the boats, their paddles, life jackets and the other accessories that go along with this fun sport.

Looks like I may have an upcoming project…

Link of the week

Woodworking classes for Kindergarteners

Yes, this article appeared in the New York Times a few years back, but I found it fascinating. It seems that – yes – there are places out there that are offering fun and exciting woodworking camps and classes for kids as young as Kindergarten age.

Learning woodworking the right way

The article links to scads of woodworking schools all over the country. From the bustling streets of New York City to the Pacific coast, there seems to be a program or school available for just about every taste.

With most kids off for the summer, it might be a good idea to check out some of these schools or draw some inspiration on how to keep the youngsters in your life active and learning.

A half-year with my bench

So, it was just a little bit more than six months ago when I decided the time had come to build my new workbench. Building a traditional Nicholson bench was a big risk for me. After all, my old bench was plenty wide for doing lots of different things at once, it was heavy and it served me well for many years.

But, it had some other shortcomings. It racked when I planed on it. It was a pain in the butt to clamp to it. And, well, it was kind of amateurish…

That’s why I jumped in and built the Nicholson. Why that design? Well, I didn’t have immediate access to seriously thick lumber for a Roubo, and I liked the looks of the Nicholson. Plus, from what I have read, these babies can take a beating.

So, now that I have had the bench in the shop for six months, and the new-bench smell is gone, what have I noticed?

  • This bench is solid. Some people knocked on the Nicholson because it was a ‘light weight’ alternative to a Roubo. Let me tell you something, this bench is a monster. It has quite a bit of construction lumber in it, and planing hasn’t been a problem at all. And, I was amazed at how rigid the structure was. My old bench had some give to it – this one doesn’t budge an inch.
  • The clamping situation is awesome. Those large aprons give plenty of places to set a peg where I can rest a board to be clamped, eliminating the need for clamps to hold the piece from falling onto the floor, and plenty of places to drive a hold down. Clamping to the top is easy, too. Those large sides do make clamping to the top a bit of a puzzle, but I quickly discovered that I could clamp on the end of the bench, making it easy.

  • Insetting my face vise was inspired. By insetting the rear jaws of my face vise into the sides of the bench and using an oversized chop, I have fallen in love with my face vise all over again. That baby grabs like nobody’s business, and works so much better that the old setup.

  • It works for traditional – and modern woodworking. Pocket screws. Hand planing. Pattern routing. This bench has filled the bill admirably. I am totally surprised at how flexible the design has been.

  • It’s a great place to podcast from. I routinely head to the shop to do podcasting duties for the Modern Woodworkers Association. Seated at the end of the bench, I can pull right in, close to the microphone, and really get into the discussion.

If you were sitting on the fence, wondering if a traditional style bench would suit your needs, I’d have to say go for it. The Nicholson was easy to build, and for the past six months has proven easy to live with.

A new shop invader

OK, so first my wife invaded the shop, then my oldest son Dominic… now my youngest has joined the effort, and I couldn’t be any happier.

You see, with the summer vacation coming very quickly, my sons have seemed to switch off to take some well-deserved rest. But, of course, we have to keep them moving. Active with the house work. Doing their summer homework. And learning new things.

Steven checks out the shop

So, when Steven saw my veneer hammer and started asking questions, well, I just had to shift gears and give him his first veneer adventure. He liked it so much, he put together the following narrative. I hope you like this!

Hello everyone. Today I worked in the shop with my dad, well…veneering!

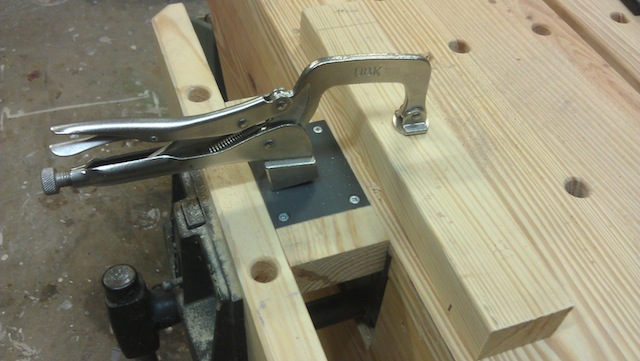
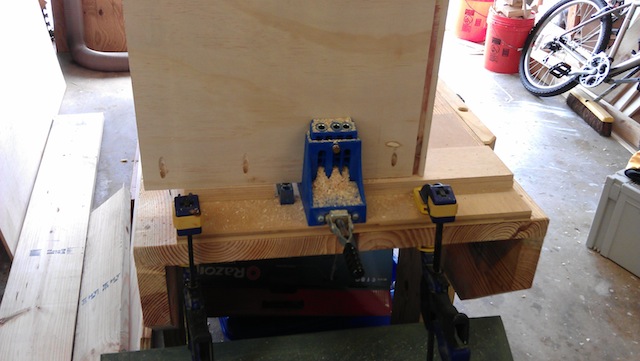
It was quite the job. We had to first find the right piece of wood for the project. (We picked out a piece of cabinet grade plywood to serve as our substrate – TI) We then had to get the thin piece of wood we call veneer. (He picked out a nice piece of figured maple…. it was sweet! – TI)

Spritzing the softener ...

But first, we had to soften the veneer with veneer softener.

Processing cow farts from solid to liquid...
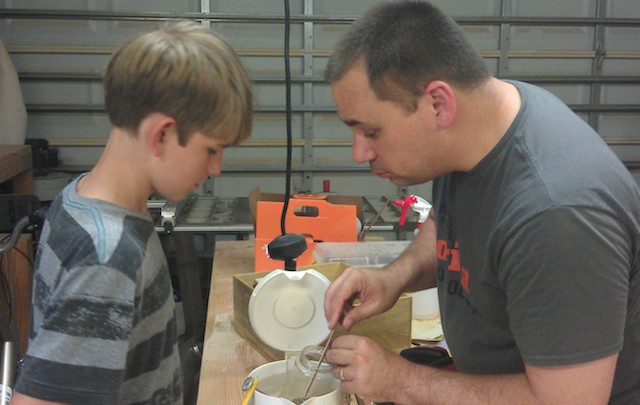
We had to then heat up the glue for the veneering since we store it in the fridge. (It was at this point that Steven announced that the hide glue we were using smelled like solid cow farts… I love that boy! – TI) We couldn’t quite get it to temperature, but it still melted.

Brush it on, Steven

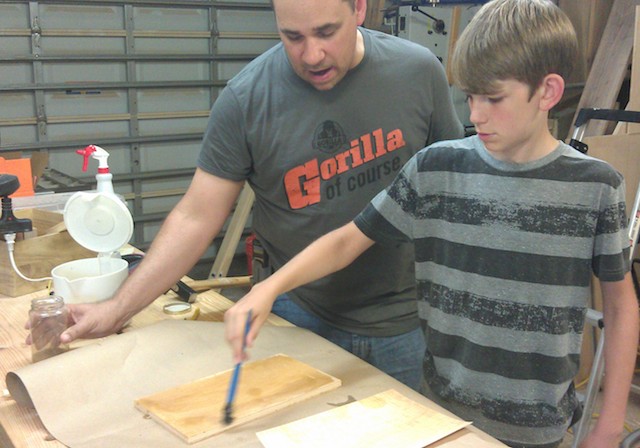
We then applied it to the, “bad side” of the veneer, and the block of wood. We then flipped over the veneer and applied glue to the other side.

If I had a hammer

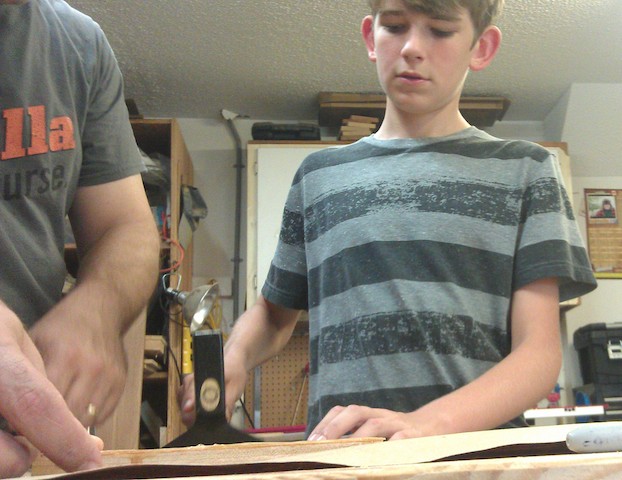
We then flattened it with the veneer hammer, and after rinse, lather, repeat, we were done.

The proud first time veneerer...

P.S: We still had to wash our fingers.

You bet we still had to wash our fingers!  That was some messy work with the hot hide glue, but the veneer laid down perfectly, sticking tight and flat to the substrate.

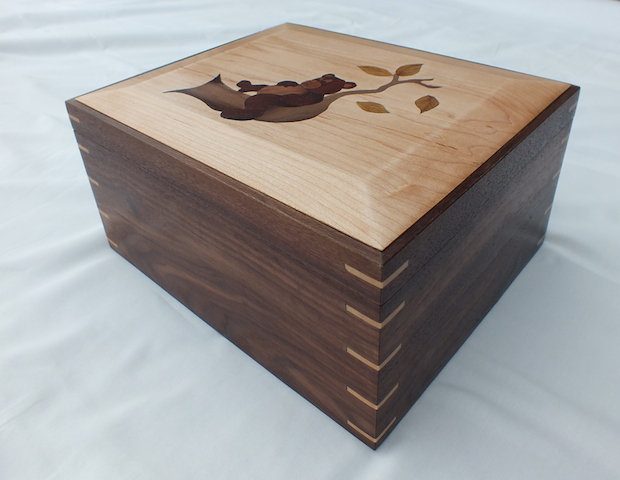
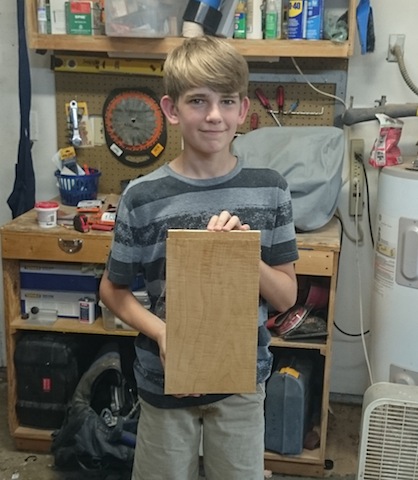
Once I gave the glue some time to dry, I trimmed the edges of the board on the table saw and broke out my random orbit sander with a 180 grit pad. The piece came out looking great, and super smooth.

After that, I wiped the dust off and wiped on a coat of finish. The grain just popped. Steven originally wanted to put it into a project, but after he saw it, he just wanted the board to display in his room.

And, I couldn’t possibly be any happier.

The weekly plan

Know your stuff

OK, folks, it’s not a woodworking plan. But, as we start the Atlantic Hurricane Season, it’s time to create another plan … a plan to protect our stuff from the potential of loss due to one calamity or another. It could be hurricanes, tornadoes, earthquakes, fire, theft or whatever other nastiness that can happen.

Damage after a shop fire

My friend Lynne McChristian from the Insurance Information Institute turned me on to this site that they run, which helps you create a detailed inventory of what items you have in your shop. Armed with this information, you should be able to recover much more quickly after a disaster. And, after all, don’t we all want to be working in our shops?

Remember, this service is free!

Link of the week

Keepsake box with custom bear inlay

OK, bear with me here today… my friend Brian Benham of Benham Design Concepts approached me recently to ask if I could possibly feature a sweet keepsake box he had built.

An up close shot of Brian's bear box...

Not only is the joinery tight, but the lid is adorned with a custom bear inlay… a very sweet looking piece. Not only does Brian show the piece during construction, but he also features a cool time-lapse video of the inlay process.  Something to check out for sure!

part of the Wood Talk Online community