The results are in!

I’m sure that most of you are on tenterhooks, anxiously awaiting the results of the Great Wood Movement Experiment of 2009.  And, yes, I did promise that about two weeks ago, I would have the results.

However, a little thing called ‘Life’ got in the way.  My timing was terrible.  My two confederates in this project  – Dave Campbell and Marc Spagnuolo – both had things that kept them away from measuring the sample boards I had sent.  For Dave, it was a family camping trip that set him back a day or so.  For Marc, I must have been clairvoyant.  I sent him the boards smack in the middle of a move between houses. No wonder it took some time to get the results back.  Dealing with power, phone and cable companies takes time!

Anyway, just to recap what had happened:

I had prepared some samples of commonly used boards in cabinetmaking – cherry, poplar, hard maple, ash, red oak and a mystery board which looked a lot like elm.  All were 5″ wide by 8″ long and were shipped to my victims – errr – volunteers by USPS Express Mail.

Dave Campbell is the deputy editor of Wood Magazine, and calls the Des Moines, Iowa area home.  Marc Spagnuolo is the Wood Whisperer himself, and has bounced between two homes in the Phoenix, Arizona area for the past few weeks.

Both of these guys let their packet of sample boards aclimate to their shops for  about two weeks. I kept a third set of boards here in my Tampa, Florida area shop in the stifling heat and humidity.

Now for some notes about the experiment…  First of all, I discovered that I really need to tune my table saw.  I was having some discrepancies across the width of the board.  For instance, my sample of ash had a difference of .006 in the width of the ‘top’ of the board and the ‘bottom’ of the board.  Guess it’s time to haul out the operator’s manual and get busy on that…

Also, none  of the boards had appreciable expansion along their length.  This was the expected result because wood doesn’t expand dramatically along the length of the fibers.  Of course, the next time I do something like this, I will cut the boards 5 inches square, so we can fit calipers across both dimensions….  Live and learn, right?

The width measurements were all taken in decimal inch measurements on or about June 8.  Just for your reference, the weather readings from the three cities on that day were:

  • Tampa, Florida – Mean temp: 79; Dew Point: 69

Tampa was its typical summer-like self.  The weather was exceptionally rainy at the start of June, and the added humidity made going into the shop a challenge.

  • Des Moines, Iowa – Mean Temp: 66; Dew Point: 65

Des Moines saw the passage of a frontal system which not only brought rain, but severe weather as well, with the touchdown of at least one confirmed tornado.

  • Phoenix, Arizona – Mean Temp: 84; Dew Point: 36

As with Tampa, Phoenix was enjoying – if you can use that word with a straight face – its typical hot and dry weather, with a dew point which seems just way too low for someone living in Florida.

The results were pretty interesting:

Cherry:

  • Tom –   5.014 inches wide
  • Dave –  4.995  inches wide
  • Marc –  4.938 inches wide

Poplar:

  • Tom – 5.007 inches wide
  • Dave – 5.004 inches wide
  • Marc – 4.938 inches wide

Maple:

  • Tom – 5.003 inches wide
  • Dave – 4.990 inches wide
  • Marc – 4.906 inches wide

Ash:

  • Tom – 5.002 inches wide
  • Dave – 5.001 inches wide
  • Marc – 4.875 inches wide

Red Oak:

  • Tom – 5.008 inches wide
  • Dave – 4.985 inches wide
  • Marc – 4.938 inches wide

Uhh, Elm?:

  • Tom – 5.003 inches wide
  • Dave – 4.996 inches wide
  • Marc – 4.875 inches wide

Since Des Moines’ dew point was higher that its normal levels due to the increased rain, Dave’s samples had considerably less movement than I had expected.  In many cases, the difference between widths was mere thousandths of an inch – something which could easily be accounted for given my faulty saw setup.

However, Marc’s numbers were considerably smaller than the samples kept in my shop.  Going from the near tropical conditions in Florida to Phoenix’s desert, the boards gave up their moisture content to equalize with the surrounding environment.  The ash sample was dramatic, shrinking nearly 1/8 of an inch across a five inch wide board over the two week period.

Even with my faulty science and measurement techniques, hopefully you have been able to see that yes, there is definitive evidence to suggest that wood does move over its width with changes in humidity.  This expansion and contraction does have to be accounted for in your construction methods, or the boards will crack or push apart the joints.  Floating solid wood door panels and table fasteners are some of the time-honored techniques for handling these expansions and contractions.

Will this be the end of the Great Wood Movement Experiment?  No way.  There are so many other aspects to check out… For instance, will boards of the same species expand and contract at the same rate if they are finished?  Will quartersawn or flatsawn boards expand the most?  Oh, so many wood samples to cut, so little time…

All I can say is that the Great Wood Movement Experiment of 2009 has been a moving experience for me.  I have to move myself out to the shop to get that saw tuned up!

Link of the week

Build a Tie Rack for Dad

tying a tieOK, the tie is the ultimate cop-out Father’s Day gift.  I have gotten ties from my wife and kids on Father’s Day, and I don’t even wear suits.

How do I know that ties are such cop-out gifts? Because I used to give my dad ties for Father’s Day, even though he delivered Coca Cola for a living.

What was I thinking?

Well, if you have given dad plenty of ties in years past, Canadian Home Woodworker has a Father’s Day Tie Rack plan you can easily build in a weekend.  Using a small amount of wood and some lengths of dowel, dad can now have space to hang up to 14 ties in a compact area in his closet.

The perfect place to put those gifts from Father’s Days past.

Oh, and to all you dads out there, Happy Father’s Day to you.

A questionable collection

This year, my family and I are not making our annual pilgrimage up north.  Bummer.

The fact that we live in Florida means that – as with many of our friends and neighbors, we didn’t start here.  We have family stretched along the length of the east coast of the United States.  North Carolina.  Maryland.  New Jersey.  Keeping those family ties strong is the prime mission on these trips.

During the summer break, we typically load the kids into our minivan and begin the epic odyssey.  By the end of the trip, we have logged nearly 3,000 miles, slept in six different homes, two hotel rooms and eaten countless dinners out.

No wonder I needed a vacation after those vacations…

Chain restaurants on the highways are our friends during these trips.  Subway and McDonalds get a decent chunk of our change on the highway, but, for breakfast, it’s hard to beat the Cracker Barrel.

If you want down-home kitch, Cracker Barrel has it in spades.  From the offerings on the menu (that’s where this New Jersey boy first ate collard greens) to the rows of rocking chairs out front, the restaurants attempt to exude the whole country cookin’ theme.  That follows through to the decorations up on the walls.

That’s where I have issues.

During last year’s trip, we had just crossed the Florida/Georgia state line on I-95 when we pulled into the parking lot.  We were seated in the dining room and had just placed our drink orders when I took the opportunity to scan the items up on the wall.  Sure, there were the various antique signs, family portraits and various farm implements from bygone eras.  But, up near the front of the restaurant was a collection of old woodworking tools.  Saws.  Chisels. A nice old brace with some bits.  And a large wooden jointer plane.

I got up to stretch my legs and check out the display.  The plane caught my attention.  It was in gorgeous condition, complete with its wedge and iron.  The body was in perfect shape, with only a few very minor checks in the end grain at the heel.

And, it had been screwed to the wall through the body.  Ouch.

Part of me was tempted to go out to the van and get the screwdriver, remove it from the wall, sharpen the iron and show the restaurant patrons what a plane like that could do.  Many tools from that era are exceptionally serviceable and with a little TLC can outperform many modern models.

The question that ran through my mind was, “Are the things on these walls real?”  Once I got to an internet hot spot, I did a little research. According to an article written by Cecil Adams of the Straight Dope, the answer is yes.  Restaurant chains such as the now-defunct Bennigans, Cracker Barrel and other establishments do have buyers who scour the country looking for these old bits of Americana. They do attend auctions, yard sales and other events to find the elements to add to their restaurants.

While displaying old items in itself is not a terrible thing, my concern is about they way these tools are handled. Screwing through the body of an antique plane is certainly not the best ending for something as noble as a properly built hand tool.

Remember, these are the tools which helped to build our country.  Artisans toiled for for years with these tools in their hands.  These tools were their livelihood.  They were part of their identity and should be treated with some care.

I have held and used some very old woodworking tools over the past decade.  There is a connection with the craftsmen and women of old when you swipe a properly fettled plane across the surface of a board, raising a fine fluffy curl of wood.  These tools are more than just ‘stuff’ from the past.

Should every old tool be refurbished and used in the workshop? Nah.  If you have a sentimental attachment to a tool – say one owned by a grandfather – there’s nothing wrong with putting that tool up on display to show off the family heirloom.  Other planes could have major defects – shot soles or cracked castings – and not be salvageable.  That’s what happens when you work with old tools.

And, since I don’t own these old woodworking tools hanging on the walls, I really have no say in how they are handled or displayed.

I guess I’m just a firm believer that these old tools should be treated with the utmost respect and given a new life in a woodworking shop, not screwed to a restaurant wall.

Pulling out the stops

Hand planing has been a zen-type experience for me in the workshop.  Sure, I could have plunked down some dough to buy a powered jointer, but I do enjoy using a sharp jack, smooth or jointer plane to get a board into shape.

The rhythm… the sound… the whole experience takes my mind to a new place, making me appreciate my shop time that much more.

The only problem I was running into was that I was spending quite a bit of time securing boards to the bench top.  I would clamp the  board between a bench dog and a Wunder Pup or a pair of wedges, plane, then have to reposition the piece.  Surely there is an easier way to do this?

Turns out I had the answer back in my shop.  When I was planning for my bench, I had bought two of these planing stops from Lee Valley.  They were cheap, and I had planned on installing them when I completed my bench this past January.

Well, I never got to installing them.  They just sat in a bag on my side workbench, collecting dust.

Finally, this weekend I was starting to do some planing and thought, “Why not just go ahead and do it?” It was settled, I was moving ahead with it…

As I got started, I discovered that a 1 1/2″ chisel was the perfect width to mortise the stop into the benchtop.  I carefully scribed the outline of the stop top and began chiseling out the cavity.  Once I got the face place fully recessed, I marked the other contours of the stop and chiseled and drilled them to the right depth. Finally, the stop secured to the bench with two screws for extra support.

Believe me, it took some guts to take a chisel to the wooden sides of my bench…

The stop is easy to use and works very effectively.  Turning the dial allows the toothed spring loaded top to pivot up, giving solid support to the board being planed.  With a few minute’s practice, I was able to effectively and quickly plane a thick walnut plank smooth on the face side.  It was easy to reposition the board against the stop as necessary to keep the stop in line with the force of the plane.

The new stop did show I had to improve my technique a little.  For instance, I discovered that I tend to drag the plane backward as I do my return stroke. A minor hitch in my technique which was easily overcome.

Was this a good addition to my bench?  You had better believe it!  This will help make my planing faster and more effective… guiding me further down the path of woodworking enlightenment…

Quick poll

Getting involved in electronics can be tricky business.  Every time a new technology is invented, processor speed increased or new storage medium is heralded as the next great thing, your computer, stereo or television is one step closer to needing to be upgraded.

Fortunately, this isn’t the case when it comes to woodworking tools.  Power tools built in the 1950’s still slice through lumber and planes and chisels more than a century old still slice and dice joinery as well as they day they were made.  And, they can still do their work despite the fact that many of these babies sat languishing in some cellar or out building for decades before being brought back to life.

This week, let us know how old the oldest tool is in your collection.  Power or hand tool – it doesn’t matter. The one caveat is that the tool still has to do work for you in a your shop – no living room display case models are allowed.

[poll id=”78″]

***

Please help support Tom’s Workbench by visiting our advertiser Eagle America. Thanks!

Link of the week

The Norse Woodsmith

So, you consider yourself a galoot?  Do you love hand tools and their methods of work?

If so, you owe it to yourself to pay a visit to the Norse Woodsmith.  This site offers a wealth of information about hand tools, old-school methods of work and jigs and fixtures which can make your woodworking easier and more accurate.

And, if you ever wanted to make your own tools, there’s a great section on that as well.  Recycling old hand saws into scrapers, building your own veneer hammer and creating marking gauges are some of the projects offered – and the construction isn’t as tough as you might believe.

Yes, there are even reviews of some powered tools, for those of you who won’t operate a tool without a power tail on it.

Woodworking Spotlight: Paul Meisel

The pace of change in our schools has been tremendous.

Paul MeiselThe incessant clatter of students taking typing classes has been replaced by the more muffled sound of computer keyboarding.  Many schools have abandoned ordered rows of students for a more collaborative ‘working group’ arrangement.

And, in many cases, classes like phys ed, home economics and wood shop have been replaced with video production and internet design.

There are, however, people working to ensure that kids get a far more rounded education than they can get from sitting in front of a computer.  Paul Meisel is one of those people.

At the Flagship Academy – a private school just outside of Minneapolis, Minnesota, Paul teaches his 10 – 14 year old students just how analytical, mathematically engaging and fun woodworking can be.

Paul’s system for teaching woodworking is called Study Technology.  Basically, he breaks all functions down to their elemental parts, and then instructs his students to repeat those basics until they have them down cold. Hammering.  Drilling.  Cutting. Smoothing.  Not only does this ensure accuracy in work and – most importantly – safety, it also builds a great deal of confidence in his students.

Student at the drill press
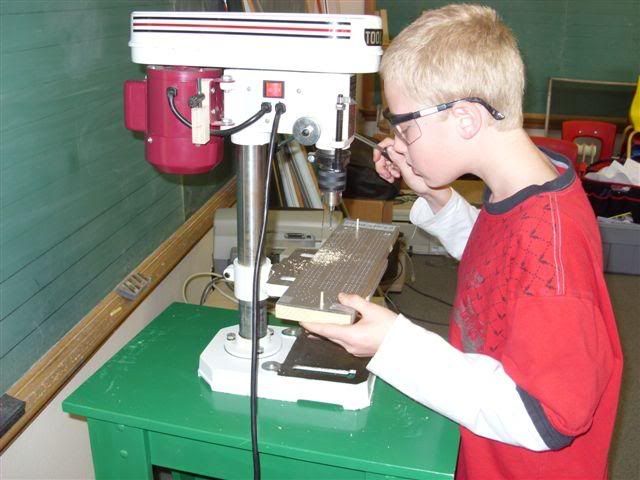
“Many of the students in my classes have never used a woodworking tool in their lives,” said Paul. “Giving them the skills they need to overcome their fears and inexperience is a liberating experience for them. Many of the students are so energized by the process, they actually become shop assistants, shepherding their classmates forward.”

Once those basics are mastered, well, they sky is the limit.  Just as a martial arts student is drilled on the basics, and then turns those basics into a flowing routine, Paul’s students advance to make projects.  Simple at first, the projects provide ample opportunity for Paul’s eager learners to reinforce what they learned and to see exactly how the skills build upon each other.

The projects are some of the basics you would expect to find taught to children in this age range – bird feeders, window planters and peg jump games.  However, some of the projects are not quite what you would expect. “One group of students built a series of bee houses to provide shelter for our local wild bee colonies.  With the current colony collapse syndrome wiping out entire bee populations, our students wanted to do something to help make a difference and provide a safe haven for the wild colonies.”  Paul even pointed out that the project got the attention of the local TV news programs, giving more exposure to the effort.

Paul is currently in the process of writing a book about his teaching techniques featuring many of his hard-learned lessons. He has offered to send me a copy once published, and I’ll be sure to post a review once it’s available.

But, why woodworking as the medium?  While this method could be used to teach other subjects, the ‘industrial arts’ provide a tangible way to gauge progress and  a visual tool to instruct the finer points. “If one of the students becomes confused or makes a mistake in the project, it’s easy for him or her to to retrace the last few steps to see where the error crept in. This way, we can go back to the point of confusion and see how they can improve their basic fundamental skills.” Paul joked, “There are many adults who haven’t mastered that skill yet.  I believe these students will have a much better grounding and can apply these skills regardless of their field of study.”

If you have an interest in teaching woodworking to kids, e-mail Paul at Paul@Meiselwoodhobby.com.

part of the Wood Talk Online community