Make your bed!

Oh, how I hated doing chores while I was growing up. Weed the flower beds. Shovel snow. Clean up the dishes after dinner.

And, make your bed. It was a chore I couldn’t understand why it was so important. I mean, yes, my dad was a Marine, and my mom loved to keep a neat house, but it seemed like such a waste of time, neatly folding and straightening out the sheets and blankets only to mess them up again later when I tucked in for the night. But, it was a big deal, and even though I couldn’t understand it, I just knew it was trouble if I didn’t take care of it.

Well, Mom and Dad, I’m making my bed. From scratch now. Yes, I’m building a new bed for Rhonda and me, and it’s about time. The original bed we bought when we first got married had served us well. It just was missing one critical thing in our basementless Florida home – storage. So, I set about to build something with a little storage that would be something a little stylish.

Cutting

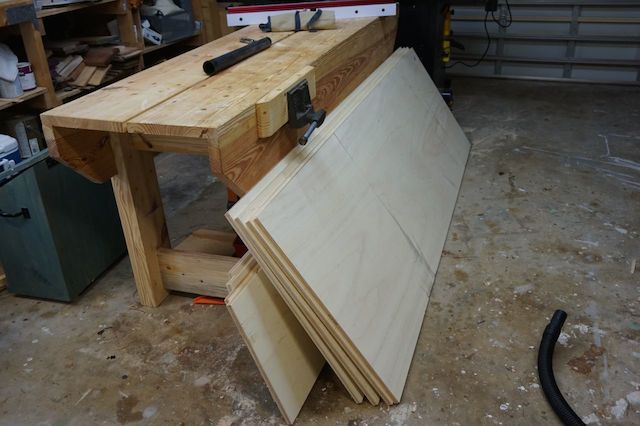
It all started, as you might imagine, with getting some supplies at our local home improvement center. I had the folks there cut the sheets down to the basic sizes so they would be easier to get home. And, you bet, it made carrying this stuff a whole lot easier.

Ply in the shop

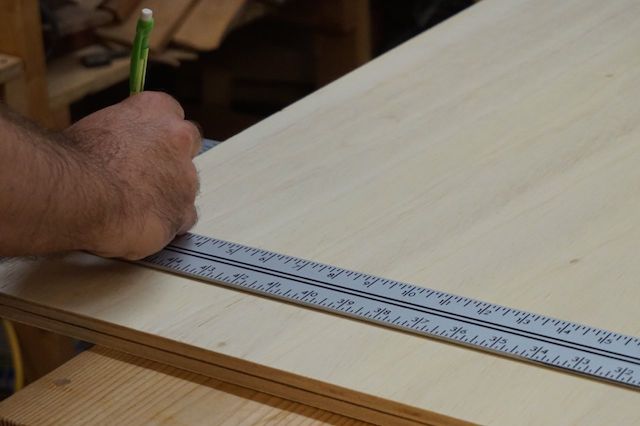
Once I had the goodies in the shop, it was a simple matter of carefully marking where things had to be cut and where joinery had to be plowed out.

Marking where things belong

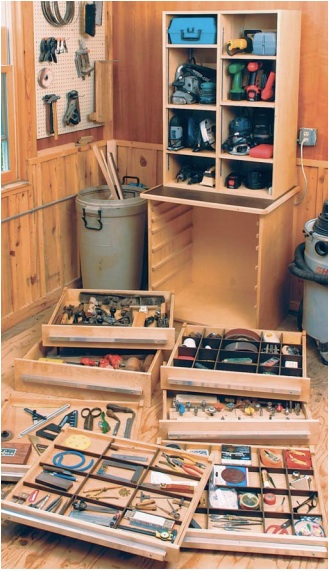
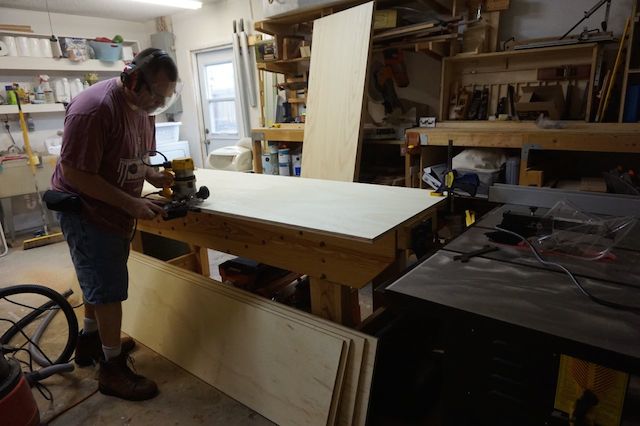
I turned to my router for most of the dadoes, since the pieces were very large. The rule of thumb is if it’s small enough, bring it to the tool (plow out those dadoes on the table saw), if it’s too large, bring the tool to the wood (routers).

routing the dadoes


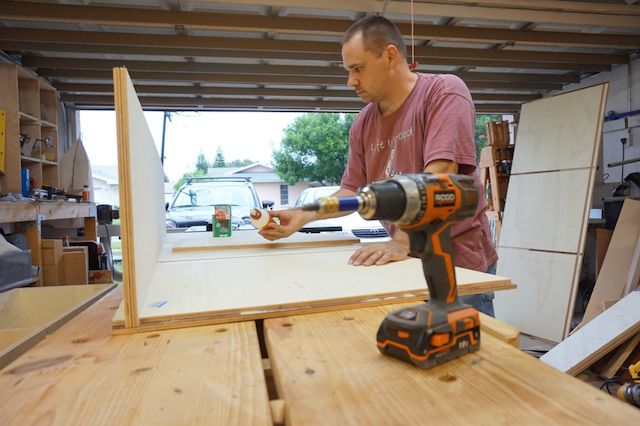
With the dadoes plowed and pieces cut, it was a snap to move to the next step, which is a great tip I remember from Norm Abrams’ master opus when he built his kitchen cabinets – drill a pilot hole through the dadoes on the cut side, so later, when you go to assemble the pieces, you know exactly where to put the screws.

drill those holes

With the pilots drilled, it was time to assemble. I grabbed my glue bottle and a huge box of screws and set to work. The pieces needed only the slightest encouragement to drop into the dadoes, which meant I had done a good job getting the joints to fit tightly.

assemble the cases

The screws were there to ensure that the piece would remain tight throughout its lifetime. With a whole lot of effort, and some skinned knuckles, I managed to get the cabinets together.

A completed cabinet

Since a queen size mattress is 60 inches wide, I opted to build the piece as two cabinet halves and bolted them together. This way, Rhonda has a set of three drawers on her side of the bed, and I have a set on mine. It also allowed me to move each half into place,  lessening the weight and making them more maneuverable as I threaded my way through the living room into the bedroom.

The bed in place

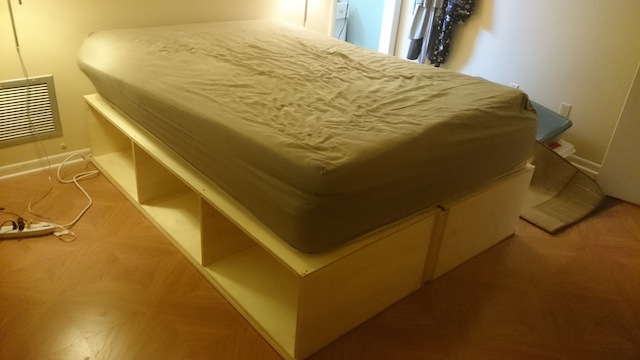
Once in place, I bolted the two halves together and put the mattress on top. That was plenty of work for one day. I figured I could work on building the head and footboards and drawers and move them into place as they are finished, making more room in  my shop to move around.

As far as the old bed goes, well, our neighbor’s daughter is moving out to her own place soon, so I was thinking we could offer her the headboard, footboard, frame and box spring to her so she can set up her bedroom. No sense letting it go to waste.

The weekly plan

American Woodworker’s Tool Cabinet

Now that the holidays are over, and you have all of those sweet new tools to incorporate into your shop, you might be looking to add some additional storage to organize those sweet new items.

Tool Storage Plan

This plan, brought to you by American Woodworker, is a great system to organize tools, accessories and the like, helping keep them right at your fingertips.

Built with plywood and simple joinery, this one is easy to tackle and will give you tons of storage space.

Oh, all the things that need to be done…

No time to post today. I have so many things going on at the house. I mean, we’re hosting 14 people tonight for the annual Feast of the Seven Fishes, and we are still struggling with how we are going to fit all of those people around our table.

The table!  Oh, no!  The table!

Oh, crap!  I should have thought about this earlier, so I could have built a table that would have been long enough to fit everyone!  Why didn’t I get to that this year? Oh, my, time to mark it down for 2015 so I can get it done in time.

Oh, no!  The back room is a mess!

And, the back room where the tree is… what a mess!  We haven’t vacuumed yet, and the kids want to play their PlayStation games. Don’t they understand everything that needs to get done? Come on, guys, get your rears in gear and start moving!

Why didn't I build that entry organizer?

Oh, and the shoe bench. What on earth are we going to do with all these shoes? Dangit, I knew I meant to build an entryway organizer this year to capture all those shoes and jackets and umbrellas and hats and all the other stuff. Man, next year…

And the food shopping, and the gift wrapping….

STOP!

STOP!

Just what do I think I’m doing?  Today is Christmas Eve. The only one we get each year. Why am I letting all this little stuff get in the way of my enjoyment of this most special day of the year?  So, my house isn’t perfect. So, I should just build a sign that says ‘Bless this Mess’ and be done with it.

When we gather tonight around the table for the traditional Italian-American feast, no one is going to notice anything other than how much food there is. How much laughter we’ll be sharing. How much joy and anticipation of the big day tomorrow.

That’s what this season is all about. This year, I learned that health is precious. That life is something that can be taken away, and that we need to be able to enjoy every minute of it, regardless of how clean our floors are or how many projects are on the back burner.

My wish to all of you is happiness, peace, joy – and the patience to slow down and enjoy every minute.

See you after the holiday…

Visual. Stunning.

It took me some time to realize this, but a blog just isn’t worth a bucket of warm spit without pictures. Lots of them. Sometimes, the story can be told simply by photos alone, with maybe just a few words sprinkled in to describe things.

Well, for the past – I dunno – forever, I have been relying heavily on a series of cameras that sorta lacked in the photo capability department.

Bleh…

Things changed about a year ago, when I upgraded to a Sony Xperia Z1 smartphone. Sony took the time to put a sweet camera on this baby. The colors look much better, the photos look a whole lot more crisp, and well, things look a whole lot better.

Sony Xperia

And, this camera is great because it’s always on me. Which makes it convenient. But, there are times when I want to get some better shots. Maybe zoom in a little bit. Maybe get things a little more crisp.

Well, Santa arrived early this year with a new Sony Alpha5000 mirrorless compact system camera.

The new Sony

This thing is the BOMB.  Similar to a professional DSLR camera, it has an enormous photo sensor and takes an incredibly impressive photo.  How impressive?  Well, I took these, just goofing around with the silly thing….

DSC00003

DSC00009DSC_0135

I am hoping that as I get to learn the camera a little better, I will be able to take even better photos for the blog, and better photos for the family. Right now, I’m working primarily on full automatic mode, but the camera does allow for some DSLR type customization, and I can swap out lenses. Plus, it records video!  Woo hoo!

Now, I just need to learn how to use the silly thing…

The weekly plan

Make your own light saber

Our friend Lawrence Wroten is at it again at his blog Midnight Woodworking. He and his son Adam have figured out a great project that definitely fills the bill for a Last Minute Elf project…

Light Sabers for both sides of the force..

Using just a simple block of walnut to turn a handle, an inexpensive flashlight and a length of PEX plumbing tubing, this father and son have made enough elegant Jedi weapons to rule the universe together…

With the new edition of Star Wars in production, this may be a great project to finish off your holiday projects.

Link of the week

The importance of hobbies for stress relief

It’s no secret – living in today’s world can be a stressful experience. Work demands, active kids, bills,the works. Add to the fact that this is one of the most stressful times of the year and, well, you start to get the point.

Woodworking can be fun

This article posted at About Health explores the psychological benefits to having a hobby – like woodworking – and how having that release can help you cope in today’s stressful times.

Don’t we need just about every possible benefit we can get?

Rollin, rollin, rollin…

My new table saw is awesome. Seriously. I have been loving the heck out of it for the past week or so, and if it performs half as well as it has already, it will easily be the last table saw I will ever have to own.

But, as I had stated when I posted about it originally, it has two small flaws. First, the wheels on it are not designed for the saw to be moved around a lot – they are more for the occasional shift to sweep up behind the saw every so often. And, the top of the saw is about a good inch and a half short of my bench top. Since I use my bench as an outfeed table, that is a problem.

The PortaMate 2500

Fortunately, my friends at HTC Tools heard my cry for help, and suggested that I try one of their new PM2500 rolling tool bases to make my saw a little more mobile.

The package arrived at my house, and I could tell it was heavy duty without having to open the package. This sucker weighed a ton – betraying the fact that it was made out of heavy duty metal.

The kit consists of four corners – two to hold the front swiveling casters and lifting mechanism, and two to hold the fixed rolling casters in the rear. These corners are held together by pieces of heavy-duty steel bars with holes drilled in them, allowing you to create bases as small as 12 x 12 inches to as large as 36 x 36 inches. They are held together with nuts and bolts, and give a good purchase.

The base, assembled

It took me less than an hour to assemble the base to accommodate the table saw’s footprint. I had to go with 20 x 21 inch base, which meant I didn’t have to bolt together bars to make up the distance. The assembly could have gone a little faster had they increased the size of the diagram, but with my cheaters and a little squinting, I had it all together after a little bit.

Alone, the base raised my saw about half an inch above the floor. Given that the rails extended up 2 inches above the platforms on the corners where the base rests, I figured I could cut out a 3/4 inch plywood platform to set down first, to get me close to the benchtop height. Cutting the platform was easy with the saw, and once I had it snugly in place, it was time to get the saw onto the base.

With a plywood deck

Now, I’m not going to joke with you.. the saw is heavy. But, with some muscle, I was able to wrestle it onto the base with only a minimal amount of cursing. On its new base, the saw glides easily around the shop. When I have the saw where I want it to be, a simple flip of the lift pedals on the front casters and the saw sets down on a pair of rubber feet mounted at the end of a bolt. This is a standard arrangement for this kind of stand, and it allows the saw to sit firmly on the shop floor.

Perched atop the base

With the new base in place, it’s going to be easy to move the saw where it needs to go when I have to move it, and get it out of the way when I don’t.

part of the Wood Talk Online community