Category Archives: Shop Talk

My shop weasels

For a guy known as the Shop Monkey, you’d think that I would have had enough of animals in my shop.  But, I’d be remiss if I didn’t tell you about my shop weasels.

Some people have gremlins.  Others have gnomes. Everybody has that mischievous spirit that runs off with that important thingamabob that you need for your next step in the project, but darned if you can find it.


Oh, I know your shop is waaaay too organized to have anything like that happen.  But, for us mere mortals who work in less than pristine shops, we have swarms of these little guys all over the place.  Where did I put that tape measure?  Why can’t I find the right chisel?  It was just on my bench right here…
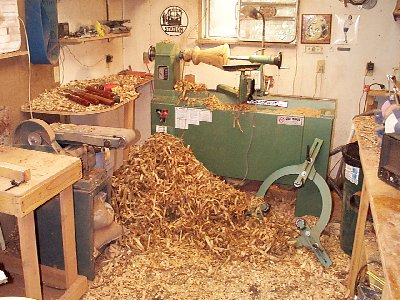

For me, learning to live with the weasels was a study in patience. I knew if I kept my cool once they did their thing, I could spend time retracing my steps and – magically – that missing tool would show up where I least expected it.  Also, the weasels move so quickly and with such care, they have managed to reclip my tape measure to my belt or replace the safety glasses they took back on top of my head without me feeling a thing.

Fortunately, I have developed a straightforward plan to help keep the weasels under control. It comes down to being more organized and cleaning up more.  I’ve discovered that when I place tools I get out to do a simple task – say a particular size of chisel to do some paring – back where I took them from in the first place, it creates a weasel-proof barrier.
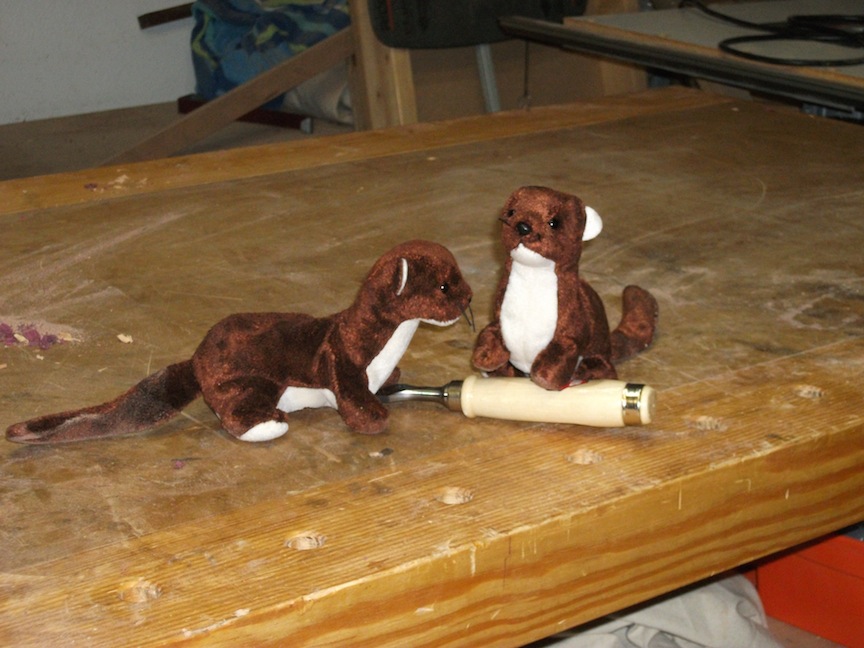

There are other techniques you can use. From the simple lanyard type safety glass retainers which allow you to hang them around your neck to advanced router bit and saw blade organizing cases to protect and organize your cutting investment, there are dozens of ways you can deter weasel mayhem.

And, manufacturers are starting to listen.  I was pleasantly surprised to see that Festool had weasel proofing in mind when they designed their tools and the cases that went with them.  My track saw kit – with all of its numerous parts and accessories – has yet to have a weasel encounter.

For smaller, easier to conceal items such as delicate screws for a set of hinges or your router base, take a tip from another vocation that deals with weasels on a day-to-day basis.  Mechanics have long relied on magnetic bowls to hold the small bits securely while they work on another component. Magnetic bowls can be found at most auto parts stores and in many larger home improvement big box stores.
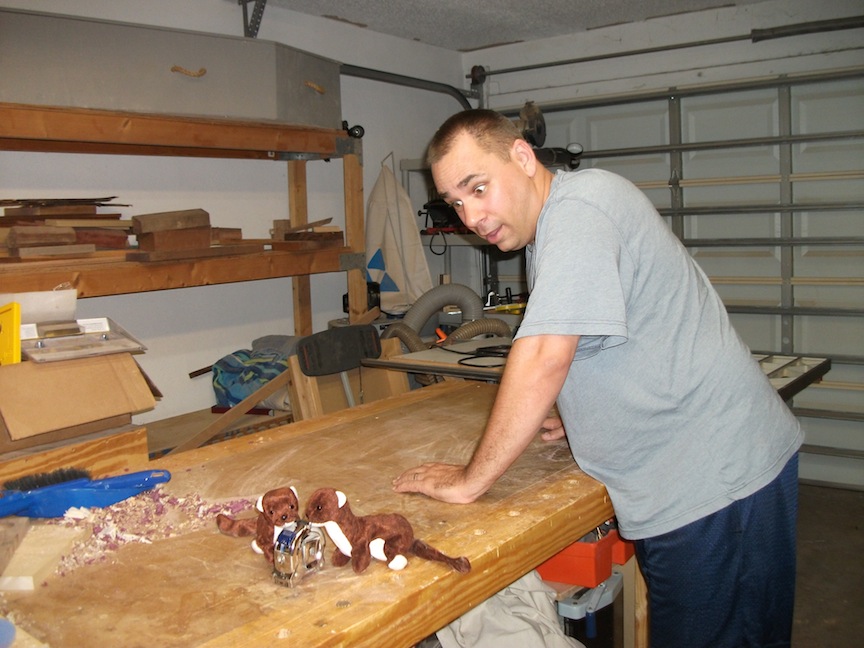

The last step I use to keep the weasels away is to clean up the wood shavings and sawdust that build up near the bench. You’d be surprised how efficiently the weasels can camouflage themselves in that stuff, waiting for an important piece to fall off the bench.  If that happens, you may never see it again… Take the time to clear that waste from underfoot on a regular basis so you too can make your shop a weasel free zone.

Now, where did I put that remote?


Wracking my brain

People have often wondered exactly what I have been thinking.  I’ve been told more than once that I really need to have my head examined.

(For those of you who may be concerned… relax. I’m undergoing a 24 hour EEG test just to verify that I truly am OK after a recent health issue. Everything so far looks A-OK, and I’ll have the results for sure in the next few days.)

Since I have the rig on, I’m sure the doc is going  to be surprised at just how much I’ve been thinking about how I need to fix a boo boo on another project.  You would think by now I have made every single possible mistake there is to make, but I am pretty resourceful.

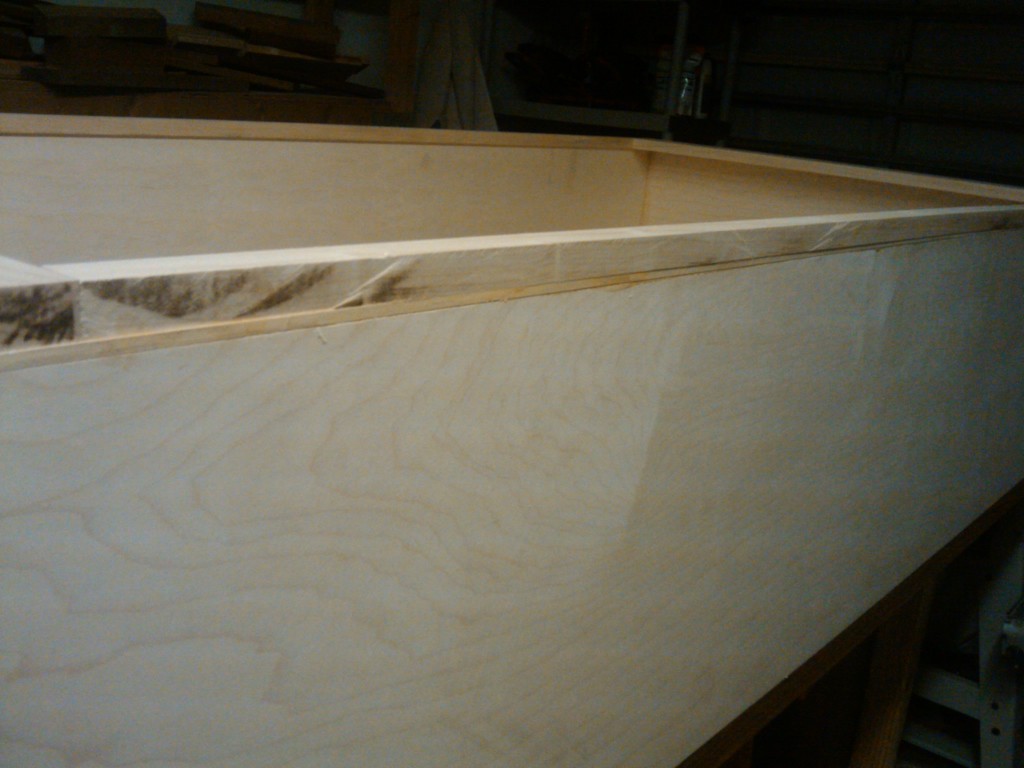
Basically, here’s the situation.  New project – new issues. I am building a pantry for a friend of ours. I ordered the (EXPENSIVE!) high quality maple plywood and hardwood for the build, and I used the Festool track saw to cut the pieces down to size. This is going to be a piece of cake, sez I, because I have used this before and I know all of the pitfalls of making cuts without using a self-squaring rip fence.

Well, If you put the track of the saw down where it’s not square, and then you make a cut, you will have a perfectly straight cut that just doesn’t quite measure up square. That’s what happened when I cut one of the sides, and I didn’t discover my boo boo until after I had the piece glued and screwed together.  Dangit.

So, I thought I could hide the issue by cutting a long wedge from a maple board and gluing the piece down to the plywood before I put the face frame on. Gosh, that plan stunk. There’s no way I am going to hide this problem.

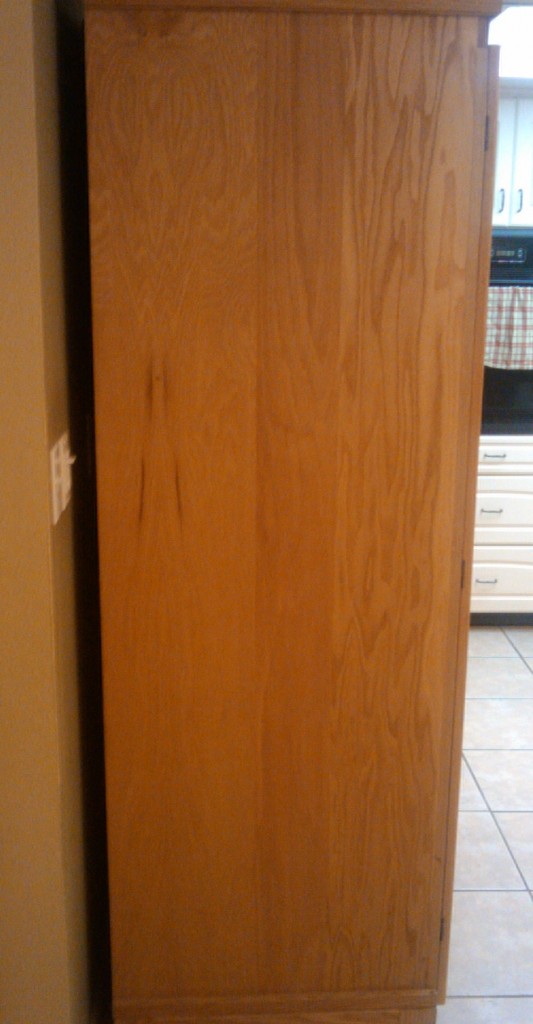
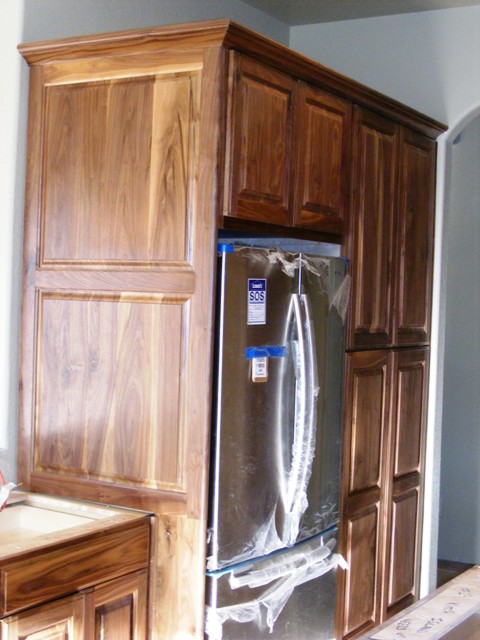
So, I got to firing those brain cells off – how on Earth am I going to fix this project.  The client was looking to get a pantry like the one I have in my kitchen, and I did a good job ripping the sides on that one straight and true on my table saw.

Think, Tom. THINK!  (By now, the brainwaves are just bouncing all over the place. The doc is going to have his hands full working on this one…)

That’s when a flash of inspiration hit me. When you look at the sides of most cabinets, they are very plain affairs. Just flat end panels sitting there in their monolithic glory.  But, I can also remember a book by Danny Proulx about building your own kitchen cabinets, where he too lamented the fact that slab sides tend to look a little boring.

So, why not take the opportunity to turn my mess up into a design feature?

Danny’s idea was to dress up the end panel of a project like you would the doors of your project to give the piece a little more visual interest. A great idea, especially since I’ll be building the doors for the project, and can use the bits to create a ‘mock panel’ for the sides. Basically, I’m going to mill some maple down to 3/8″ thick, bead the edges and then picture frame the pieces on to the cabinet… making the ends look pretty fancy…

Sure, it will cost a little extra and take some additional milling to make it right, but the finished piece will look totally awesome.

That’s enough thinking for one day… I’ll let my brain sit back and kick its feet up to celebrate another job well done!


Transition time

So, I lost this entire weekend. Total bummer, because I had a busy weekend planned of woodworking and finishing projects up my sleeve.

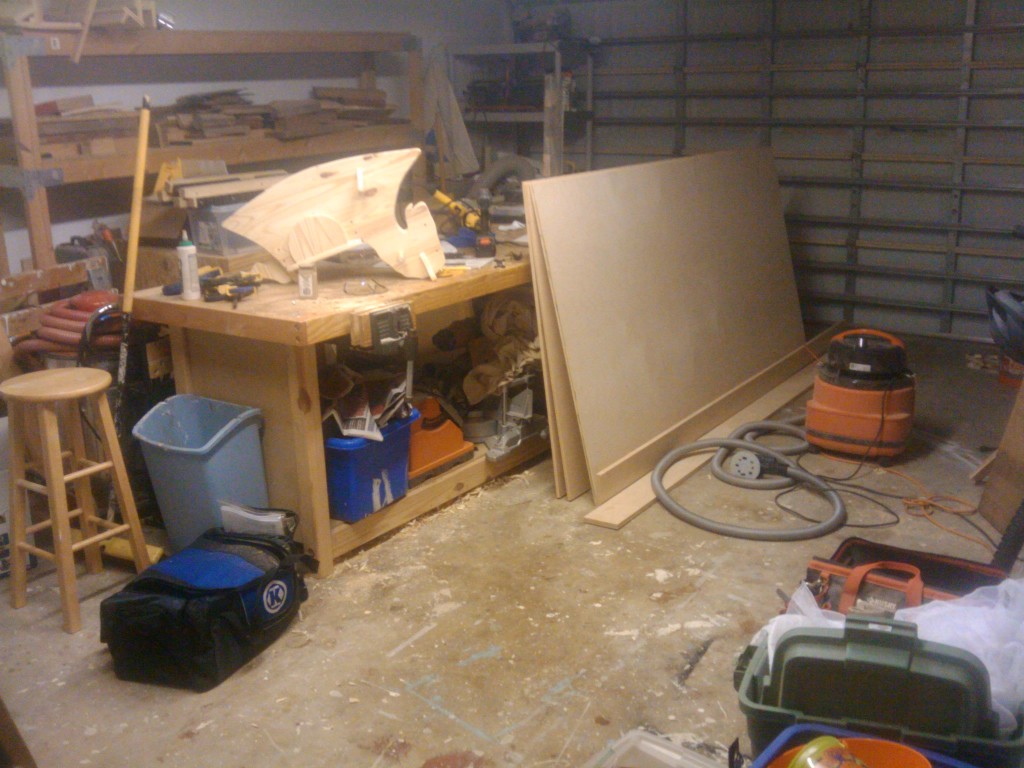
This past Friday, I took delivery of the material for the next project I’m working on – a pantry unit for a good friend. I also had the rocking horse that Dominic and I were working on to complete. So, the plan was to get into the shop, knock out the rocking horse, move it to a corner of the shop and let Rhonda and the boys complete the finishing job.  Then, start hoisting sheets of plywood up onto the bench and start breaking them down into project components.  It was going to be the perfect weekend. Heck, I even had the weekend off from coaching, as the basketball league took a one week break.

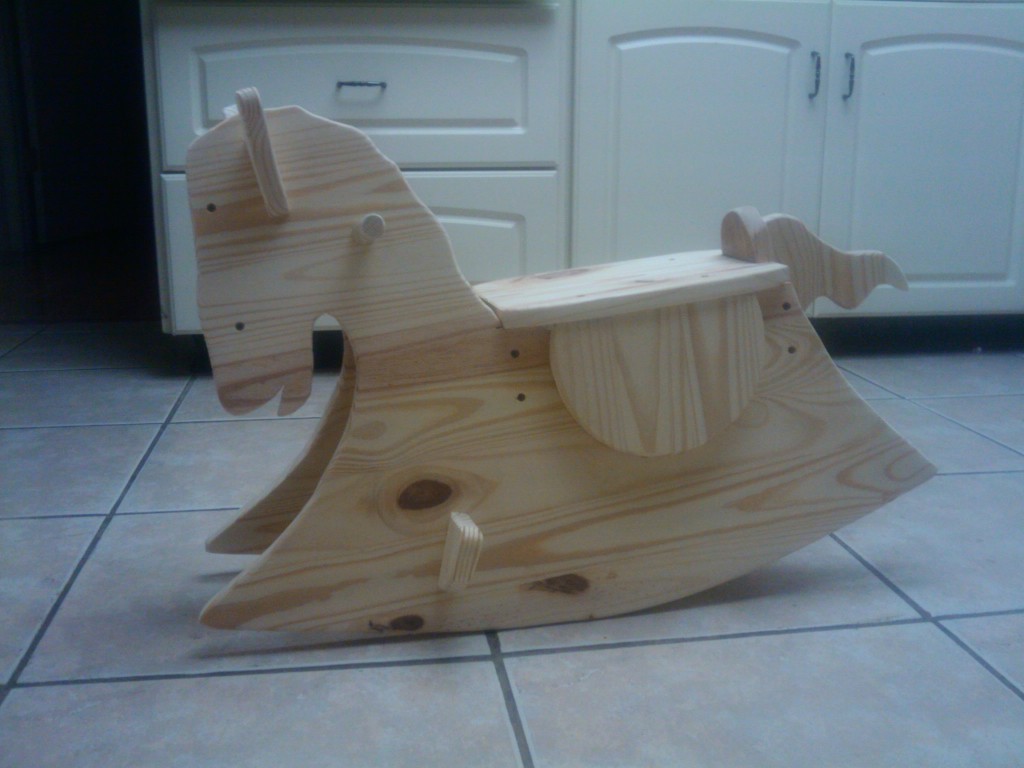
Well, all of that went out the window. Total bummer. So, I’ve been working after work to get some stuff done in the shop. Tonight, I was able to get the horse assembled.  The results… Well, they did leave a little bit to be desired. My horse has a bit of a forward lean – no doubt a miscut in the shape of the rockers.  Looks perhaps like there is a bit of a peak in the middle that needs to be shaved down.  Oh well, that’s why I have a spokeshave and a month or so before I have to drop it off at the pregnancy crisis center.

So, while the horse is up with the vet, the sheets of plywood for the new pantry project are taking up space in the shop. It’s amazing how large – and heavy –  4 x 8 sheets of plywood are in person. One of these days very soon, I’m going to have to find a safer more out of the way place to stash them…

Because this Saturday is the annual pumpkin carving party as well…

Oh, well, life is all about going with the flow. And, I know that once I get everything back on track, we’ll be off to the races.

So, I’ll just have to sit tight, get some stuff done a little at a time, and try to enjoy the start of the hectic  season!


Mudflapping

Last week, a computing pioneer passed away. Steve Jobs, co-founder of Apple Computer, succumbed to the pancreatic cancer he had battled so bravely for the past years. His vision helped to revolutionize computing, music, phones… a lot of what we take for granted today.

While he is being memorialized, many of his more famous quotes are being posted on the Internet. Some are inspirational. Some are snarky. Some are full-on competitive. And, then there’s this one, which seems aimed at the woodworking community.

When you’re a carpenter making a beautiful chest of drawers, you’re not going to use a piece of plywood on the back, even though it faces the wall and nobody will ever see it. You’ll know it’s there, so you’re going to use a beautiful piece of wood on the back. For you to sleep well at night, the aesthetic, the quality, has to be carried all the way through.

Of course, if Steve Jobs was going to build a piece of furniture, he would probably make an app for that.And, I get the point he was trying to make – that if you are going to invest the time and effort into building something beautiful, don’t use ‘inferior’ products and methods to finishing things off.  But, this quote did make me stop and think about the work I do in my shop.

No one is going to deny that nothing quite captures the beauty, depth and richness of solid wood other than solid wood itself. And, when it comes to building certain types of woodworking projects, there is nothing quite like solid wood. Small boxes that can be picked up and handled?  You bet. Pieces that will be opened and examined closely… sure.

And, I have no issues with the plywood that Jobs pointed to as substandard. The cabinet grade plywoods I use for higher-end cabinet projects costs upwards of $100 a sheet. In effect, it is stacked, glued up veneer instead of a crud-filled piece of sheathing. So, I would feel fine going with plywood on a project.

But, the spirit of his quote  – do you put the same level of care into the hidden parts of your projects as you do into those that are seen? You know, I don’t always. And, that’s something that was once referred to as Mudflapping.

If you have ever driven behind a truck, you will notice that some drivers love to embellish their rigs with fancy looking accessories. High end paint jobs. Fancy chrome. And, if you look down at the wheels, you will often see fancy mudflaps. Sometimes sporting the chrome silhouette of a nude reclining woman. While they make the rig look snappy, these flaps serve a utilitarian purpose – preventing the dirt on the road from being flung backward toward the cars behind the truck. So, as you can imagine, the inside of these snazzy looking flaps is just ugly and covered in mud.

When I know the piece I’m building is going to be permanently attached to the wall, I won’t do a darned thing to finish the piece. There’s simply just no reason to. The home office setup I built last year for my friend Paul was built from a series of boxes, and when they were secured to the wall, no one was going to see them. Ever. I guess maybe when they get ripped out 40 or 50 years from now, but no time soon. The unfinished backs were the perfect place for me to write notes about where they were going to be placed, what was going to be stored in there and if I had to do anything special to accommodate wires or other electronics.

For projects that are going to be seen ‘in the round’ – from all directions and angles – of course I take the time to carefully finish all sides. Everything gets sanded down to 180 grit, planed or scraped, sealed and finished. You never know where or how the piece is going to be used, so it’s best to go on the side of caution.

However, there is a case in which I need to more carefully consider my finishing regimen.  For the recently completed stair-stepped bookshelves, I carefully finished the ‘front’ side of the piece. I sanded it carefully, applied the gel stain, buffed it down with some 400 grit paper, applied the wipe on varnish, re-buffed and wiped on a coat of wax. It looked really nice.

The only problem was that I didn’t put the same level of care into finishing the back. I wasn’t quite as careful in the sanding, applying the stain or the finish. My thought was that the piece was going to be pushed against the wall, it wasn’t going to matter much.

What I hadn’t counted on was that the client was having her walls painted. So, she had the two shelves out in her living area. And she had to look at their backs until the painting was done.  So, she asked for the can of stain, and was going to apply it herself.

D’oh! Never something you want to hear about your work once it has been delivered. In this case, mudflapping was NOT the way to do things… And it provided me with a valuable lesson.  After all, if you are going to be following me on this blog, I can’t be flinging mud your way!


My apprentice philosophy

There has been a move afoot recently in woodworking – a more back-to-basics approach as seen in the shops of the 18th century. In many cases, this leads  folks to eschew power tool woodworking completely and go entirely to hand tools. I have got to admit, watching someone build a project solely with hand tools is an impressive feat. Sort of hearkens back to the days of everyone’s favorite French woodworker André Jacob Roubo.

And, if you have been following the woodworking media for the past few years, no doubt you have seen the ultra-famous plate 11 from Roubo’s master work L’Art du Menuisier showing his shop in detail. There’s even a close up of the bench that he used as he worked wood in Paris before the French Revolution.

While many get fixated on the images at the bottom of the page showing the equipment furniture makers used in the day, I think the most telling part of the image is on top. There, you see nine rows of workbenches with different parts of projects spread out upon them, seven people people hard at work at those benches and one person walking into the room. Believe it or not, everything I have been doing to this point in my development as a woodworker has to do with the folks in that image.

Think about it. Say, on a typical Monday in Roubo’s shop, he would be working there as the big cheese… the head honcho. Roubo was a master carpenter and furniture maker, and his work was in demand. So, his job was to run the business as well as doing the highly-skilled woodworking. When it came to making a furniture piece work, he was the man. After all, his name was tied in with the operation – so his reputation was on the line.

But, who were these other folks? Didn’t Roubo do all the work himself?  Were there there to cheer him on and offer moral support?

Nope. If his shop was like any other shop, he had other folks who were working hard to make the shop hum. The guys doing the mundane work such as flattening and thicknessing boards were the apprentices. Starting at a young age, these up-and-coming furniture makers had to make their  bones for years learning the basics of how wood works, and how to prepare boards for those higher up the food chain. They would also be called upon to do much of the grunt work – such as pulling highly detailed profile planes with ropes while the more skilled carpenters in the shop guided them. Sure, it was a hard life, but if skills were going to be passed on, this full-immersion operation was critical.

Next up the ladder were the journeyman carpenters and furniture makers. Now, these folks had already done their apprenticeships, but had yet to be considered a master in the guild. As such, they could charge a daily rate for their work (the name journeyman comes from the French journee – the word for one day). Now, these journeymen were skilled and already possessed knowledge, but they were still working to learn more about the craft. As such, they could be counted on to do things like cutting joinery and even completely assembling less complicated pieces. Eventually, the journeyman would build a project which could be submitted to the guild for consideration to full membership. This project would be known as their masterpiece.

Now, what the heck does this have to do with my shop? Everything. Just as Roubo was busy doing several things, so am I . I have that old eight  to five gig – with additional nights and weekends for talks and events. There’s the laundry, lawn mowing, dish washing, home maintenance and other required chores. I have to ride herd on the boys with their homework. I’m coaching my sons in basketball this fall. My wife would like some time with me away from the chores. There’s this blog thing. And, yes, I also like to woodwork!

In my mind, I have come to appreciate the work that my apprentices can do for me.. by plugging in my power tools. Yup, I can tell my portable 12″ apprentice to plane project boards down to a certain thickness, and it gets done. I can also plug in my 1.5 hp apprentice and instruct it to clean up the dust and shavings, and that job gets done as well.

When it comes to the work that the journeymen would do in my shop, sometimes I like to do it. I’ll try hand cutting dovetails or hand planing edges of boards for glue ups. But, I have absolutely no problem giving these projects to the router or table saw to handle.

Of course, I keep the master work to myself. The design. The final fitting of joints. The careful surface preparation. That’s where I see the enjoyment of the craft in my shop.

Classifying the work I do in my shop into these three categories has helped me keep my sanity on many occasions. Rather than trying to achieve some mind-numbing hand tool technique, I will make an assessment on my own of where the job belongs and assign it to the proper folks in the shop, just as Roubo had to back in the day.

Keeping this in mind helps me work more efficiently in my limited shop time, and it also gives me a better appreciation for the folks who had to the do the job centuries ago – and the folks who invented the power tools to give me the option to handle them on my own.


The doweling mysteries

One of the first real woodworking ‘tricks’ I learned was how to join two boards together without using metal fasteners. I had gone to a building supply store that was going out of business to buy wood, hinges and a special tool I had heard a lot about – a doweling jig.

While my first woodworking project wasn’t anything to look at, it marked a real monkey-and-the-monolith moment in my woodworking avocation – using wooden dowels to join project parts together.

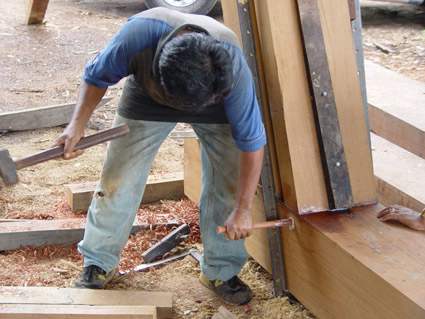
Using dowels is a tried and true woodworking technique that stretches back thousands of years ago.  The massive joints in timber-framed buildings are set in place with treenails – wooden dowels across mortise and tenon joints. Craftsmen have similarly pegged smaller mortise and tenon joints in their furniture projects for just as long. Masters such as Krenov and Maloof used dowels in their projects as well.

If we’re going to get to the bottom of dowels, we need to break them into two groups…

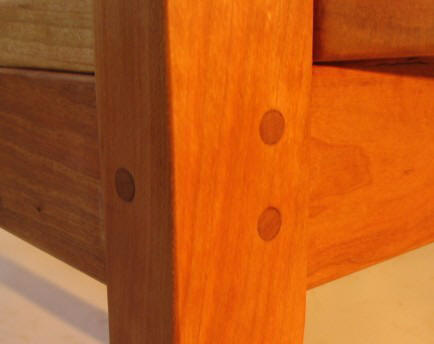
The first group involves visible dowels. These joints are created by drilling through a project and driving a dowel in.  How versatile is this joint?  I dunno – how creative can you be? I’ve seen through dowels being used to affix breadboard edges on tables, to join sides to fronts on drawers – even just for decoration.

Do you need glue for the joint?  It depends – is the joint permanent (locking together a mortise and tenon joint) or is it part of a project that can be disassembled (like locking a stretcher on a trestle table base in place)?

The dowel material can be a simple ambiguous ‘hardwood’ dowel picked up in a home center, a dowel of a specific species ordered from a supplier or even one you custom turn from a treasured blank on your lathe.

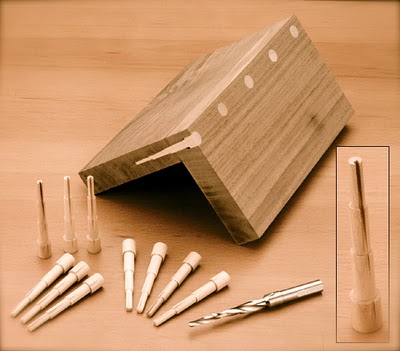
While these joints can be made with a drill and the right sized bit, there is a product that allows for through dowel joints that get extra bite. The Miller Dowel system relies on a tapered drill bit and specially formed dowels that step down in diameter. These steps on the dowel allow it to be driven into the tapered hole and get a solid grip. They come in an assortment of commonly-available species.

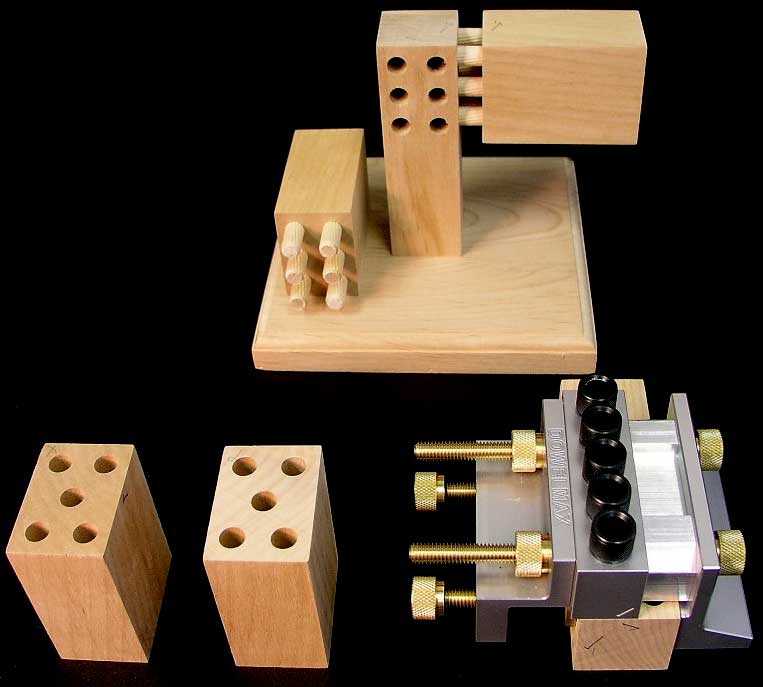
The other type of dowel joints involves hidden dowels. This is when you drill mating holes into two parts of a joint and insert a length of dowel that’s hidden from view. These dowels work like a small floating mortise and tenon joint.

Needless to say, the two holes had better be drilled accurately into both pieces, or they won’t mate properly. You can lay out these holes with a ruler and pencil… and, if you take your time and work carefully, yes, you can do a fair job.

One tool you can use to help ensure better accuracy is called a dowel center.  After you drill the first hole, you insert one of these centers in it. The part that sticks out from the hole has a sharp point that – when pressed against the mating board – accurately marks the center of the hole you will need to drill.

The next step up is the basic dowel jigs you can find on the market. The most popular of these models are self centering, with adjustable jaws that grip the work and hardened steel bushings in the guide itself. Simply line up your center marks, clamp the guide in place and drill with the properly sized bit. These jigs no only help ensure the dowel hole is centered on the edge of the board, but also perpendicular to the face you are drilling.

If you are looking for more flexibility, there are some high-end doweling jigs that offer even more usefulness. The DowelMax and Joint Genie are two models that allow you to drill just about anywhere and get accurate holes.

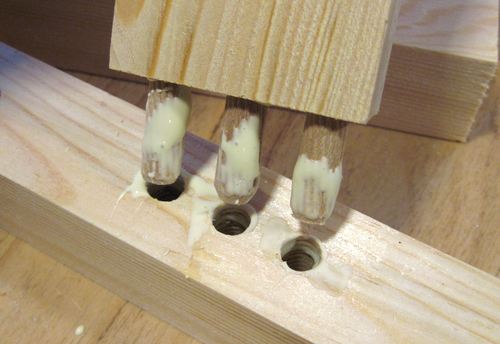
When it comes to the hidden dowels themselves, you can certainly use lengths of store-bought dowel cut to size, but there are also dowels designed specifically for the task. These dowels have flutes or spirals carved down their sides to allow room for excess glue to move to, preventing hydraulic pressures from letting the joint come together.

Dowel joints are fairly strong joints, especially when larger dowels are used.  Also, when drilling the holes for the dowels, you want them clean and as straight as possible. To get the best holes, opt for brad point drill bits.


I’m developing an Affinity for these

So, a few weeks ago, the folks at Affinity Tool Works contacted me.  They wanted to explore the possibility of some kind of agreement with Tom’s Workbench.  Hey, who am I to turn down a future potential advertiser?  I told the representative, “Sure,” and that we could look to see where things went.

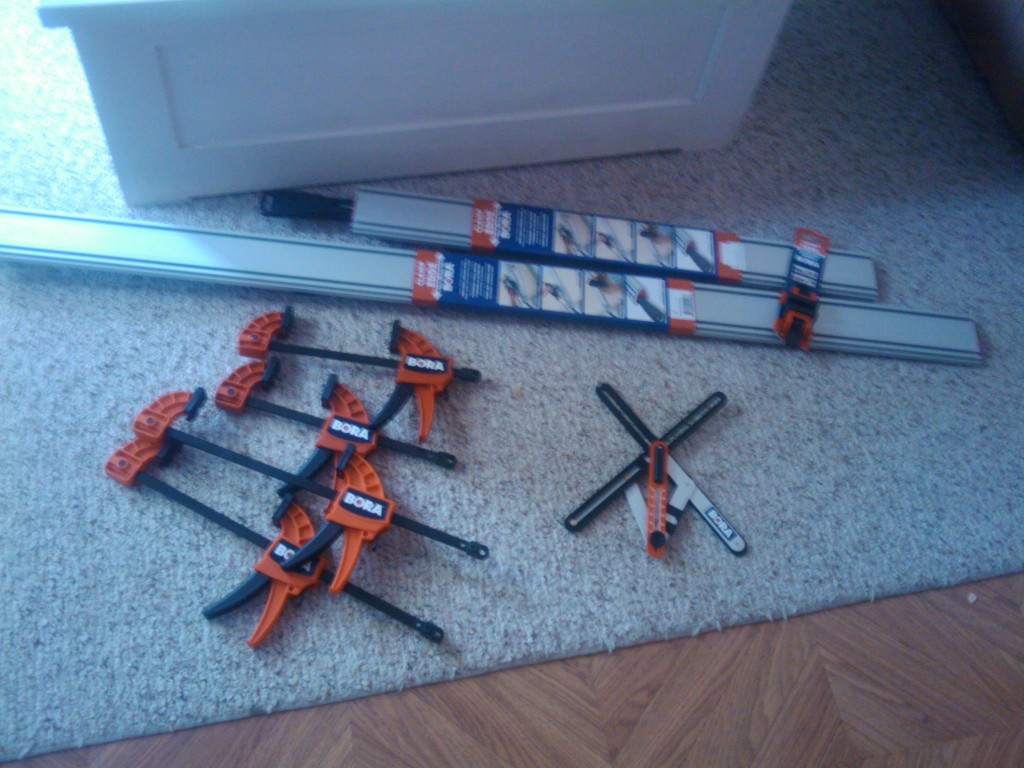
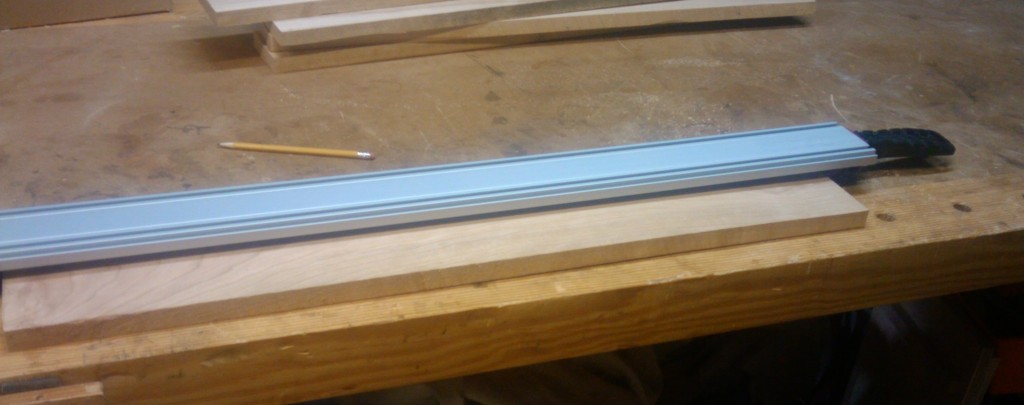
Well, imagine my surprise when I came home from work one day to find a care package from Affinity with some sweet looking tools. One of their Angle Master tools, some squeeze clamps and a pair of their Bora wide track clamps. I was thoroughly impressed by the tools… they are very high quality, and gosh, tools are cool! (Add to the fact that my friends at Eagle America are also distributors, and wow, this is a win-win all around!)

The only concern I had was with the wide-track clamps. I mean, they are swell, but I already had a similar clamp I had bought years ago, but never got any use out of it. It was kind of awkward to use, and it never really gave me the accuracy as a tool guide I needed.Were these tools going to end up as dust collectors in my shop?

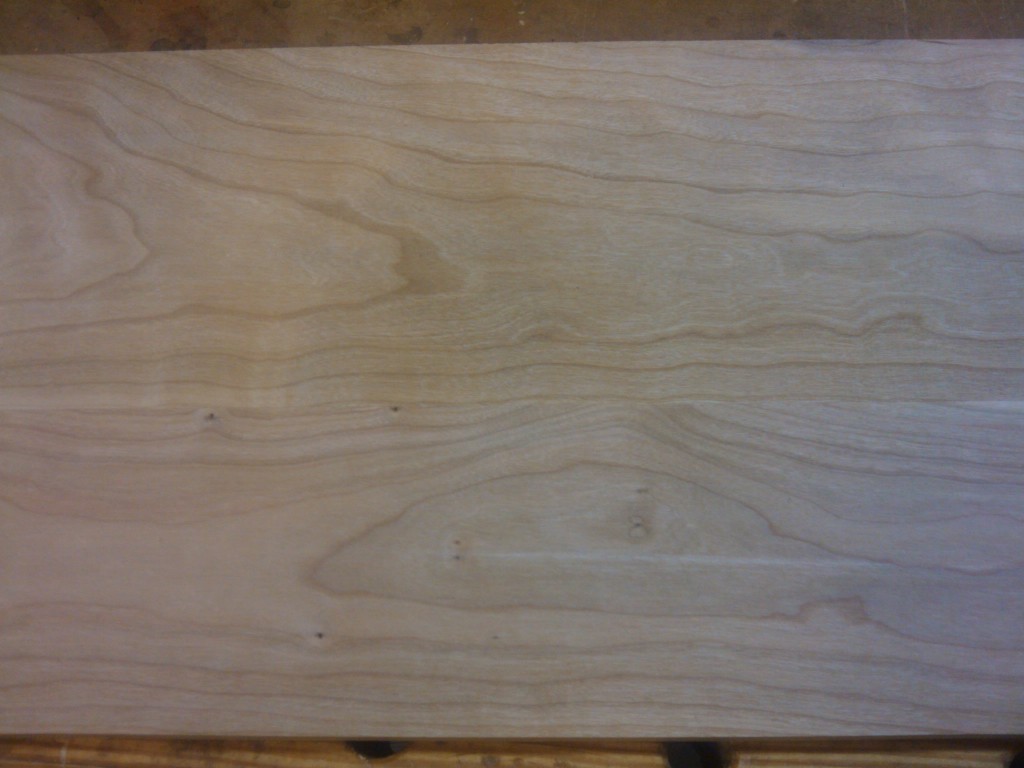
That’s when I got a round-house kick of inspiration right upside my head.  Even better, it had to do with the project I am working on. The bookshelf units I’m building are from some gorgeous – yet rough – cherry boards I got from Bell Forest Products. I have to take them from their rough condition to smooth, flat and square. I had spent some serious time in the shop face planing with my hand plane and thickness planer to get the top and bottom faces smooth and parallel, but I wasn’t looking forward to starting the edge-planing process.  The shop is hot, and the thought of extra exertion didn’t appeal to me.

I looked at the boards. I looked at the new Bora clamp. The boards. The clamp. Back to the boards. Right back to the clamp.

BINGO!

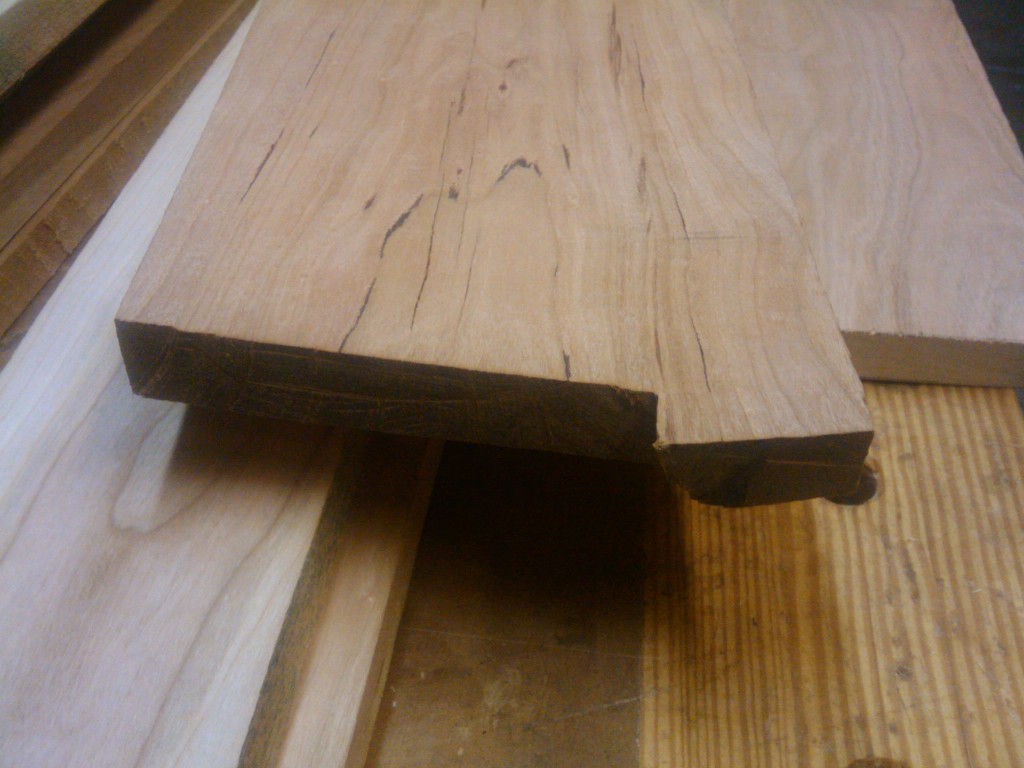
I jumped into action. The first thing I did was take my boards and cut them to rough length. I added a generous four inches to the length of my finished dimension so I would have plenty of material to trim the final shelves to length. I also made sure that the ends of the boards were relatively square. Not dead on precise at 90 degrees, but if your ends look jagged like this, you will need to de-jagify them.

I placed the board down on the bench, then clamped the Bora to both ends of the board, overhanging one edge by the slightest amount.  Make sure the locking lever is up on the clamp, so when you push it down to lock the board in place, it’s in line with the clamp body.

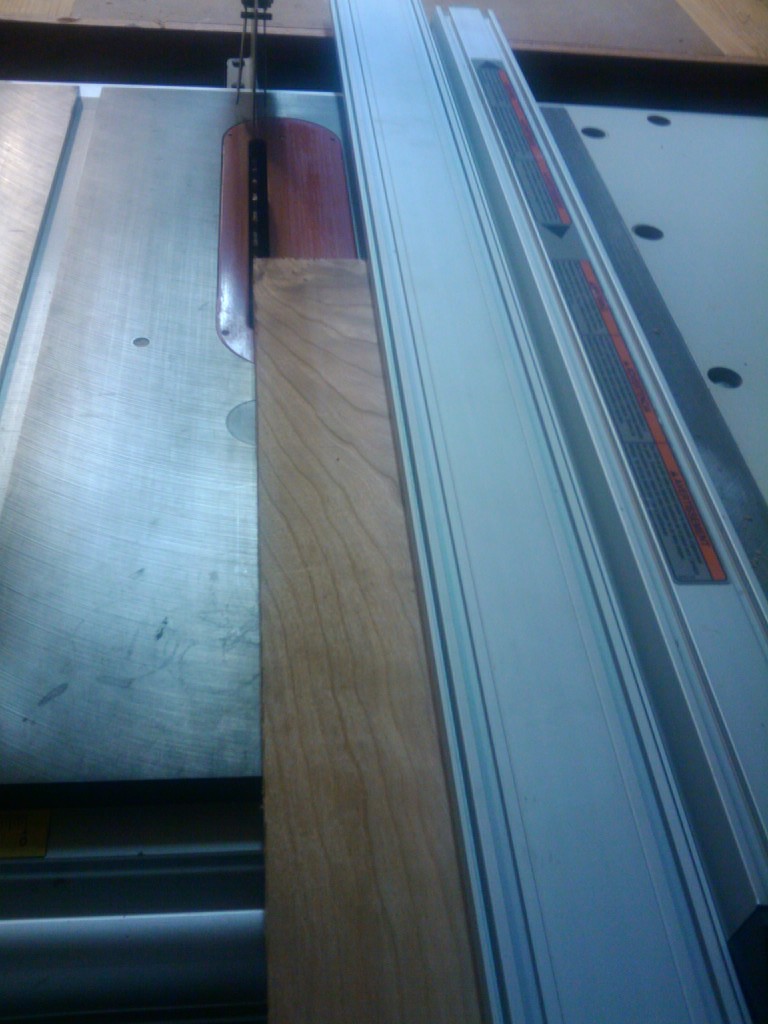
Now, here comes the fun part.  Unlike my older edge clamp, the Bora’s clamping gear doesn’t extend past the edges of the clamp. This means you can present the dead-straight clamp  edge to your rip fence.  I set the fence until it just grazed the free edge of the board, started the saw and pushed the assembly through.

Since only the straight edge of the clamp is riding on the fence, the resulting cut on the free edge will be dead straight. After I got that first edge nice and straight, I simply unclamped the board, flipped it so the fresh edge rode against the rip fence and blammo, a pair of parallel, smooth edges that are ready to be glued. It’s really that easy.

Using the Bora clamps like this drastically reduced the amount of time necessary to edge joint the boards for the project, and gave me some pretty sweet results.