Category Archives: Tools

Putting some pressure on

I have got to tell you – I love clamps. More clamps equals nothing but goodness.  The only problem is that when I started woodworking, all I could afford were the uber-cheap dollar store variety.  Sure, they looked good, but the F-clamps would bow under even the slightest amount of pressure, and the heads of the aluminum channel clamps I was using tended to snap if I torqued down on them. A total bummer.

I did manage to limp along with this arrangement for several years.. until I had my first experience with some really high-quality clamps made by Bessey Tools.

Under pressure

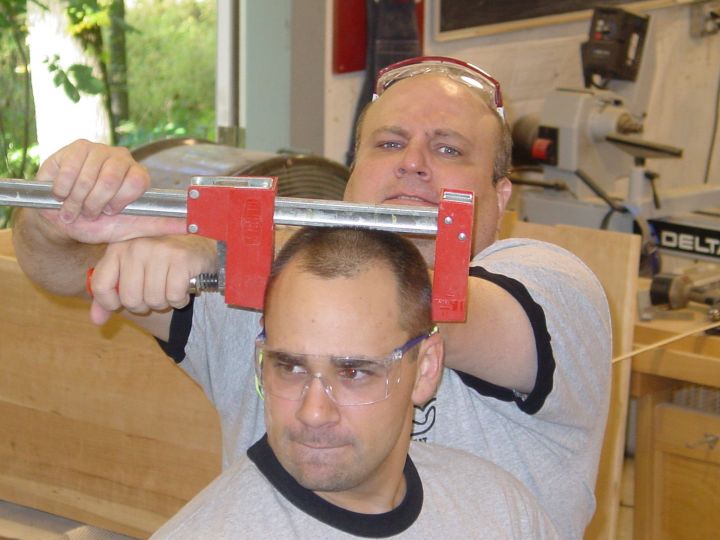
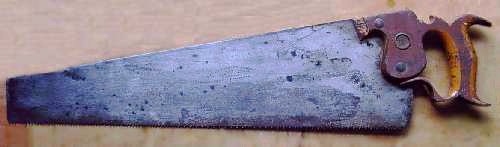
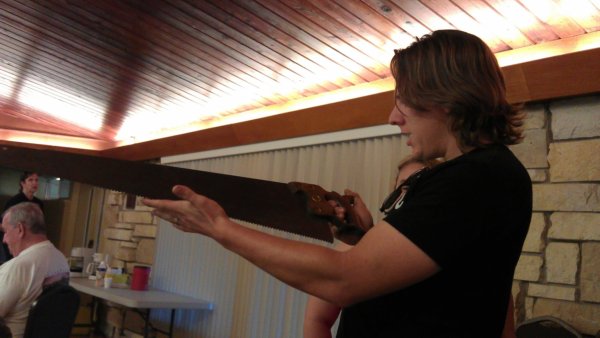
Yes, I like to wear my clamps on my head.  Why do you judge?  All joking aside, the clamp in the picture is an original Bessey K-Body clamp, and once I had a chance to use one at a woodworking school I attended, well, my heart skipped a beat and my palms started to sweat.  Yes, I realize that a clamp may be a clamp, but these babies were something special. Beefy. Sturdy. Useful. I had to get my hands on some of them, and I went through a period where every dime I could scrape together went toward buying some for my collection.

My old K-Bodies

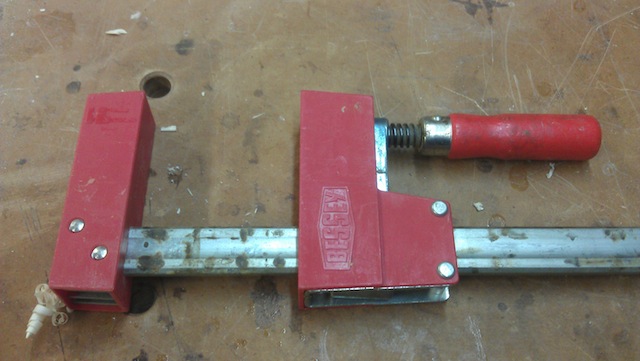
These are my workhorses.  I love the heck out of them – I have for nearly eight years now. But, I only had  eight of them, so for my glue ups, I would either have to spend a lot more time to do my glue ups, or risk using the crappy clamps (which have slipped on me many times, knocking my glue ups out of alignment) to get a good product.

Initially, I just asked the folks at Bessey to give me some advice. They have been great friends of the blog for years – donating items to give away as prizes for Get Woodworking Week and my thousandth post (was that last summer already?).  Well, once they got my request, the folks over there were over the top with their generosity, sending me a selection to help round out my collection.

K-Body Revos

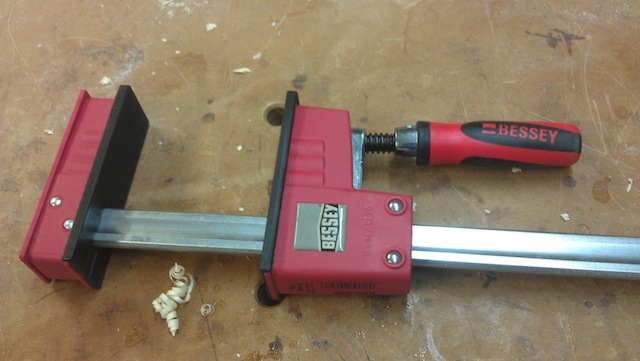
One of the first ones I was eager to try out were the new K-Body Revos. And, here I was thinking that the originals were awesome… These were a big improvement. The handles now have a rubber grip built in to them, making putting on the clamping pressure a whole lot easier. The jaws are larger, and the action to lock the lower head in place seems a lot more robust. These were definitely a plus.

K-Body Revos with both adjustable jaws

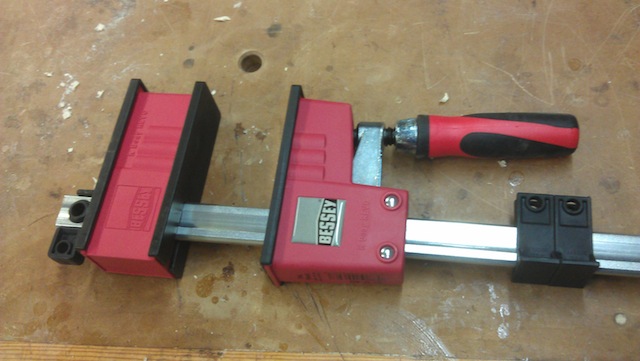
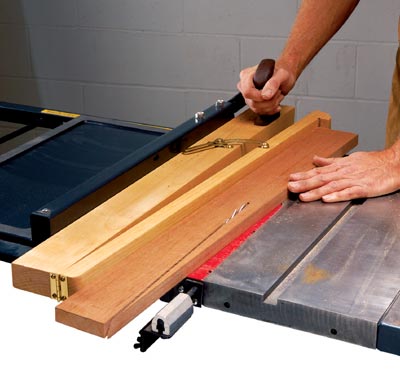
They also sent me a few of their K-Body Revos with both the top and bottom jaws adjustable – called the Vario. The fun thing about these clamps is you can center your workpiece on the clamp bar and bring both jaws in to the work – preventing the massive tilt issue that you sometimes get with narrower workpieces and long clamps. These are deluxe for sure.

Revo Junior

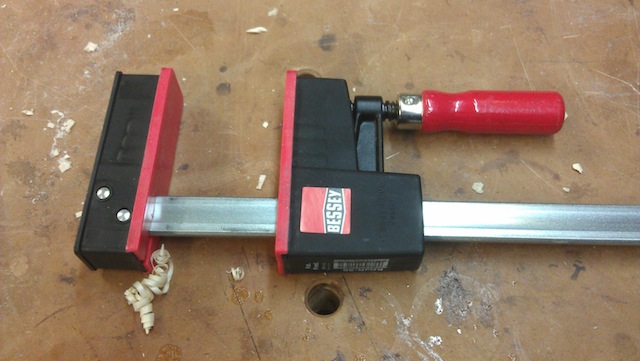
They also sent me some REVO Juniors. Basically, you get all of the features of the larger clamps in a smaller package. Since I normally used my original K-Bodies on the bottom and threw the junky clamps on top, these are perfect replacements for those older ones.

UniKlamp

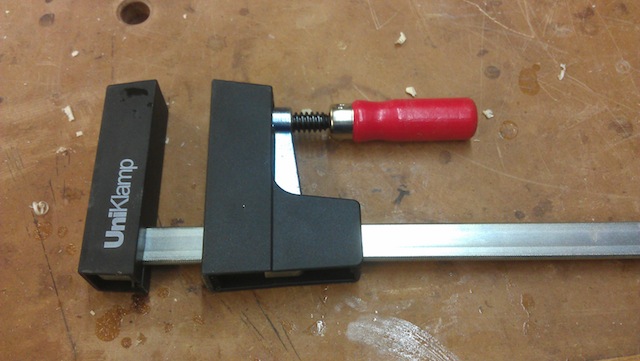
And, when it comes to more delicate construction projects – like my 2 x 4 treasure chest – they even included a set of their UniKlamps. They have the parallel jaw technology in a very lightweight clamp, making them an option for smaller jobs.

Thank you very much for these clamps, and I look forward to putting them to good use in my shop. In fact, I have a few projects I want to get started on soon that may require quite a number of glue ups….


Tools I use: My dust suckers

Woodworking can be a very messy business. If you use power tools, you will have lots of planer shavings, sawdust and other pulverized wood products spewing out of every one of your machines.  For hand tool folks, you have saw dust, planer shavings and other unwanted wood byproducts in your shop as well.

Hey, it’s a tough life, but someone has to clean it up.

That’s where I tend to get a little creative.  Hey, I have two boys, and I try to get them to clean the shop for me.  I tell them it’s a really cool game they will love.

That hasn’t worked since I think they were eight and five…

The Delta dust collector

Since then, I have come to rely on a trio of machines to help keep the mess at bay. In addition to keeping the dust off the floor, catching it at the source helps to keep it out of the air – and my lungs.  That’s why I rely on my Delta dust collector. I bought this baby back in 2004, and it has been a real love/hate relationship. When I hook it up to a tool that has a dedicated dust port, this thing is a champ. My new Ridgid planer works great with it, and there are usually just a few bits of planer shavings after I am done.

I also have it going through a shop-built cyclone separator that sits on top of a trash can. This contraption works well, spinning the majority of chips into the can before they get to the collector bag. I think it helps make the collector work more efficiently.

The hate part? When I try to hook a non dust port equipped machine to it (like my table saw), it stinks. The hose is heavy, and it doesn’t generate the suction to clear the dust from the large open area under the saw. Yes, I have seen the involved plans that allow you to build dust collection into your contractor’s saw, but no, I have never had the inclination to build one of them. I’d just rather be building furniture…

My shop vacuum

For the stuff that gets out of the table saw, I turn to my trusty shop vacuum. This baby sucks up everything, and with a dedicated floor cleaning fitting, it can make the place look relatively spotless in a short amount of time. That makes me happy…  I have also hooked it up to my combo belt/spindle sander, and the nozzle is a nice slip fit onto the port on that tool, making for very clean sanding sessions. It’s one of those tools you wonder how you get along without once you have to…

One Fein collector

For really specialized dust collection, I turn to my Fein dust collector.  This baby is the bomb. It has an outlet built into it where you can plug the tool. In this case, I have my random orbit sander plugged in to the hose and into the machine.  When you turn the tool on, the power comes from the collector to power the tool, and it also turns on the collector’s motor. As you sand, the sawdust is pulled through the sander into the collector. When you lay off the trigger, the motor for the tool stops, and the collector runs for a few seconds more to ensure all of the dust is sucked into the canister. It also works great with my track saw, providing nearly dust free operation.

Now, I’m sure that some of you probably have more advanced whole shop systems, while others may be making due with smaller systems. But, one thing is for sure. My friend Mike Siemsen will give me a hard time for not relying on a simpler, more back to basics approach.

Mike Siemsen and his trusty broom

Now, if I can only find an apprentice who wants to use one of these babies…


A clean slice

This coming weekend is the St. Petersburg Woodcrafters Guild annual picnic on the shores of beautiful Lake Seminole Park in central Pinellas County. Sure, it’s getting a little warm to be outdoors in Florida this time of the year, but there are still just enough cool breezes – and a cold front nearby – to keep the temperatures tolerable. Besides – it’s an excellent opportunity to get to eat a bunch of great food and hang out with other woodworkers.  Oh, and I get to eat some Publix fried chicken… the local grocery chain makes the best stuff I have ever tasted.  Oh, boy, is it ever good….

Mmmm, Publix fried chicken

One of the activities for the big day will be a carving event. Last year, a few pieces of basswood were handed out with a few carving knives, and everyone at the event got to work. There were some beautiful carvings, and it was easy to quickly see how good some of us were, and how far many of us have to go to do a good job!  But, that’s part of the fun of going to a woodworking picnic, right?

My Sloyd knife

This year, I wanted to bring a knife I use in my shop. This is a Sloyd knife. My neighbor, originally from Sweden, told me that basically it is a craft knife that many Swedish woodworkers start off with as their first tool. It’s great for carving, slicing and other small shop tasks. I got mine a while back from a friend who saw it for sale in a shop up in New Jersey and sent it down to me. For years, it sat in my tool chest, just waiting for the day when I would use it.

As with most blades, it came from the store ground nicely, but needing a honing to really make it special. I have tried sharpening it by hand, but that can be tough on the fingers. The knife jig that came with my Tormek was available as well, but it never was able to get a good purchase on the blade – it was just too small.

Tormek Small Knife Jig

That’s why I was pleased to get the newest jig from Tormek. The new small knife jig is a clever piece of tooling that had me honing in very little time. It basically consists of two parts – a cross bar of metal that gets clamped into the jaws of the jig’s knife blade, and a plastic clamp that works by grabbing the handle of the knife.

First, I set the cross bar of the jig into the jaws of the knife jig blade. It’s critical that you get this crosspiece aligned parallel with those jaws. This makes the next step a whole lot easier. Fortunately, if you flush up the front of that crossbar with the front edges of the jig, you are in the butter zone.

The jig set up

The next step is to clamp the knife handle into the plastic clamp. There is a screw clamp knob on the back of the jig that allows this to grab knife handles of many different shapes and sizes. Since the Sloyd knife I am using has a wonderfully contoured grip, it took a little finessing to find the sweet spot to clamp it in place. But, once it was there, the blade was parallel with the rest of the set up and it was ready to go onto the sharpener.

The jig set up and working

It was a simple matter to run the blade over the sharpening wheel on the first side, then flip everything over and move to the second. Since this is a dual bevel took – not a single like a chisel or plane iron – I had to make sure I had everything geared toward a 30 degree measurement – two 15 degree sides – to ensure everything came out well.  After the initial grind on the rough setup, I used the grading stone to make the wheel smooth and proceed to the honing.  After that,  a quick spin on the leather stropping wheel, and this baby was ready to cut.

Ninja Slice!

Yeah, a clean slice through a piece of paper is a very good indication that I nailed it. With my new sharp knife, I’m looking forward to trying my hand at carving – or fending off other ravenous picnic goers who get too close to my fried chicken!


How about a hand?

With Woodworkers Safety Day just two days away, it’s important to remember some of the basic rules… A few of the most important include keeping your hands away form the spinny, whirly things and holding work securely while you work on it. Some days, it seems as if you need an extra bullet proof hand…

Woodworking Safety Day

Well, one of the most important tools that can work that way is a vise. When it’s bolted to a sturdy workbench, you can get some serious, accurate work done.  But, what happens when you need to do the work away from that bench?  I mean, it would be backbreaking work to drag your bench to a drill press every time you needed to bore accurate holes.  Wouldn’t it be great to bring the vise to where you need it?

The Bora Vise

Well, that’s what a portable vise can do for you. And, my friends at Bora Tools are very happy to release their large woodworking vise to the public. This handy little tool can help make your woodworking a lot more safe.  It features a very wide base with holes to bolt to a surface. A padded grip handle to tighten the jaws – with a quick-release button on it – allows you to get a snug grip on your work for sanding, drilling, routing or whatever…

Many people use mechanic’s drill press vises to hold their work for some of these purposes. The only problem is those hard steel jaws are designed to hold metal and can easily dent wood. The Bora vise is designed with cushioned jaws that won’t mar the work.

In the past, I have used some type of jury rigged setup to hold work for my drill press. Or, even more stupidly, I would just hold it with one hand and work the press with the other hand. And, yes, I have had the work spin out on me.  To demonstrate how much better this arrangement is, I decided to bore a 1/4″ wide mortise into a very small scrap of wood.  The first thing I had to do was to secure the little scrap into the vise.

The scrap is secure

Then, I chucked a 1/4″ forstner bit into the drill press and started chain drilling the mortise.  I bored the outside holes the drilled out the middles.  The work was pleasant, and at all times I had the work under total control. Before long, I had the whole shebang bored out, and all I had to do was cut a wee little tenon to fit inside.

The wee mortise is ready!

As long as I keep this handy tool somewhere I can see it, I’m sure I’ll be using it a whole bunch more.  Great stuff!

Sharpen that saw

Over the past few years, this blog has  led me to some interesting places in the woodworking world. One of the most interesting is the hand tool world embraced by folks such as Shannon Rogers, Kari Hultman and Mike Siemsen. Hand planes. Chisels. And, most impressive of them all… hand saws.

Most of my collection are new models that I have purchases. A dozuki. A Veritas dovetail saw. A gent’s saw. Some nice stuff.

A Disston D-7 rip saw from the 1920s

But, my favorite is my old Disston 5 TPI ripsaw.  I bought it online, stunned by how much steel was left on the saw.  As you can see, the handle is still in very good shape. The listing said that the saw dates back to the 1920s. The blade has some rust on it, and the distinctive etching has all but disappeared.

The best part of the saw is the amount of steel on it. The width of the blade is impressive given the age of the saw. As the saw gets sharpened, steel is filed off from the toothed end, narrowing the blade. Given enough sharpenings, the width of the blade gets so narrow that the saw eventually becomes unusable. Unless, of course, you want to cut the plate up into scraper sized blanks.

At last night’s St. Petersburg Woodcrafter’s Guild, I brought the saw in to have it looked at. Turns out that luthier extrodinaire Andy Gibson sharpens saws in his shop. He give the tool a once over, and was very impressed with its quality. He pointed out that when the saw was sharpened in the past, the teeth were never properly dressed, so it was something that was going to have to be fixed before it can be sharpened.

Andy Gibson checks out the saw

He also pointed out a subtle design in the saw. The front teeth of this rip saw were set closer together. He said that was in order to get the saw started into the kerf, with the larger teeth set toward the rear for heavier cuts.

Andy was going to take the saw back to his shop to do the sharpening, but then he had an idea. Why not come to my shop where we could do the sharpening together?  Hey, now that’s a good idea. We’ll have to set up a time to see when we can do that.  Heck, while we are at it, he’s also offered to help me build a new cherry handle for this old baby.

He’s a pretty sharp guy!


The safe taper

Check this out.

Got 'em all

I am a hobby woodworker who – after more than fourteen years of building – still has all of the fingers and eyes I was born with. That’s a pretty impressive track record, considering that I learned on my own, I made some stupid mistakes and I have done some tremendously risky things on my saw.

A shop made taper jig

The one thing that scared the heck out of me was cutting a taper on the table saw.  You would think that it would be an easy task… They make commercial tapering jigs that are relatively easy to set up, or you can bang out one in your shop with a few scraps of plywood and a butt hinge.

Sure, it was simple, until I had to use one. While trying to push this board over the table saw with this jig against my fence, I never felt so afraid. There was no real way to hold the work securely against the jig. It seemed either was going to have to risk a bad hand injury to get this cut to work well, or I was going to have to take my chances and try to let it ride.

So, I found other ways to cut tapers. On the bandsaw, with a quick touch up with a plane. That worked OK, but I was never able to duplicate the crisp, accurate cut I got straight off the table saw. So, I never used tapers.

What a shame. Tapers on a project can lend some grace and elegance to a piece. I was recently bemoaning my in ability to cut tapers when I got an offer from Bruce Wang at Micro Jig to try out a new tapering jig.  I love the folks at Micro Jig. They make products like the GRR-Ripper push block that gives you positive and safe control over your workpiece. When the new product – the  Microdial Taper jig arrived, I decided to put it to the test.

True Cut Taper Jig

It’s a robust looking jig in the company’s famous yellow.  It comes complete with a fixed leg which runs against the rip fence, and a swinging leg with a hook to control the workpiece, mounting points for a GRR-ripper push block to help hold the work down and a handle to keep positive control over the workpiece.

The two adjustment dials allow users to dial in some specific taper angles, either by identifying the angle or the rise and run of the taper. These are set by an interesting stop that allows the jig to be locked at a specific setting. Or, if you are trying to match an existing taper, you can ignore the settings and do it freehand.  A nice option.

Ready to cut

To use the jig, you set it at the specific angle, and lock it down both at the pivot point and on a slot that allows the legs to follow an arc. Once that is done, it’s a simple matter to set the jig against your rip fence and then set the board into the jig. Because my test jig allowed for a lot of space on the board, I used my GRR-Ripper block freehand on the board as a hold down.

I started the saw and pushed the board through. Boy, was that a lot more comfortable.  There was a lot more jig between my hand and the blade, and the integral handle made pushing the jig a real breeze. The results were impressive.

The jig set to cut a taper

The instruction manual gives directions on how to cut one, two, four and even eight sided tapers, allowing woodworkers the flexibility to cut many different designs. It is also a multi-tasker, even providing the ability to use it to joint boards for those of us who are jointer poor..

This jig will make my taper cutting safer, helping me to keep all ten fingers attached permanently. The fact that it helps cut those tapers more accurately is just the icing on the cake.   Look for the Mircodial tapering jig in stores soon.


A case for the quarter

When my mom gave me my first router for my birthday a bunch of years ago, it had a 1/4″ collet. She gave me a collection of some pretty useful 1/4″ shank bits to go along with it. That was totally awesome.

Until everything I read said that no, you don’t want to use 1/4″ shank bits. The 1/2″ shank bits have more metal in them, meaning they are far more stable, stronger and able to give cleaner cuts.

So, I laughed as I gave away most of my 1/4″ shank bits. I mean, I was on a mission to eliminate them from my router bit collection. After all, they were inferior, right?

I loves me my router...

Not so fast. I have recently come to kick myself for giving up the nice collection of bits I had amassed. I bought one of these – a DeWalt 611 multi-base ‘trim’ router. It’s called a trim router because, way back in the day, they were really only used by cabinet installers to trim laminate and do some light work on a job site. That was until woodworkers discovered just how handy these little babies really are.

With one hand on these routers, you can do small dadoes. You can put a profile on an edge. You can do a ton of different jobs that would be too small, too delicate or too restricted for a bigger unit. The DeWalt also has some sweet features that other routers in its size range just can’t touch – LED lights in the base and both a plunge and fixed base. It’s router nirvana.

I have had to find some good advice on going back to the 1/4″bits that I so hastily disposed of. Fortunately, I was recently at the Infinity Cutting Tool’s router basics class last month, where I had a lot of time to ask a bunch of what I thought were stupid questions, but were pretty darned smart after all.

Quarter inch vs. Half inch bits

For instance, I asked why anyone still made 1/4″ shank router bits at all. David Venditto, an old hand at router bit technology, was able to explain that for small diameter bits, it would be wasteful to make those with a larger shank. For instance, we were using the instructor’s DeWalt 611 (no wonder I wanted one so badly) to do some hinge mortising. So, we went with a small downcut spiral bit. That’s when I asked why spiral bits that were 1/4 or 1/8 inch didn’t come with half inch shanks. He told me that there would be so much material removed from the shank, it would drive the cost up considerably, yet not provide any advantage.

Small roundovers don't need much muscle

Another situation comes in when you are trying to use edge molding bits. For simple small-radius round overs, chamfers and the like, there is very little wood being removed. Since that is the case, the router doesn’t need to be a full powered animal – a smaller, more maneuverable router could do the job just as well.

And, in many cases, proprietary bits for jigs can come only in 1/4″ shank bits. The Keller Dovetail Jig, for instance, uses 1/4″ shank bits for both the tails and pins. Since that is the case, replacement bits for these jigs need to be made to match.

This shank needs more meat

David was very clear when he explained that half inch shanks were far more preferable when removing larger amounts of material. And, even though some manufacturers do make bits such as stile and rail sets that have quarter inch shanks, it’s better to have more mass and strength in the bit to reduce chatter and prolong the life of the bit.

OK, maybe the announcement of the demise  of the 1/4″ shank router bit was a bit premature. With this new generation of fully-featured compact routers, the 1/4″ bit will probably see a renaissance. And, that’s OK with me!