All posts by Tom

I'm the guy who writes the blog...

The weekly plan

The Family Handyman’s table saw crosscut sled

Sure, you can use a miter gauge for crosscuts, but once a panel you want to crosscut gets much beyond 12 inches or so in width, you are going to need to step up your game and think bigger. That’s why there are a plethora of plans out there.

The Family Handyman Crosscut sled

This one, offered by the Family Handyman magazine, is simple to build and can bring a lot of accuracy to your project.

Oh, and if you want to make it even easier to build, MicroJig has a product called the ZeroPlay guide, which can simplify your construction and make your jig just a little bit more accurate.

Drawer choices

OK, so the bed is progressing well (if it wasn’t for that whole return-to-work thing I had to do this week, I might be done!) and I now turn my attention to the under-bed storage drawers. These babies are going to have to hold a lot of stuff. Wrapping paper. Cold weather gear (yes, we do travel north sometimes during the colder months, wise guys), Electronics boxes with all the parts and pieces we don’t need.

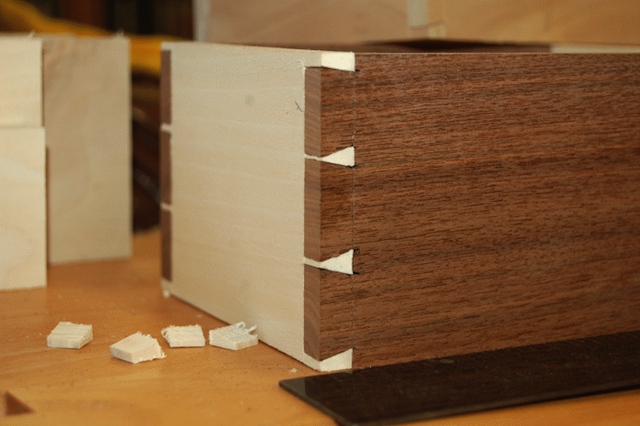
So, I am going to need to build six drawers that will be pretty sizable and will have to stash quite a bit of gear. Since this bed is not an heirloom piece of furniture (believe me, it’s plenty durable and nice to look at, but I don’t expect to see it in a museum any time in the next century), the whole idea of hand cut dovetails in carefully selected figured maple is right out.

Dovetails are pretty

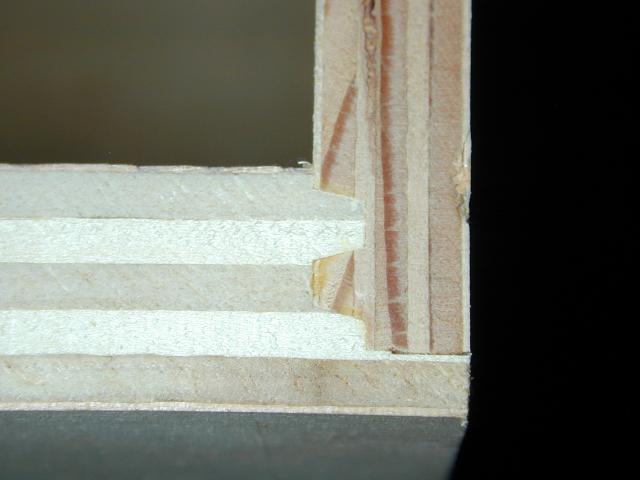
So, what then? I could turn to a specialty router bit with a drawer-lock type joint. You know, the type that cut mating profiles that nest together to create a tight joint. Meh, I don’t think I want to wait for a bit to be delivered.

Drawer Lock Bit

How about a drawer that uses dowels to lock the sides to the box?  You know, that could work, but there’s the whole alignment thing to deal with…

A doweled drawer

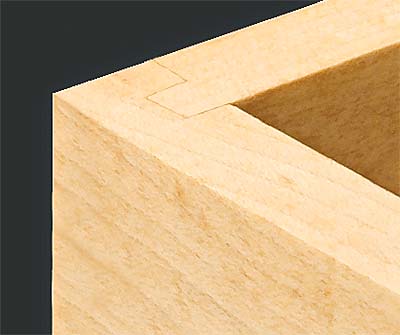
Of course, I could turn to the old table saw trick I used on my friend Paul’s home office center… Just using the table saw with a dado blade.  Nah, too many blade changes make my head hurt…

Biscuits? Splines? Machine cut dovetails? Finger joints? Aaaaargh… too many choices!

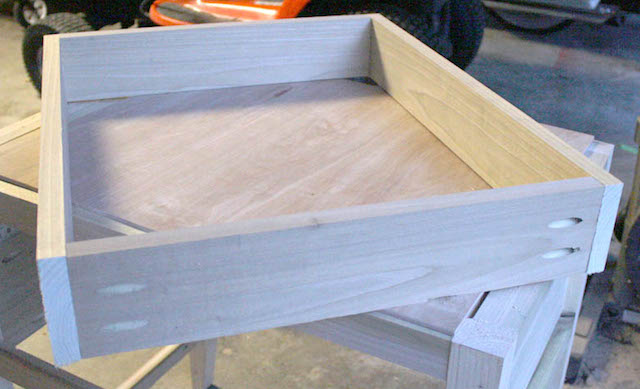
You know what? That’s it. This is utility cabinetry that we sleep on. I’m thinking now why not just go for pocket screws and be done with it? The sides of the boxes are going to be made with plywood anyway, so no need to get all fancy with them.

A pocket hole built drawer

Plus, I plan on attaching some false fronts to the drawers to match the rest of the bed cabinetry, so you know what, I’m thinking that’s the way to go.

There. Decision made. Now, back to the shop!

Headboard, footboard

OK, so I’m in bed phase… and things have gone swimmingly so far. The cabinets are in place and bolted together.  But, wow, I don’t want to look at that footboard. Plus, I need something a little bit more – how shall I put this – stately for a headboard than just the painted wall.

So, I set about building a headboard and a footboard for the bed. This way, I could hide the seam where the cabinets are joined, and give the bed a more finished appearance.

http://tomsworkbench.com/wp-content/uploads/2015/01/1420140839782.jpg

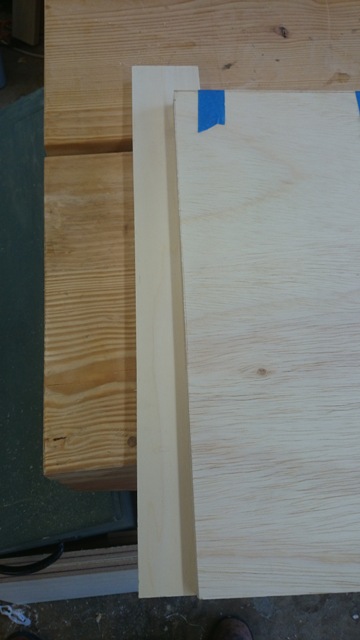
Since I was going to make both the headboard and footboard out of the same plywood I was using for the cabinets, I started by using my edge taping trick to cut a matching veneer for the exposed edge of the plywood. That was easy with the table saw, some glue and a little blue painter’s tape.

The back boards

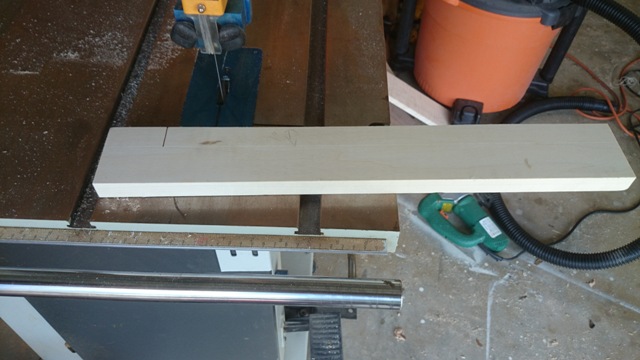
From there, I cut some alder boards to serve as posts for the bed. My plan was to face glue two boards together, cutting out the inside one to fit the head and footboard to make a strong assembly. I figured a one inch inset would be plenty strong for this, so I scribed a one inch line down the side of the two ‘back’ boards of the stack.

Layout

The next step was to lay the pieces on these scribed back boards to show what I had to cut away to fit the pieces. The footboard, since it was square, was a piece of cake. The headboard, which had a curve, was a whole lot more important to lay out to make sure the fit was perfect.

CuttingWith the marks in place, it was a quick trip to the band saw to slice away what wasn’t necessary. I love the band saw for work like this because it’s just so darned easy.

The assembly

With the cut made, I glued and tacked the two boards together, then glued and screwed the panels into place, fitting exactly in the area I cut. For some reason, this photo looks slanted,but I assure you that the ends of the board were indeed square.

The footboard

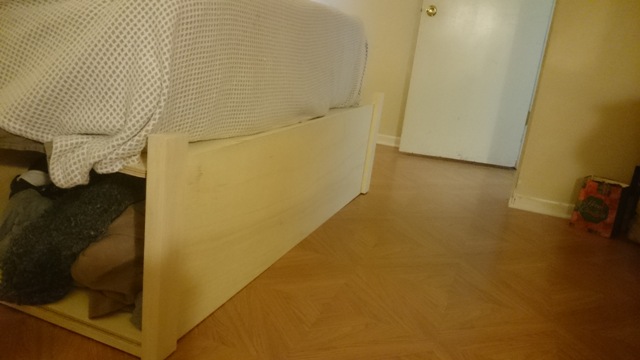
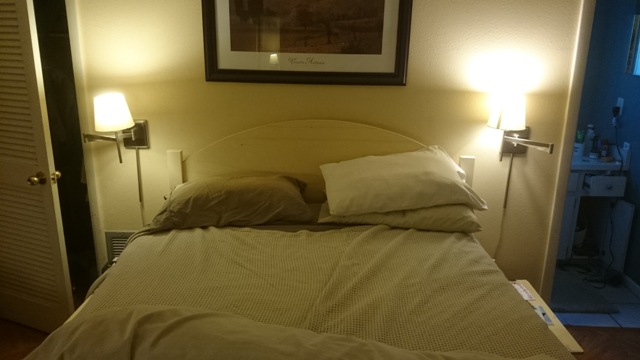
Just a few screws through the cabinet into the head and footboards made these things rock solid, and I just love the way the headboard looks with its graceful curve.

The headboardAll that’s left to do now is to build six drawers and finish the piece. Yes, we plan on finishing it in place in the room (with the mattress and bedding removed, of course), which means water based stain and finish – a first for me. This should prove interesting, but so far, I can’t tell you how happy I am that this is working out well.

Make your bed!

Oh, how I hated doing chores while I was growing up. Weed the flower beds. Shovel snow. Clean up the dishes after dinner.

And, make your bed. It was a chore I couldn’t understand why it was so important. I mean, yes, my dad was a Marine, and my mom loved to keep a neat house, but it seemed like such a waste of time, neatly folding and straightening out the sheets and blankets only to mess them up again later when I tucked in for the night. But, it was a big deal, and even though I couldn’t understand it, I just knew it was trouble if I didn’t take care of it.

Well, Mom and Dad, I’m making my bed. From scratch now. Yes, I’m building a new bed for Rhonda and me, and it’s about time. The original bed we bought when we first got married had served us well. It just was missing one critical thing in our basementless Florida home – storage. So, I set about to build something with a little storage that would be something a little stylish.

Cutting

It all started, as you might imagine, with getting some supplies at our local home improvement center. I had the folks there cut the sheets down to the basic sizes so they would be easier to get home. And, you bet, it made carrying this stuff a whole lot easier.
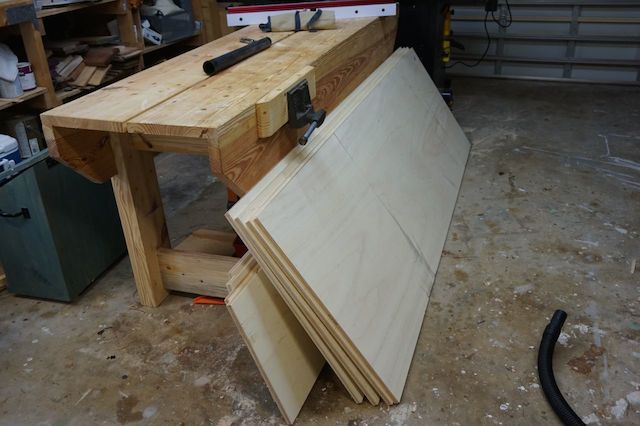
Ply in the shop

Once I had the goodies in the shop, it was a simple matter of carefully marking where things had to be cut and where joinery had to be plowed out.
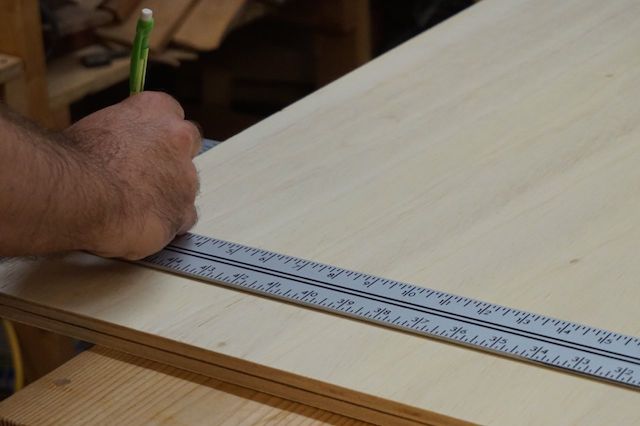
Marking where things belong

I turned to my router for most of the dadoes, since the pieces were very large. The rule of thumb is if it’s small enough, bring it to the tool (plow out those dadoes on the table saw), if it’s too large, bring the tool to the wood (routers).
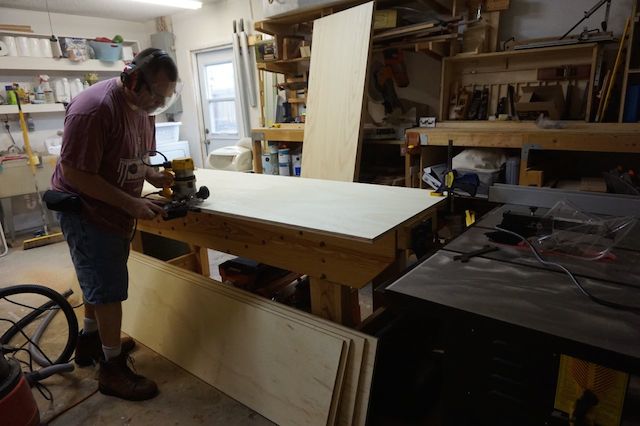
routing the dadoes


With the dadoes plowed and pieces cut, it was a snap to move to the next step, which is a great tip I remember from Norm Abrams’ master opus when he built his kitchen cabinets – drill a pilot hole through the dadoes on the cut side, so later, when you go to assemble the pieces, you know exactly where to put the screws.

drill those holes

With the pilots drilled, it was time to assemble. I grabbed my glue bottle and a huge box of screws and set to work. The pieces needed only the slightest encouragement to drop into the dadoes, which meant I had done a good job getting the joints to fit tightly.

assemble the cases

The screws were there to ensure that the piece would remain tight throughout its lifetime. With a whole lot of effort, and some skinned knuckles, I managed to get the cabinets together.

A completed cabinet

Since a queen size mattress is 60 inches wide, I opted to build the piece as two cabinet halves and bolted them together. This way, Rhonda has a set of three drawers on her side of the bed, and I have a set on mine. It also allowed me to move each half into place,  lessening the weight and making them more maneuverable as I threaded my way through the living room into the bedroom.
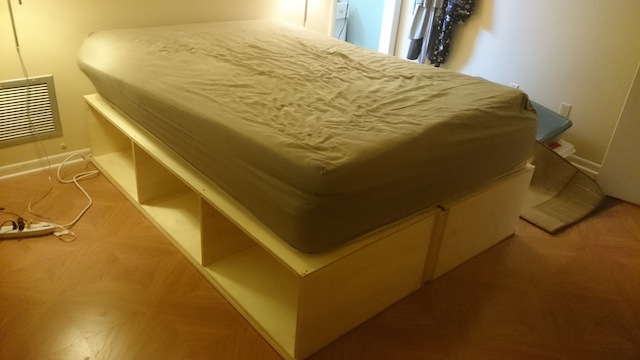
The bed in place

Once in place, I bolted the two halves together and put the mattress on top. That was plenty of work for one day. I figured I could work on building the head and footboards and drawers and move them into place as they are finished, making more room in  my shop to move around.

As far as the old bed goes, well, our neighbor’s daughter is moving out to her own place soon, so I was thinking we could offer her the headboard, footboard, frame and box spring to her so she can set up her bedroom. No sense letting it go to waste.

The weekly plan

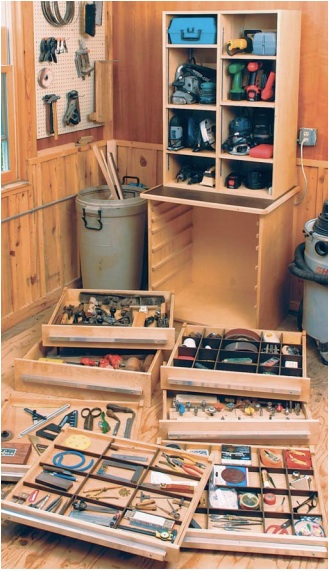
American Woodworker’s Tool Cabinet

Now that the holidays are over, and you have all of those sweet new tools to incorporate into your shop, you might be looking to add some additional storage to organize those sweet new items.

Tool Storage Plan

This plan, brought to you by American Woodworker, is a great system to organize tools, accessories and the like, helping keep them right at your fingertips.

Built with plywood and simple joinery, this one is easy to tackle and will give you tons of storage space.

Oh, all the things that need to be done…

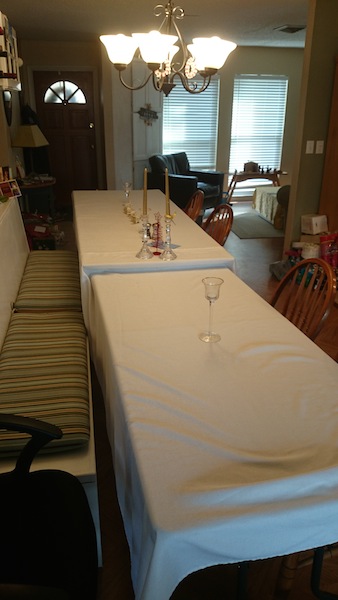
No time to post today. I have so many things going on at the house. I mean, we’re hosting 14 people tonight for the annual Feast of the Seven Fishes, and we are still struggling with how we are going to fit all of those people around our table.

The table!  Oh, no!  The table!

Oh, crap!  I should have thought about this earlier, so I could have built a table that would have been long enough to fit everyone!  Why didn’t I get to that this year? Oh, my, time to mark it down for 2015 so I can get it done in time.

Oh, no!  The back room is a mess!

And, the back room where the tree is… what a mess!  We haven’t vacuumed yet, and the kids want to play their PlayStation games. Don’t they understand everything that needs to get done? Come on, guys, get your rears in gear and start moving!

Why didn't I build that entry organizer?

Oh, and the shoe bench. What on earth are we going to do with all these shoes? Dangit, I knew I meant to build an entryway organizer this year to capture all those shoes and jackets and umbrellas and hats and all the other stuff. Man, next year…

And the food shopping, and the gift wrapping….

STOP!

STOP!

Just what do I think I’m doing?  Today is Christmas Eve. The only one we get each year. Why am I letting all this little stuff get in the way of my enjoyment of this most special day of the year?  So, my house isn’t perfect. So, I should just build a sign that says ‘Bless this Mess’ and be done with it.

When we gather tonight around the table for the traditional Italian-American feast, no one is going to notice anything other than how much food there is. How much laughter we’ll be sharing. How much joy and anticipation of the big day tomorrow.

That’s what this season is all about. This year, I learned that health is precious. That life is something that can be taken away, and that we need to be able to enjoy every minute of it, regardless of how clean our floors are or how many projects are on the back burner.

My wish to all of you is happiness, peace, joy – and the patience to slow down and enjoy every minute.

See you after the holiday…

Visual. Stunning.

It took me some time to realize this, but a blog just isn’t worth a bucket of warm spit without pictures. Lots of them. Sometimes, the story can be told simply by photos alone, with maybe just a few words sprinkled in to describe things.

Well, for the past – I dunno – forever, I have been relying heavily on a series of cameras that sorta lacked in the photo capability department.

Bleh…

Things changed about a year ago, when I upgraded to a Sony Xperia Z1 smartphone. Sony took the time to put a sweet camera on this baby. The colors look much better, the photos look a whole lot more crisp, and well, things look a whole lot better.

Sony Xperia

And, this camera is great because it’s always on me. Which makes it convenient. But, there are times when I want to get some better shots. Maybe zoom in a little bit. Maybe get things a little more crisp.

Well, Santa arrived early this year with a new Sony Alpha5000 mirrorless compact system camera.

The new Sony

This thing is the BOMB.  Similar to a professional DSLR camera, it has an enormous photo sensor and takes an incredibly impressive photo.  How impressive?  Well, I took these, just goofing around with the silly thing….

DSC00003

DSC00009DSC_0135

I am hoping that as I get to learn the camera a little better, I will be able to take even better photos for the blog, and better photos for the family. Right now, I’m working primarily on full automatic mode, but the camera does allow for some DSLR type customization, and I can swap out lenses. Plus, it records video!  Woo hoo!

Now, I just need to learn how to use the silly thing…