 I woke up this morning. That’s always a good thing. It means I have another day to enjoy on the green side of the grass and do what I do.
Yet, I woke up this morning, and things were totally different.
Today is my 40th birthday. A big moment in anyone’s life. After all, with the average life expectancy of a male in the United States pegged just shy of 80, that means that statistically half of my life is now in the book.
Today, I look back at the accomplishments of my past 40 years, and I have to smile. Sure, I did some pretty dumb things through the years. Opportunities lost – or completely missed. Bad decisions when I should have been making better ones.
But, all in all, I am where I am by making a lot of the right decisions. Studying hard in school. Graduating high school – then college. Asking my wife to marry me. Buying our first and only home. Deciding with my wife to become parents…
Becoming a woodworker. It’s amazing to think that I’ve been woodworking for a quarter of my life. About the same amount of time I have been a parent. I just can’t imagine life without my kids or my craft.
The crazy thing is that I feel like I’m not over the hill – but as if I am finally arriving at adulthood. My thirties were better than my twenties, and I feel as if my forties will be even better. After all, now I have another decade of knowledge and wisdom that I didn’t have when I entered my thirties. I am better at my job, I’m a better husband and father and I’m a much better woodworker.
Now, a lot of those painful learning lessons of just getting here are over and done with. Oh, sure I have a whole bunch more to get through – after all, my sons have yet to reach the terrible teen years.
However, I also know not to take myself so seriously. Now, I know that I have established myself at my job and in my craft. Now, I come armed with the knowledge and experience to accomplish what I want to in my life.
Now, I don’t feel like it’s all downhill…
It’s not a midlife crisis – it’s a midlife realization that yes, I did put my mind to what I wanted to do, and I was able to do it. Besides, if I did have a midlife crisis, I wouldn’t go for the stereotypical red convertible Corvette- I’d spring for a Powermatic 66 or a Delta Unisaw…
It almost makes me want to go out and build a new project with techniques I have never tried before…
Thanks for reading.

 It never fails… you get to the end of that tough project, and you begin to scrape, sand and plane the wood to get ready for finishing.
 A few weeks ago, I posted a
 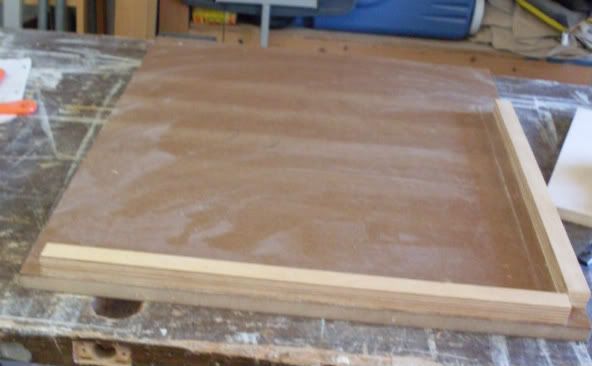 This is one of those projects I have always thought about, but never got around to building. That was until I had to build a box that had mitered corners. Trying to square those slippery joints and keep the joints aligned… well, that was tough.
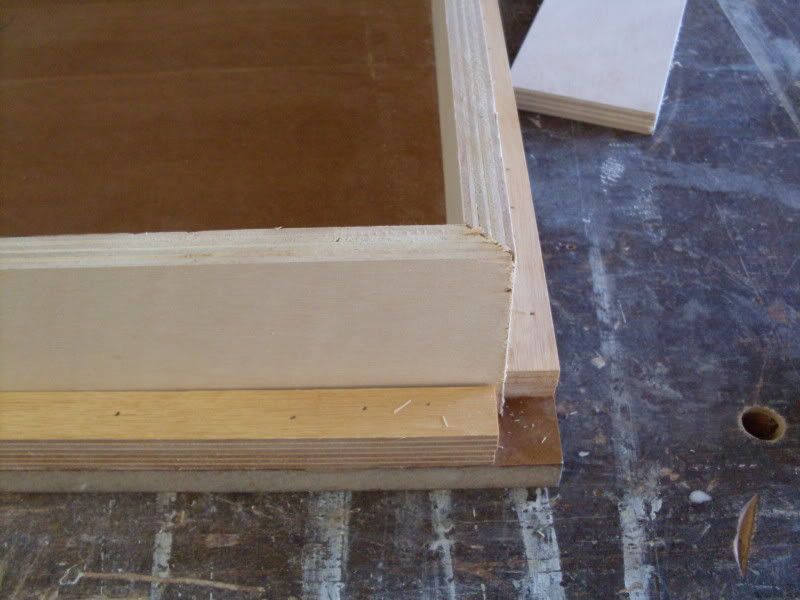 After I built this, I finished it with four coats of polyurethane to help prevent any glue from sticking to the jig.