It was my honor…

Please allow me to introduce you to someone who has helped me tremendously while doing my ‘day job’ as a public information officer for Pinellas County.

Len Ciecieznski

His name is Len Ciecieznski, and we worked side by side for the past 15 years. My first memory of Len was actually before I started at the Communications department. Back in the summer of 1996, he escorted a busload of citizens through the Property Appraiser’s office when I worked over there. And, in 1998 when I accepted my current job at Communications, he was the first staff member to come to my office to ask if I had lost my mind, giving up my office with a huge picture window to work in a place where I was going to be sitting in a tiny cubicle.

Since those early days, we have worked on all types of projects – from the serious to the downright silly. I remember the Y2K activation of the Emergency Operations Center with Len, and I can remember the long, tense six-weeks of the 2004 Hurricane Season, which saw PInellas County threatened by four hurricanes. Len and Lori Hudson on the set of Inside Pinellas 
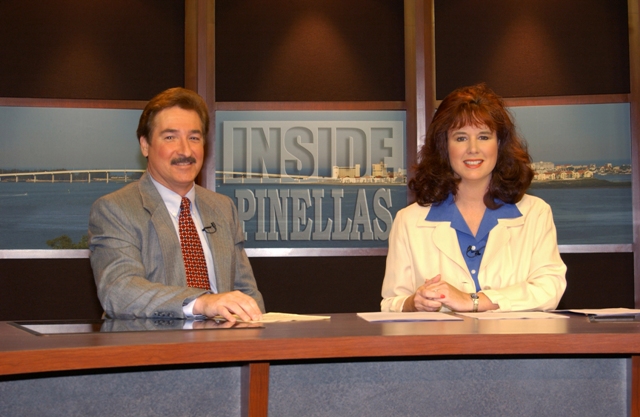
Len flourished on TV. His butter-smooth voice and friendly presence led him to become the voice of the county. Whenever we planned a major event in our TV studio, Len was there, serving as the glue that held everything together.

He often lent his talents for other projects, such as this media training video we did 11 years ago. It still holds up as well now as it did when it first aired.

pinellas honors america

The event I will ever remember Len for, however, was called Pinellas Honors America. Just two weeks after the 9/11 attacks, our office orchestrated a huge event outside of the county courthouse for people to come to pay tribute to the survivors of the attacks in New York, Washington D.C. and Shanksville, Pennsylvania, and to remember those who lost their lives. With Len’s leadership, the team of Public Information Officers were able to pull off a small miracle of cooperation to put on an event that people to this day remember vividly.

This past November, Len announced that he was diagnosed with pancreatic cancer. This is a very aggressive form of the disease, and as he bid his last farewells that day, no one – especially Len – knew what to expect. Chemotherapy. Operations. Radiation treatment. He has weathered the storm, going to battle every day to fight the odds and beat this disease.

A few months ago, he announced that he was retiring from the county. We all quickly decided that someone who had given so much for the county couldn’t be sent off quietly. So, we decided to dedicate the studio to him. I volunteered to build a commemorative plaque for him.

The plaque

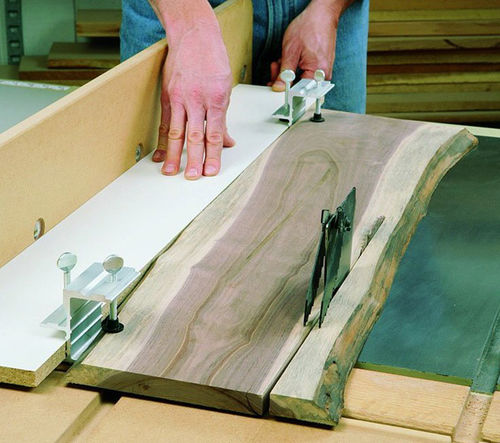
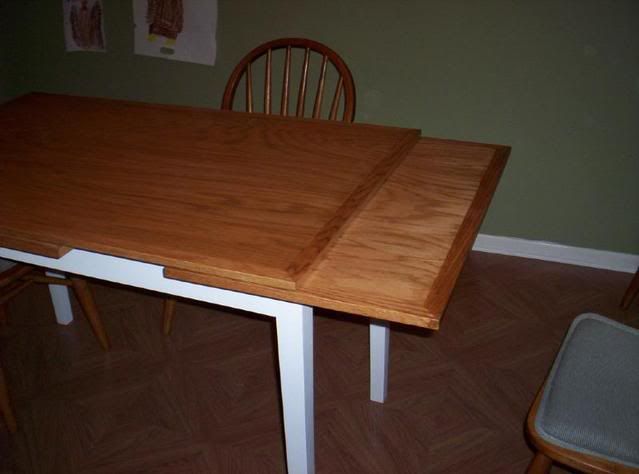
Centering the design around the studio’s On Air light, I stuck with the golden oak used to hold that to the wall. It was made with a pair of bookmatched boards, with a cut out for the On Air light to protrude through. I used breadboard edges on the top and bottom to prevent any warping, and the shelf that the microphone rests on is attached using a sliding dovetail joint. It is glued only on the end behind the microphone to allow for wood movement.

This past Friday, Len and his family returned to the office for the first time since he left that November day. We had a big luncheon for the staff, and after that, we showed a video clip of some of his best work. Len had the energy to deliver some very funny remarks to remind us of the spirit he brought to work every day.

Then it was my turn. I got up and reminded everyone of the times we worked together. Other colleagues got up to say a few words as well. Then, we unveiled the plaque. Unveiling the plaque 
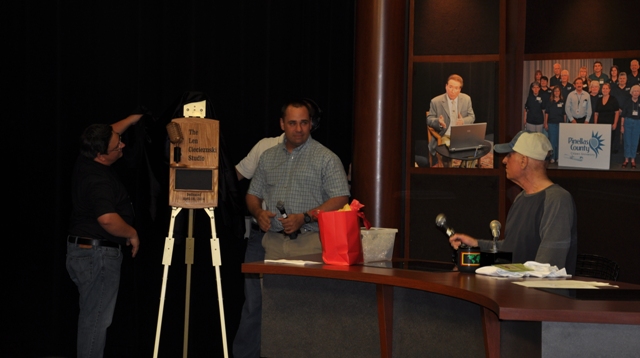
Both Len and I fought back the tears. As I handed it over, I read the inscription I had put on the back of the plaque. It had so much meaning, I needed for him to hear it from me directly:

To Len – My mentor. Colleague. And Friend.

After some group photos, Len and his family followed me out to the hallway to mount the plaque in its permanent location. Len and his family posing with the plaque From now on, anyone entering that studio will be able to draw from the spirit and energy Len brought to everything he did. This was, by far, the most rewarding project I have ever built.

The Weekly Plan

Ana White’s closet organizer

Oh, we woodworkers love to build furniture for the rooms in our homes. Dining room tables. Comfortable chairs. Beds.

But, when we put our clothes away, we often hang them in bare-bones closets with one hanging rod, maybe a few shelves and a whole lot of clutter. Wouldn’t it be great if you could focus your attention on building a closet organizer?

A sweet closet organizer

Well, today’s plan is all about that. Take your closet from messy to meticulous with just a few sheets of plywood, some time in the shop and an easy-to-follow cut list. If spring cleaning is in your future, this is a great place to start.

Oh, by the way, this scary looking bunny wants to wish all of his amicos everyone Buona Pasqua!

A Deranged Easter Bunny

From the looks of that mook, you might want to watch the candy in your basket very carefully…

Link of the week

A home-made spray booth

Spraying is a great way to lay down a nice looking finish in a very short amount of time, but trying to do that task inside can create a mess – or even worse, a hazardous situation with chemicals. That’s why it’s important to set up some kind of spray booth to do the task to help contain the mess.

Al is out there spraying his heart out

Woodworker and all-around good guy Al Navas shows how to build a simple, easy to use spray setup – complete with an exhaust fan – for a small investment of cash.

If you are looking to get into spray finishing, this is an interesting article to start with.

Why not just buy it?

I have got to tell you, this Plan of the Week thing I have been doing the past few weeks has been pretty darned successful so far. I have had people send me plans they have drawn up. I have linked to popular plans from woodworking magazines. I have posted plans for several rooms in the house.

And, this past weekend, I posted a plan for a miter saw stand. OK, innocuous enough. But, it did elicit an interesting comment from one of my readers:

I’m a sucker for DIY as much as anyone else, but wouldn’t one of the prefab manufacturer’s stands be a lot lighter and just as good, for around the same price? They’re even included free with some of the higher-end mitre saws.

Now, that’s a great question that I don’t normally get on my blog. And, one that deserves a good answer.

Building a chair

Woodworking is a many-splendored thing, isn’t it? I mean, there are all levels by which one can get involved in the craft. There are those who love up-close, intricate work, while others love big, burly chairs and tables. There are turners, scrollers, carvers… the works.

Just as there are many different woodworking styles, there are also many different woodworking philosophies. I have heard of people who are collecting tools, and when they get enough to have a complete shop (table saw, jointer, planer, band saw, routers), then they will start woodworking. I have also seen (and, I am one) woodworkers who, given a jig saw, a drill and enough imagination, have leapt into woodworking with great gusto, building their skills and attempting to impress the heck of their families and friends.

Jointing using a table saw

Both approaches are perfectly fine and absolutely acceptable, as long as the woodworker is fine with that. Different strokes for different folks.

However, there are also those who, while they may buy a few tools, get a tremendous amount of joy out of building their own. Hand planes. Band saws. Drum sanders. If money is tight and the imagination of the woodworker is vast, there’s really no end to the number of tools that can be built. And, many of these tools work just as well – if not better – that the commercially-available ones.

Scott Meek builds awesome planes

For me, though, I don’t get a kick out of making my tools. Not in the least. So, when I get a chance to buy or inherit a tool, I usually go that route.

Now, if the tool needs a place to rest, I will go in and build the table, like I did a few years back when I built my miter bench. Woodworking magazines are seldom without a plan for a piece of shop furniture you can built to make things better for your work flow.  Heck, I know woodworkers who build entire banks of shop storage cabinets to hone their skills before attempting something like a set of cabinets in their kitchen, just to prove they could do it.

Diamond plate garage cabinets

Of course, there are also beautiful, heavy duty, hyper accurate items you can buy for your shop. I frequently drool at the diamond-plate shop cabinets available at the local home center and wonder what they would look like in my shop.

And, ultimately, couldn’t you just buy furniture and not build it?

So, I guess the answer is this… can you build something like a miter saw stand? You bet. Can you buy one? Absolutely. Is one better than the other?

Who am I to say?

Just make a decision that fits your budget, talents and needs, and you will be a happy woodworker.

You got your color in my finish!

Putting a finish on a project is one of those processes people have written books about. Yes, those books are worth their weight in gold. Adding color to – or changing the color of – your project is also a topic that throws a wrench into the works.

Wait a second… what if you could add color to the finish … wouldn’t that at least cut your problems in half?

Reeses... mmmmm

Or, could it cause an issue, kind of like when someone combined chocolate and peanut butter? Hmmm, or, I mean mmmm…..

Polyshades

Surprisingly, there are already products out there that do this. My first experience with this type of product is made by Minwax – Polyshades. This is basically polyurethane mixed with an oil-based stain. I read the label recommendations very closely, but ended up with a finish that ended up with some pigmented brush streaks.

The instructions on the can state very clearly that you are not supposed to thin the finish at all, but I mixed some thinner into the finish to the point where I could apply it with a rag, and got a better result.

Ingredients for your own home brewOf course, you can accomplish something similar by mixing some stain into a clear finish you use. In the jar, I have my homebrew finish of boiled linseed oil, thinner and varnish, and I have mixed the two together and finished projects in the past. Of course, you want to match the solvent in the stain or dye and the finish…

My dining room table

For instance, the top of my dining room table was primarily done with a clear finish. The first coats looked good, but after a while, I realized I couldn’t get the tone right. So, with a splash of some red oak stain into the finish, I put on the next coat and I was a lot more happy with the results.

Watco colored Danish oil

Another color and finish combo I have used is made by Watco. It’s sold as Danish oil, and it comes in the standard clear color. But, it also comes in blends that add color to the wood you are finishing. I am using the golden oak mix right now on the surprise project I am building, and it’s matching the color of the wood in the office I am trying to mimic. I have also used the dark walnut color on oak in the past to simulate an arts and crafts look, and it comes out looking good.

It really is a matter of simply wiping the finish onto the wood, letting it sit for a while and then wiping it off. I have yet to have it give me streaking when I apply it, and the surface is that same soft, touchable type of finish that I get from the clear version.

What they look like

As you can see from these samples… that’s some pretty good looking stuff.

The weekly plan

About.com’s Portable Miter Saw Stand

Powered miter saws are handy tools to have in the shop. From cutting lumber down to size to executing compound angles for moldings, they can do quite a bit of work.

But, only if they are easy to get to and have a solid station on which to work.

The Miter Saw stand

That’s why today’s plan is so great. Made from common construction lumber, the stand is easy to build and can be broken down to be moved to where you are working. If you own a powered miter saw, a project like this is a must.

Link of the week

William Ng School of Fine Woodworking

William Ng comes from an engineering background and uses a similar approach in his woodworking. Precision, accuracy and efficiency are emphasized in his teaching.

Someone who starts a bio about himself like that had better be able to back it up, and William Ng does so in spades.

Happy students at the William Ng school

From his school in Anaheim, California, William instructs students on building gorgeous pieces in his well-appointed shop. When William isn’t teaching the students, he brings in big-name instructors like Marc Spagnuolo, Chris Schwarz and Darrell Peart to run the classes.

William’s site also features some great links not normally found on a woodworking school site – including a comprehensive link to travel information on how to get to his school.

part of the Wood Talk Online community