Had to see The Boss

Boy, was I a mess late last week. It had nothing to do with the Modern Woodworkers Association podcast, which did end a little later than normal. And, it had nothing to do with work, which has become crazy this time of the year.

Bruce Springsteen can really rock

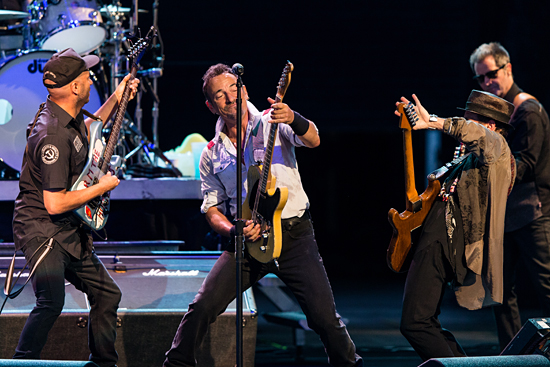
No, it had to do with a little concert I went to see on Thursday night. There was this show by this guy you might have heard of – Bruce Springsteen – that I went to see on Thursday night. Now, it’s been a few years since I last saw him (Born in the USA tour, 1985, on the floor of Giant’s Stadium in East Rutherford, New Jersey), and I can distinctly remember that his show went on for a long time.

This show was no exception…

Big Screen Springsteen

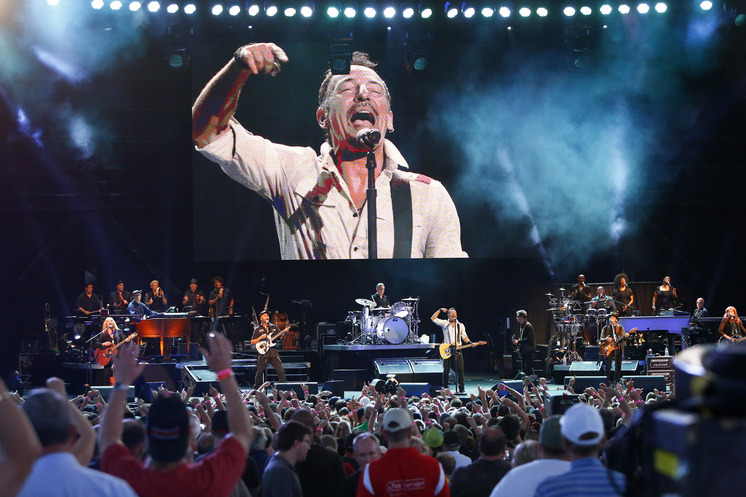
THREE hours after Bruce and the E Street Band hit the stage, they started their encores. Without taking a break. The musicians are machines, still able to crank out the tunes nearly 30 years later.

Which, of course, led me to make some woodworking observations based on what I had learned from The Boss.

  • Don’t be afraid to change your tune. Bruce turned out rockers for years, but took a risk by recording folk tunes in his Seeger Sessions album. While a totally different genre of music, those songs blended flawlessly into the show, adding a ton to what was already a great show. How many times do we build the same kind of projects because we don’t want to get out of our comfort zone? Reach out. Try those projects you have always wanted to. You just might be surprised with what you can do.
  • Keep your circle of friends wide. Ever since his original album – Greetings from Asbury Park in 1972 – Bruce has performed with a group of musicians know as the E Street Band. Through the years, the numbers and members of this band have changed, and has evolved into a full-on stage production including a full horn section. By keeping your woodworking circles wide open, you can meet other woodworkers who can bring their special talents to your woodworking repertoire. Perhaps someone had a lathe and can turn a component for a project for you, or a big bandsaw that can resaw a special board for you.
  • The Boss and Tom MorelloKeep doing what you enjoy. It was 29 years since I last saw him, and I know it has been 41 years since his first album hit the scene. Still, you can tell that Bruce brings the energy to the show and enjoys himself tremendously. He makes it seem as if it’s not even work. As long as I can get out into the shop and enjoy what I am doing, I can picture myself doing this for years to come.

Fortunately, I had a weekend to catch up on my sleep so I can go to work this week. But, when I do, I will be listening to The Boss on my little office radio.


The weekly plan

Toy Storey by Danny Proulx

Even though he passed away nine years ago, I still miss woodworking author Danny Proulx. He was a great woodworker and an awesome teacher of the craft, and he was the first real woodworking celebrity I had ever made contact with.

Danny's toy storage plan

While he is no longer with us, his website still lives on with the help of Danny’s protégé Luc Rousseau. Many of Danny’s free plans are also still on the site, and this one is a real gem. Using common lumber and standard plastic bins, woodworkers can build a simple toy storage solution to beat the clutter that comes with kid’s toys.

Having stepped on my share of Lego blocks in my day, I can tell you that something like this would have been VERY handy in my house!

A splendid combination

Back over the holidays, I was the proud recipient of a genuine Leatherman multi tool, and I have got to tell you it has been worth its weight in gold. Not just because it is a handy set of pliers, a very sharp knife or a quick way to open a beer at the end of a hard day. It’s worth it’s weight in gold because it does all of that in one tool. A real multitasker.

My combination square from Bora

That’s why I am falling in love again with my combination square from Bora Tools. Oh, that baby is handy. It gives you a whole bunch of different operations all in one tool that’s easy to keep close by while out in the shop.

First, it’s a square. Yes, I know that sounds obvious, but that gives you something to check your project for square during assembly…

Squaring an assembly

Plus, a great guide for marking out joinery or cut lines. Unlike a regular square, combination squares let you draw both 45 and 90 degree lines on your workpiece right out of the box.

45 - 90 - HIKE!

Let’s go a little farther with this. Power tool setup is made a ton easier with a combination square. Say you need to ensure your band saw blade is square to the table. That’s an easy one to set up with this tool.

square that blade

But, what about checking to see if your table saw blade is aligned with the miter slots and not out of whack. How can you do that?  Easy. Just place the measuring head in the slot, extend the blade until it contacts a tooth at the front of the blade. Using the same set up, push the combination square to the back, rotate the blade so the same tooth is touching, and you will see immediately if your blade is off kilter.Check the alignment

Need a precise way to check the blade or bit height of a cutting set up? It’s in there!

Hey, that's just what I wanted!

My favorite thing about my combination square is that it is very handy, and works well with my split top Nicholson bench. Hey, when you need to keep the square right at hand, it’s easy to just slip it into the split and it’s good to go.

My square is handy

Just think, I haven’t even begun to scratch the surface with this tool. You can take the blade out and use it as a steel rule. You can use it to find the center of a round item. Gosh, there’s almost enough stuff for a second post!

The tale of the tape

So, I have this coworker back at the office who had a little ‘issue’ with a shelf in his pantry. It seems that some kind of wood-eating insect had gotten into the plywood shelf and did what it does so well, eating through the plies of the shelf.

He cut off a piece and brought it to me in my office, and asked if I could take it back to my shop, cut a new shelf for him and bring it back. I told him no thanks, I really wasn’t looking for something to get into my prized wood stash and turn it into sawdust.  But, I told him, if he microwaved the piece for – say – four minutes, I think whatever was living inside would be an ex-wood-eating insect, and I would be able to tackle the job.

a chunk of the shelf

So, he gave me the chunk of wood. It was a very simple piece, just a strip of 3/4″ plywood with the edge taped and some type of ‘golden’ stain applied to it. Oh, and my friend had drilled the hole in the front edge, it wasn’t the work of that bug.

It was an easy job to cut the plywood to size for the body of the shelf, but how was I going to match the edge banding? I could go buy a roll of edge tape, but where is the sport in that?

The set upI set up my table saw to do something I had never tried before. I cut an extra strip of plywood about one inch wide, turned it on edge then used my Infinity thin strip ripping jig to set up a cut that would just skim off the face veneer of the ply.

Look, Ma!  It's edging tape!

Using a push stick to keep my hands out of the way, I guided the piece past the blade, and ended up with a strip of face veneer that was – obviously – a perfect match of the plywood I was working with.

taped in place

From there, it was an easy job to apply a thin, even film of glue and the edge tape, holding it in place with some blue painter’s tape. I made sure that the edge banding extended past both sides of the plywood, so there would be some to sand down to perfect the coverage.

Toit like a toiger

Once the glue was dry, I used some 180 grit sandpaper to gently remove the excess edge banding. I do have to perfect my technique a little bit, but I think it looked pretty darned good. Plus, I mean, it was going to be inside a pantry, right?Ready for finishing

Once I got it sanded and scraped to my satisfaction, I wiped on a coat of that golden oak Danish oil I had used to tint it as closely as possible to the original, then brought it outside and applied six coats of lacquer from a spray can – which is a really quick and easy way to put on a nice finish. I finally sanded the piece with some 320 grit paper, and waxed it so the surface was nice and smooth.

My guess is that this will be the nicest looking shelf in the pantry.

The weekly plan

Popular Mechanic’s trestle table plan

A dinner table is so much more than you might believe. It’s a place to dine, of course. It is also a homework center, a place to spread out for a marathon game of Monopoly, a family gathering spot… well, it has a lot of uses!

Popular Mechanic's trestle table

Because it is such an essential place in the home, most woodworkers want to build their own. Today’s plan is a pretty easy one from Popular Mechanics magazine, showing how to build a classic trestle table.

While there are other table designs (believe me, I will be featuring a lot more), this is one I am particularly drawn to.

Link of the week

Build your own Log Cabin

So, now that we are in spring, thoughts turn to those summer vacations we like to take from time to time.

For some of us, a trip to the beach is what the doctor ordered. For others, the excitement of the big city is in our future. And, for some, a log cabin, far away from it all deep in the woods, is the ideal.

That log cabin

If this last idea tickles your fancy, then today’s link of the week is for you. This article in Mother Earth News shows how a couple – using axes, hand saws and the materials available to them – built a little log cabin in the woods.

Of course the work was backbreaking, but the two story structure, complete with windows and a wood stove, provides that whole back-to-nature vibe that many of us might be seeking.

Pine is fine

When I started woodworking, most of my projects were built out of white pine found in the local home improvement center. Why not? It was cheap, plentiful and easy to work.

But, after a while, I was told by other woodworkers that I should never – and I mean NEVER – use p-p-p-p- domestic conifers. After all, woodworking is all supposed to be about the hardwoods, right?

we see lots of this in Florida

Well, not so fast. While it’s maybe not appropriate for every project, there are plenty of times when pine is perfectly fine to work with

First, let’s talk about pines. There are lots of species of pines out there. Loblolly pine, lodgepole pine, ponderosa pine, longleaf pine, eastern white pine… the works. When it comes to pines, though, most fall into one of two categories – white or yellow.

White pines typically grown in the more northern climates, while yellow pines tend to grow farther to the south. Driving through the highways of Florida, you can see vast stands of yellow pines as far as the eye can see. In fact, the name of the county I live in – Pinellas – comes from the Spanish word for Point of Pines.

A southern yellow pine table by Michael Hurwitz Furniture

While I use white pine from time to time (and love it), my favorite pines are of  the southern yellow variety. They have a very pronounced grain pattern, and I know that turns some folks off. But, for me, I don’t mind it at all.

A pine chest I built

I have used it for furniture, such as this raised panel blanket chest I built for my bedroom. The piece is as solid as the day I built it, and even with a full load of stuff in it, it can carry a bunch of weight with no issues. The details on the raised panels came out crisply, and with a coat of amber shellac and some Danish oil on it, I think it has that classic southern furniture look.

My workbench was built using southern yellow pine as well. I know that when most folks build their benches, they source some gorgeous hardwoods so the bench will stand the test of time. But, as Chris Schwarz pointed out in his workbench book, southern yellow pine is plenty strong for the purpose. And, as Mike Siemsen of the Mike Siemsen School of woodworking pointed out about his bench – if you accidentally drop the project you are working on, would you rather have the workbench  or your project get dinged up?

My Dutch Tool Chest is another example of pine’s versatility. Chris Schwarz pointed out that pine’s characteristics – strength and light weight – make it ideal for tool box building. I cut dovetails into the base, and that sucker is holding together nicely, no matter how many times I haul it out to places.

Now, where do I get my southern yellow pine for building? Would you believe me if I told you in the construction lumber area of my local home improvement center?

Yes, the blanket chest I had built was made of resawn 2 x 8s. I cut them, then stickered them for a week to let them acclimate to my shop. In the ten plus years since I built the piece, I haven’t noticed any warping, cupping or twisting.

So, if you have turned your nose up at pine in the past, maybe it’s time to take another look at it for your projects. You might just be pleasantly surprised by what you find.

part of the Wood Talk Online community