Proper plane preparation prevents problems, pal

Rusty and CrustyOne of my most favorite movies of all times is Raiders of the Lost Ark. Who could ever forget Indiana Jones trekking around the world to find the lost Ark of the Covenant, battling bad guys left and right while taking a beating that would kill just about any mortal person?

In many ways, I see myself as a little bit of that adventurer/archaeologist when I start hunting down old hand tools. (OK, it’s my childhood fantasy to run around exotic marketplaces with a bull whip and a brown crusher on my head. There. What’s it to you?)

Instead of running away from evil Nazi agents, I can be found some Saturdays walking around the long-running flea market a few miles from my home. My wife hates going there, but I get a kick out of looking at the old tools hand tools for sale. Some are in pretty tough shape, while others look like they have never seen a square foot of wood in their lives. Some have reasonable prices on them, while others… well… you have to wonder why a nasty looking chunk of rust with a rotten handle can cost more than a plane you can buy new from a woodworking store…

I’ve bought lots of old tools – especially hand planes – at that flea market and in the other big virtual flea market out there – eBay. Since I have told my family about my interest in old tools, I’ve been getting them by the bushel. Old hand planes, spoke shaves, auger bits – it’s a bonanza of old iron that shows up at my door – whenever someone needs something built!

Before you decide to take the plunge, it pays to become familiar with what hand planes are all about. You can check out an excellent primer at Wikipedia (http://en.wikipedia.org/wiki/Hand_plane), or, what I would recommend would be to get to a library and check out Garret Hack’s The Handplane Book. These are both great places to look for the basics.

Once you get the old tools, you really want to put them to use as soon as possible. While you could take a rusty old hulk and try to work with it, it pays to do a few things first.

Pieces parts
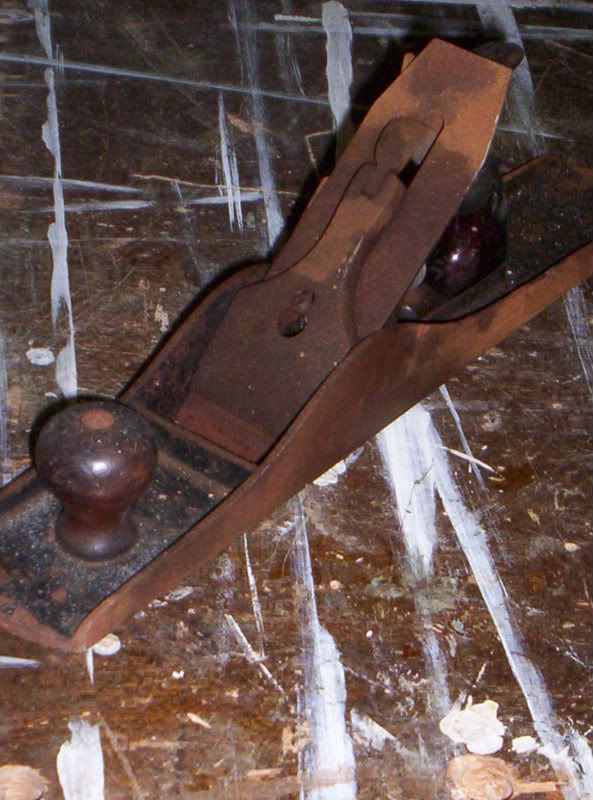
1. Before you buy – or after you receive one as a gift – check the plane out thoroughly. Look for broken totes and knobs (you can buy or make replacements), cracked iron, warps and twists, missing pieces, etc. I’ve received some planes that look like they were used for target practice – needless to say, those babies are probably not going to get put back into service. I typically put the broken planes up on a shelf in my garage for decoration and as sources of spare parts.

2. Once you decide you want to rehab the plane, take the entire thing apart. Remove the handles, cap iron, frog, everything. I usually start with wiping everything down with a rag sprayed with some WD-40 and a blast of compressed air for the nooks and crannies. For screws, use an old toothbrush to get the crud out of the teeth.

3. Some folks become crazy about getting rid of rust. I’ve seen people sandblast their planes, submit them to electrolysis and a bunch of other methods to strip off a layer of rust. For me, I’ve found 400 grit wet/dry paper with a blast of the aforementioned WD-40 can clean up the pieces very nicely.

Shiney and New
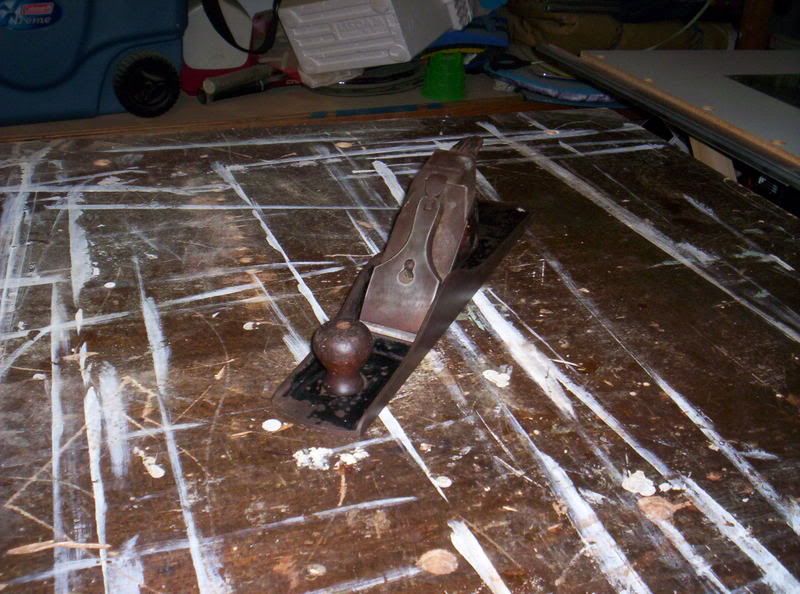
4. Assemble the tote, knob and frog into the plane body, but hold off on the blade and chip breaker. I usually stick a piece of 320 grit wet/dry paper down to my table saw, lubricate with the WD-40 and rub the sole of the plane until its clean. You’d be surprised how much bright red rust comes off the sole of some of these babies! Keep wiping the crud out of the paper so you can eventually flatten the sole of the plane.

5. And, when it comes to flattening plane soles, don’t make yourself batty about it. An easy way to ensure the sole is flat is to draw a squiggly line with a permanent marker across the sole. Rub the plane on the sandpaper a dozen strokes, then lift the plane up and look at it. Where is the marker still on the sole? You want to make sure the front and the area around the mouth are nice and flat, so rub the plane until those areas are without marker.

Curls6. Once you have everything nice and shiny, look at the plane iron. Sharpen and hone that sucker. If you can swing it, look to get a replacement plane iron. There are some killer replacement plane irons out there for $25 – $40 from Lee Valley, Lie-Nielsen, Hock tools and others.

7. Assemble the entire plane and give it a good wipe down with some furniture paste wax. That keeps rust at bay and allows the plane to glide nicely across the board.

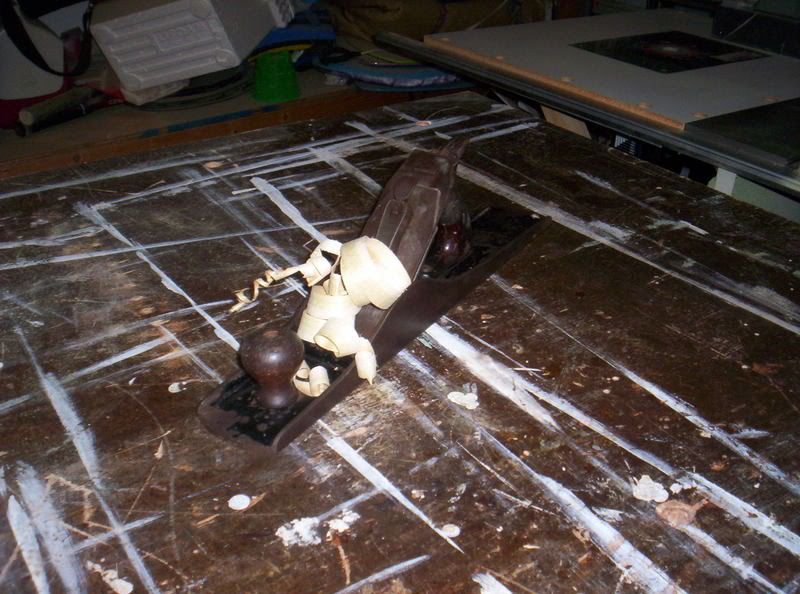
8. USE THAT PLANE! Give your jointer, planer or random-orbit sander a rest and develop the skills necessary to dress, joint and smooth wood the old fashioned way.

You may never give up your power tools, but you will gain valuable insight into how wood works, and just how fortunate you are to have those modern shop tools. Now, there’s something to discover all on your own.

In Love With Ugly

My workbench is ugly. It’s REALLY ugly. If ugly were bricks, my bench could build the Great Wall of China.

The beast was born one Valentine’s Day night when my wife was working evenings. I was the only guy at Home Depot that night (everyone else had the sense to take their sweeties out for a nice dinner). I cobbled a puny little bench together with some Simpson Strong-Tie connectors, 2×4’s, a half-sheet of ¾” plywood and a fistful of screws. And, it was good.bench1

Later, when I discovered that my 2 foot by 4 foot bench top wasn’t going to be large enough to work for me, I scrounged through my neighbor’s garbage after he did some renovation work and found his old wooden entry door. SUPER ugly 1970’s carvings and molding on the outside a dark, chocolate brown paint on the smooth inside panel. I carted that heavy sucker home, removed the small plywood top and screwed the big 36″ x 80″ door in its place.

Yes, it has the hinge mortises. And the bore holes for the deadbolt, door knob and security peep-hole. I consider that as part of my shop security plan.

Over the years, I have glued up on it, painted on it and tested the sharpness of plane irons on its corners. I’ve pounded on it, screwed jigs to it and (accidentally) cut into it with a circular saw. This thing is a beast! The creature from a nasty corner of the nasty garage.bench2

But, it has a beauty all its own, too. That ugly bench of mine is the perfect size for my shop. I have built countless projects on it – from the obscenely large to the dainty and delicate. I can lay a straight edge on the door and verify that yes, it is dead flat – once I scrape the beads of dried glue off of it. I can clamp projects down to the overhanging edges and know that they won’t move when I chisel, cut or plane. It’s the same height as my table saw, and functions as an outfeed table.

I’ve added some modifications to my bench to make it even more useful. After using a real, professional woodworking bench with a tail vise, I longed for a better way to clamp projects to my bench top to face plane them. I bought a matched pair of Veritas Bench Pups and Wonder Pups, and drilled a series of ¾” holes through the top. Now, I can plug in the pup, clamp it in place and face plane until my heart’s content.bench4

Another awesome upgrade was adding an old Wilton vise to the front of the bench. It’s right there on the left corner. I experimented with several different configurations of where to site the vise, but the classic position for right-handed woodworkers suits me just fine. Edge planing boards is now a snap.

By the way, the vise itself is just as ugly at the bench is rides on. It was plucked from a dumpster behind a school that was doing away with its wood shop program. It must have been built in the 1960’s, coated in a light layer of oxidation and surface rust and has a handle made of a length of metal electrical conduit. I cleaned it up, put some southern yellow pine faces on it and it works like the day it was built.bench3

Do I ever want to replace that ugly bench with something new and pretty? Sure I do. I get bench envy from time to time. I was at the American Sycamore Woodworker’s Retreat in Cloverdale, Indiana and saw a beautiful maple workbench with purpleheart inlays. Heavy mortise and tenon joinery. Dual screw tail vise. The thing looks more like an altar for some woodworking religion than a bench.

But, it didn’t have the character of mine.

Will I eventually replace my bench? Well, I have to confess that I have researched a number of plans from books, magazines and the Internet. But, every time I draw up a shopping list for wood and hardware – I find myself sitting at my old, ugly friend that has seen me through so many projects…

You know, I discovered I really am a loyal, sensitive guy.

The Eyes Have It

My woodworking hobby stated – as many do – as a home improvement urge. My wife and I moved into our home back in 1997, and the previous owner…….Well, as my mom taught me, if you can’t say anything nice, don’t say anything at all. Some of the things I saw still leave me puzzled.

For example, ceiling fan in the master bedroom. Rather than install the silly thing in a way that would 1- ensure the sucker would stay on the ceiling and 2- not cause a house fire, she did things her own way. The electrical wire was just run through a hole punched in the ceiling. The connection between the fan and the wire was made only with electrical tape – and it wasn’t inside a junction box. The fan itself was hanging from a vaulted ceiling socket that was screwed into a joist until the screw heads stripped out. Since neither screw was tightly mounted to the joist, the fan had this nasty tendency to wobble like crazy.

I had faced this, and dozens of other ‘issues’ just like it, for the past decade.

As I was doing this work, I began to develop a reputation as a handy man. One my co-workers and friends found out about quickly. And, I was often offered deals to ‘help’ friends and neighbors fix their issues. I recall one Saturday when I was at a co-worker’s house, doing a few odd jobs (to earn some tool money, of course). While I was cutting an aluminum screen door jam to size with a jig saw, I was amazed at the amount of metal fragments that were flying away from the cut.

Of course, I was not wearing safety glasses. I didn’t have them on me. Needless to say, a piece of aluminum jumped up from the saw and hit me right in the eye. I could see it flying up to get me. The piece stuck. I ran to the bathroom and rinsed the eye out, and, fortunately, the piece came out. But, my eye hurt. BADLY. It was tearing up something awful.

I told my friend that I had to get to a hospital, and – quite foolishly – drove myself to the ER. Two hours, $100 and several exams later, I found that the injury was only a scratch on the cornea. Some prescription eye drops and time was all I needed to recover.

But, I learned a very valuable lesson that day. Your eyesight is one of the most precious things you have. I don’t care how careful you are, there really is no excuse for not wearing safety glasses. In fact, after my trip to the hospital and the pharmacy, I went to the local home improvement store and bought several pairs of safety glasses. One pair went into each portable tool’s case in my collection. One pair went into my toolbox. Others are stationed around the shop in strategic, easy to find locations. I even bought a really cool looking pair of safety glasses and one of those eyeglass retainers, so all I have to do is let them hang when I don’t need them. That way, I can find them without searching around the shop.

Now my rule is, “nothing gets cut unless the glasses are on,” and that goes for guests as well as the woodworker. Hopefully, you will see the wisdom of this decision without having to lose your sight.

Stop Worrying and Learn to Love the Silence

Power totally rules.

In school, I loved my history classes. Reading about the early colonists who settled very close to the site of my elementary school made me feel as if I had a direct connection with the history of America. And, learning about the hardships they had to endure made me feel pretty lucky to grow up in an age of power tools.

Washing machines to do the laundry.

Chainsaws to cut down trees, and powered log splitters to spit out cord after cord of firewood.

Table saws, sanders, routers and all of the other tools Norm Abram used to build projects on This Old House and the New Yankee Workshop. Yes, Norm and my dad are the two guys responsible for my woodworking habit. Both made – and still make – extensive use of power tools when they build their projects, although Norm a) has more of them b) has fancier ones and c) can build a freakin’ bedroom set in half an hour, while my dad can do something like that over a period of a few years.

So, it was only natural that when I started setting up my shop, I told my wife that I was going to need more power in order to build nice projects. I built pretty projects with my power tools. The louder my shop was, the nicer the projects turned out.

Then, the day happened. I was building a low credenza entertainment center – my first real paying project. The top was going to be 24 inches wide, seven feet long and made of solid red oak. The rest of the project had been a piece of cake, but the top was giving me heartburn. How was I going to make this top work without a jointer? I had neither the cash nor the space to provide for this essential piece of woodworking equipment. I thought and thought and thought some more. I even considered loading the wood back into my minivan, driving it back to the hardwood supplier and having them do the work.

As I was getting ready to cart the wood to my van, I looked at my workbench. There sat an antique No. 5 Stanley plane from about 1935. “Hmmm,” I thought to myself, “I wonder if that would work?” I clamped the piece to my workbench and took a swipe with the plane. It didn’t glide like I could make it now, but it sliced off a pretty decent curl of wood. Another pass – another curl. Before long, I had planed the boards nice and smooth, and they fit together tightly. And, boy, was I impressed!

Today, I couldn’t imagine working without hand tools. I have hand saws that slice through wood like a dream, planes – both ancient and brand new – that can shape wood into exactly what I want. Other tools, like spoke shaves, drawknives, bit braces and rasps will often eliminate hours of jig building required to make one cut.

Learning how to use these tools isn’t as difficult as you might think. Your library is a great resource for finding how to care for and use these tools from earlier days.

The Internet is another outstanding source of information on techniques and how-tos. I’ll even throw you your first one right now – a “how-to” I wrote a while back about face jointing boards without a jointer.

And, I can’t tell you the pleasure I get from going out to the shop on a Saturday morning, while my wife and sons are asleep. All I hear is the whoosh of the plane over a maple board, the zip-zip-zip of the handsaw or the yielding of the wood fibers as a sharp chisel pares away waste wood.

I’m getting a lot of woodwork done without disturbing the peace that comes with the start of the day.

Now, that’s power!

Size Does Matter: The Other Side of the Coin

Can I brag for a moment?

I have really good eyesight. I mean, REALLY good eyesight. As long as I can remember, I have been able to read license plates across a parking lot. This is quite a feat, considering the rest of my family has awful vision. Both of my brothers, my mom and my dad all wear glasses or contacts. To be fair, my dad’s glasses are reading glasses (that must be where I got the good eyesight from). But they are all amazed at just how much more detail I can see than they can.

Why, then, was I having trouble seeing what I was doing? Could it be that I was tackling my first really small project?

It was a simple one. Someone asked me to build a postage stamp holder – something funny, creative and made out of wood to hold a roll of stamps. I had the idea of building a very small band-sawn box that could do the job nicely. The lid was going to be held on by rare-earth magnets and a slot that would meter out a stamp at a time from the roll. There was even going to be an appropriate decoration paying tribute to the speed at which stamped letters travel compared to e-mail.

To make this vision a reality, I grabbed a chunk of maple, headed to the band saw, and immediately realized just how different the scale of the project was compared to others. This piece was small. I mean REALLY small. Three inches across and an inch and a half thick. And, once I cut the body of the box to size, I had to cut it into even smaller pieces to create a base and a lid.

As I cut the box from the chunk of maple, the tiny size of the project forced me to rethink nearly all of my construction practices. Well, it wasn’t actually the size of the project, but the close calls I kept having that caused me to sweat the details and count my fingers.

My band saw, normally a very well-behaved machine that gave me very few troubles in the past, provided me several frights. I will often scribe a line and freehand larger pieces through the saw, but those methods didn’t work on the small pieces. They had a nasty habit of slipping from my fingers and shooting across the shop.

Fairing the piece on my benchtop belt sander was another adventure in aerodynamics. Simply running the small piece against the belt – while preventing a nasty 120 grit manicure – allowed me to skip my cardio workout as I chased it all over the shop after it went flying.

Fortunately, before I had to run to the hospital, I realized I was going to need some shop jigs that would help me stay a perfect ten – on my hands, at least. Cutting jigs, sanding jigs and even drilling jigs helped me build the piece without a visit to a hand surgeon.

Sure, building jigs can seem like a pain in the butt. While you are in the flow of a project, you can get lost in the work you are creating. Taking time out to build something out of MDF that will never see the light of day can seem like an unnecessary waste of time, especially if you only have to make one more cut. You are indeed tempting fate.

When you feel like this, think for a minute just how long it will take you to get back into the swing of things after you finally get the all-clear from the medical folks.

Benjamin Franklin was right on the money when he said that an ounce of prevention is worth a pound of cure. Remember, if the little voice in your head is screaming, “Hey, dummy, that looks pretty scary,” you have got to listen. Hopefully, you’ll see how safe you can truly be! That’s so obvious, I’m surprised I didn’t see it earlier in the project.

I guess hindsight really is 20/20.

Size Does Matter

You know you are getting in way over your head when you are building projects so big, you can stand inside them. No, I’m not talking about carpenters building a house. Of course, those folks have to build projects big enough to stand in. Or at least crawl into – you know, something like a doghouse. (I’ve been there a few times after tracking sawdust in across the clean carpet).

And, no, I’m not talking about building a coffin – although, technically, you aren’t supposed to STAND in a coffin. It’s more of a reclining position.

I’m talking about woodworking and furniture projects that make your home complete. That’s exactly what happened to me late last year when I built an entertainment center for my family room. I had this grand vision of an entertainment center that would house a big screen TV (OK, it’s only 36″, but, the way my wife reacted, you’d think we had bought a movie theater screen and could charge admission), books, toys for my two sons, a whole host of electronics, DVDs, CDs, LCDs, VCRs and other ingredients in my alphabet soup.

My plan was pretty straightforward – build one central ‘box’ that would house the TV and storage, and two flanking ‘boxes’ that would serve as bookshelves. I would mount them to the wall up on a frame that I would level right on the concrete slab. This, I told my wife confidently, “was going to be so easy, a child could do it.”

I quickly realized, however, that I was probably going to have to turn to illegal child labor just to put the project together.

First of all, working by yourself on a large project can be the pits. Just imagine trying to square up a seven foot tall, two foot deep, four foot wide center box unit while assembling it on a 36″ by 80″ workbench. I pushed the piece off the edge at least a half dozen times trying to get it lined up.

Then, once I finally managed to get the sucker together and square, where the heck was I going to store it? I mean, I have a pretty decent sized shop – a 20′ x 26′ two-car garage, but that piece loomed larger than one of those monoliths they showed in the movie 2001: A Space Odyssey. Then, getting those three huge boxes inside. Without punching a hole in the walls. And knocking the nick-knacks off the shelves in our dining room … well, that was an adventure.

What got me through the project, ultimately, was the fact that I had VERY generous neighbors. One neighbor came by and offered me a second set of hands while I was assembling the monster case. Other neighbors offered to help me store the pieces in their garages while I assembled the job. And, when the time came to move and install, another neighbor came to my aid and kept me from putting the corner of the box through a window!

The moral of the story – get in friendly with your neighbors. If they are interested, they may be able to offer another set of hands when the big projects get tricky. Unfortunately, most will then ask you to build a huge project for their homes.

But, hey, at least you’ll have practice.

The Wood-a-holic

Yes, it’s true. I’m Tom Iovino, known as Tampa Tom far and wide, and I am a wood-a-holic. I have to admit this as part of my twelve step program. I knew I was in trouble when I started exhibiting the following symptoms (yes, it’s OK for you to admit that you too might be a wood-a-holic after reading this list):

  • You race home from a hard day at work to put in a few hours in the shop.
  • You start arranging your vacations and family schedule around woodworking expos.
  • You can spend hours in a home improvement center turning every hand wheel, flipping every switch and checking the fit and finish of every power tool you see.
  • You walk into a furniture store, drop to your knees and inspect the underside of every piece of furniture to see how it was built.
  • You find yourself proclaiming, “I could build that,” when someone describes the need for a piece of furniture.

It’s not really a bad affliction when you think about it. Woodworking is the kind of addiction where you can actually accomplish something useful. A piece of furniture that can fill a need – and maybe even look good in the process. That’s always a good thing. Sometimes, I’ll use reverse psychology to get where I need to. For instance, a few years ago, we ran out of cabinet space in our kitchen. We couldn’t squeeze another box, pot or pan in there. So, I sketched out a design for a free-standing pantry that would fit into a perfect corner of the kitchen. I priced out the materials, and then looked for a pantry at a furniture store. The pre-made one cost considerably more than the materials, but I wasn’t convinced she would go for the deal. So, when I showed her the plans, I greased the skids a little – “That was a great idea you had for me to build a new pantry.”

She was sold.

My wife will get annoyed that I’ll spend the better part of a Saturday in the shop building something. But, once that piece gets into the house, everything seems to work itself out. She’ll even call the neighbors over to take a look at the finished piece. That’s when I have to strike while the iron’s hot – “Hey, honey, since I did a good job on that piece, what do you think about me building a (fill in the blank)?” If I say this in front of the neighbors while they are admiring the work, they’ll start asking about when the new project will be completed.

I call them my enablers.

part of the Wood Talk Online community