3/8″ Mortise Chisel
- Won on eBay – October 2008 – $9.99
After drooling at some new mortising chisels, and bemoaning the fact that high-quality models started at $60 and up, I combed eBay looking for some old steel to get my hands on.
A friend of mine drew my attention to this little gem. The description was intriguing:
Antique Page Whitmann & Co 3/8″ wide Mortising Chisel. This lot features a scarce cast steel mortising chisel manufactured by Page Whitmann & Co. The heavy blade allows the chisel to be used as a lever against the side of the mortise. This scarce socket chisel is marked “Page Whitmann & Co W. Fitchburg”, “Cast Steel Warranted”. This dates this chisel to 1850’s, Civil War Era. Page-Whitman & Co started when Albert Page left Abel Simonds in early 1845 to for A G Page & Co and through mergers became Page Whitmann & Co. There is no handle.The blade measures 3/8″ wide. In good condition. Overall measurement is 11 1/2″ long. Great browning age patina. This is a rare chisel for your collection or use.

Hey, it was worth a bid. Fortunately, I was the winner on the auction, and it recently arrived at my home. The first thing I had to do was make a handle, and I’m KICKING myself that I didn’t set up my camera to show how I did it. Basically, I followed the directions written by Bob Smalser on how to make a chisel handle. I used a chunk of maple that was thick enough to work with, and came up with this…
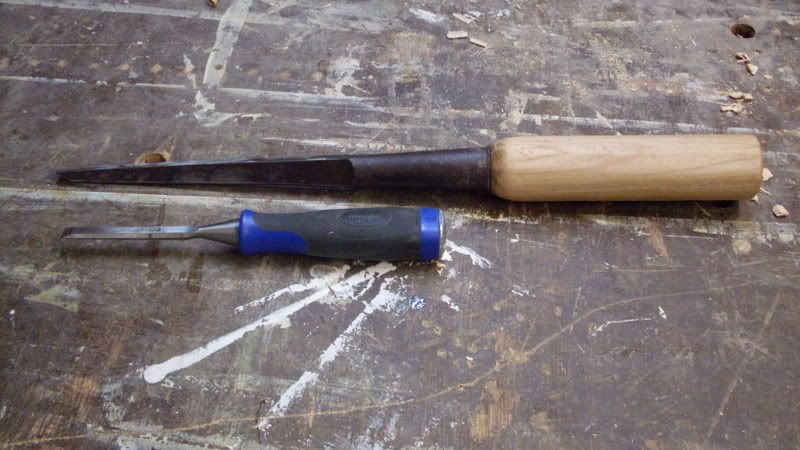
The Marples 3/8″ bench chisel is there just as a comparison… this chisel is HUGE and heavy. After I got the handle fitted, I ran the flat of the blade against the grinding wheel of my Work Sharp. That took a whole lot of scale and pitting out of the blade without removing all of the patina of age, then I reground the bevel to the 30 degree angle that helps keep this beefy chisel’s blade from chipping.
Just for giggles, I took a piece of 2 x 4 scrap which was sitting around the shop, quickly marked out the lines for a sample mortise and went to work.
Three minutes later – I cut my first mortise with a mortising chisel…
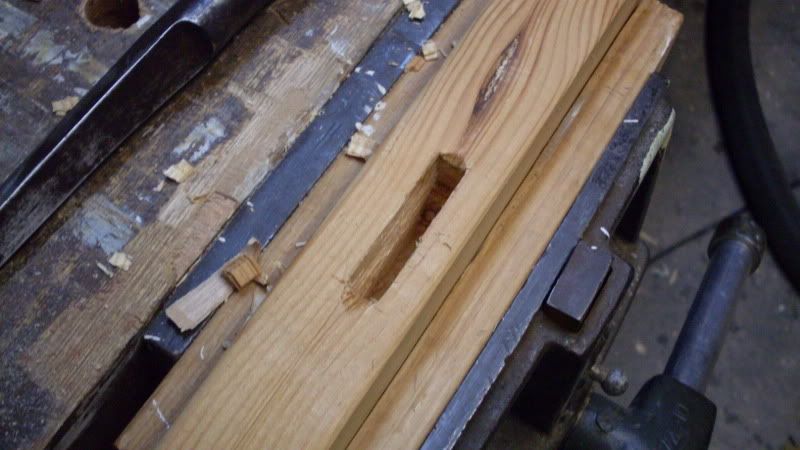
Wow… this chisel wants to cut straight, deep mortises. Granted, this is kinda rough and into construction grade lumber, but WOW, I can see myself cutting mortises with this grand old tool for years to come.
Now, I just have to get a complete set of mortising chisels…

 There was this TV commercial once that proclaimed a certain brand of potato chips was so good, you couldn’t eat just one…
 Anyone who has watched an episode of Woodworks has seen the creativity, skill and calm demenor of David J. Marks. Sure, this Santa-Rosa, California based woodworker is famous for his shows, but they only touch the surface of this extremely talented man.
 Walking into any large retail store is always an
  interesting experience. Because mass merchandisers have to think well into the coming months, they have to push the products for events quite a long time from now.
 I got some galvanized T-hinges from the hardware section and used those to operate the lid. When we are out of the season, I’ll put all of the decorations into it and use it for storage up in the attic.
 I have it chained to a tree in front of my house (unfortunately, in my neighborhood, nice seasonal decorations have recently developed this nasty habit of ‘walking’ away…). To complete the look, I added a green flood light and a fog machine, which spills an unearthly green lit fog across the lawn when it’s activated. Pretty cool stuff.
 In order to get tight joinery and excellent results with your woodworking projects, you have to start with flat, straight and true boards. And, when it comes to edge jointing your boards, there are lots of options out there.
 So, you want to build a bookcase with some shelves to hold a few nick-nacks in the living room. Rather than spend lots of money, you opt to build them out of painted MDF. After a few months of holding ceramic kitties and a vase of flowers, your spouse says, “Don’t you think it wold be cool if we put my 1957 collection of the Encyclopedia Brittanica up there? They look so good.”