Category Archives: Tools

Happy Father’s Day to me!

I love my family. What a great bunch of folks… My wife, Rhonda and my two sons Dominic and Steven. Not only are they a bunch of fun, but they treat me right!

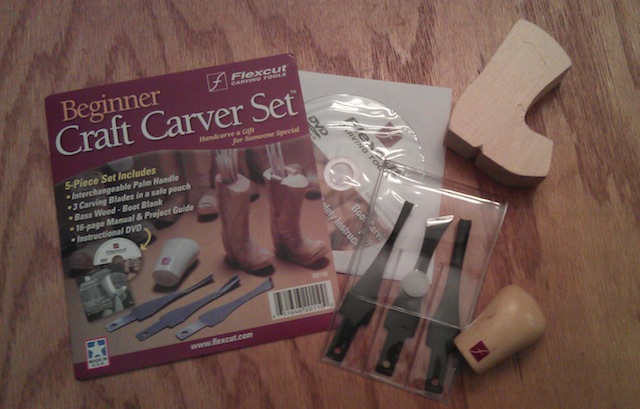
For instance, yesterday I had probably the best Father’s Day I have ever celebrated. It started off with a simple breakfast and a few presents. The best one was this carving kit from Flexcut. It came with three separate blades, a handle for them to insert into, the instruction book and  a boot shaped block of basswood to try my first project. Sure, I’ll mess with it, but I’m looking forward to doing a little letter carving for  a sign for our house.

Of course, after the bathroom is done.

It’s funny, but the instructions warn me off from using a sharpening stone on the blades – just a strop. Going to have to see how well that works.

From there, it was off to Tampa to Centro Ybor. This is in the heart of the old cigar rolling district, and the place just oozes history. Many of the old cigar factories and warehouses have been converted into night clubs, special stores and restaurants, and I had to pay a visit to the Tampa Bay Brewing Company. The visit was totally unplanned until Friday night, when we saw the restaurant featured on the show Diners, Drive ins and Dives. The beer was awesome, but no where near as great as the food. WOW! It was there I also discovered something very important… Beer is my friend.

While the day was going well, my wife and I started talking about going and doing a little bit of shopping. At a place. I’m not sure I can mention its name…

Gulp.

Ikea.

Hey, Iggy put me up to it. Bad Monkey…

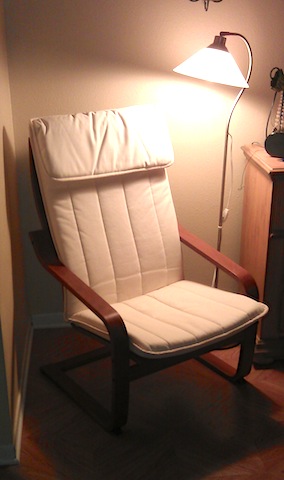
We went to the Swedish smorgasbord of furniture just looking to walk around for a bit, but we saw something that my wife had been asking me about for years – a comfortable chair to fit in our bedroom.  At only $69 for the chair and cushion.. and she could have it immediately… well, I swallowed my pride a bit and went for it. It was too good a deal, and mama is happy.

The rest of the day involved a trip to the city’s pool for a swim and some Argentine-style steaks on the grill.  That Chimichurri sauce is some REALLY good stuff.

As I put the boys to bed tonight, I gave them an extra hug. While the stuff we did was fun, the best part is that I got to spend the day with my two sons and my wife. That’s the good stuff that makes all this worthwhile.


Trust your feeling…

Who could ever forget the climatic scene in Star Wars when the rebel alliance was pressing their attack on the Death Star? Oh, you may not be a Star Wars fan. If not, you might want to check out this awesome site of wood turnings.

But, if you are still with me, you’ll recall that Luke Skywalker was piloting an X-wing fighter into the trench that led to the thermal exhaust port. After his wingman had to pull out, Luke was all alone with the Imperial fighters right behind him. As he was setting up the shot, the voice of Ben Kenobi came to him and told him to turn off his targeting computer and trust his feelings.

OK, I hope I haven’t given away too much of this 35 year old movie, but old Obi-Wan was on to something – especially when  it comes to woodworking. You see, there are plenty of ways to get precise measurements. We turn to all sorts of rulers, gauges and the like, but, for my money, nothing beats the accuracy  of touch.

Think about it. If you want to see if something is flush, you don’t try to eyeball it or use a micrometer. No, you run your fingers over it. Your touch will let you know – immediately – if something is flush, raised or depressed below the surface. That feeling may change as the seasons change. If the wood swells in the warm, humid summer air, the relationship of the inlay may change as it shrinks in the dry winter air.

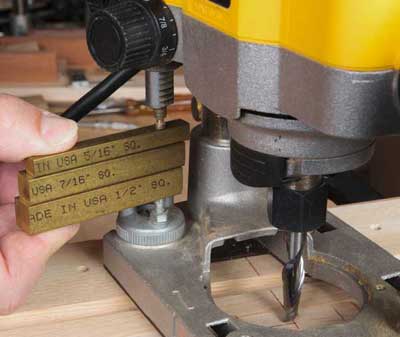
That’s why I rely on these babies… a set of set up blocks I picked up from Veritas. I have found these to be as handy as can be because I can use them to rely on my sense of touch to tell how things are set up with incredible accuracy. For instance, if I need a router bit to be a certain height above the router table, I’ll stack up the requisite number of set up blocks and then adjust the bit, feeling to see its relationship to see when things are on the money.

The set I have comes with bars of 1/16, 1/8, 1/4/ 1/2 and 3/4 of an inch. The set also contains a 1-2-3 block – a piece of aluminum which measures – ironically enough – 1 inch by 2 inches by 3 inches. Incredible!  So, by combining these babies, I can go from 1/16 of an inch to 4 and 11/16 of an inch, feeling for accuracy all the way.

I also rely on these suckers to set the rip fence on my table saw for accurate rips or to set plunge depth for routing. Sure, you can rely on the measuring tape that comes on the tool, but  when you want to make extra sure you nail the measurement, it’s always good to rely on at least two forms of measurement to enure that everything adds up.

The challenge, as you might imagine, is to keep the entire set together. After all, in the heat of battle, these little suckers tend to go flying. That’s why I like that this set comes in an organization case.

Just so they don’t get lost.  Or stolen by the Sith Lord and carted off to some space station fortress that needs to be destroyed.

Just sayin’.


A sharp idea

If you saw my link of the week this past Friday, you may have noticed that I am starting to express an interest in carving.

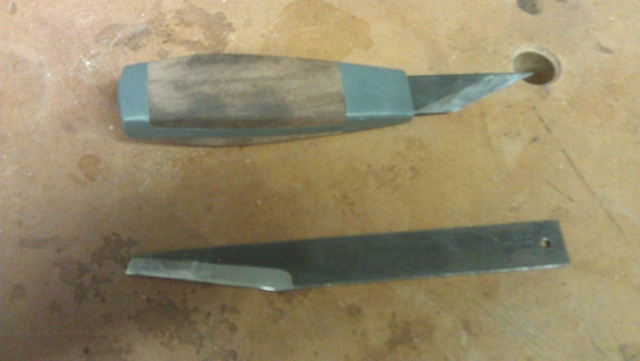
It’s not the first time the thought has crossed my mind. In fact, I have a few tools I bought but never actually used. This mill knife set is the prime offender.  I got interested in it when I saw Norm Abram carve a set of wooden signs on one of his shows. Using just a mill knife, he was able to carve the Serenity sign. Since the knife set didn’t cost too much, I figured, “what the heck?” and ordered it.

When it came in the mail, I took the knife out of its package and tried to carve a basic shape into an old scrap of 2 x 4.    It didn’t work. That’s when I discovered that no matter what kind of carving you would like to do, there’s one thing that you must have – sharp tools! I grabbed the mill knife set, tucked it into my tool chest and swore I would take it out again when I was ready to work with it again.

I think that was in 2007.

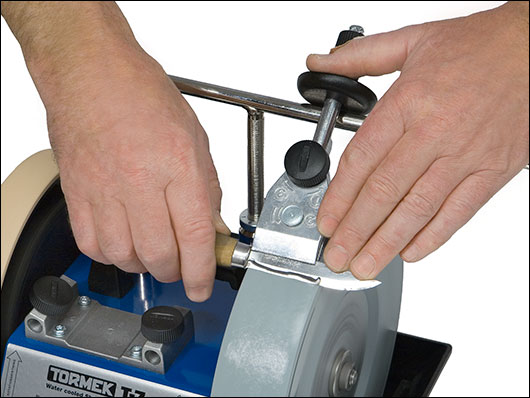
That’s it… time to move. The first thing, of course, is trying to get things nice and sharp. This was a natural for breaking out the Tormek and putting it up on the grinding wheel. The tool itself is rough and tumble, and it has a very tough blade with some coarse grinding marks, so they had to go first on the coarse setting. Once I got the angle down, I did the rough sharpening, then regraded the stone to the fine setting. This put a nice polish on the blade and made it sharp.

But, that’s not where I stopped. I need these suckers to be sharp enough to slice wood with minimal effort. If I have to force the knife, there’s a great chance I’m going to tear the wood fibers.  That’s why I charged the leather strop with some honing compound and ran the blade over that on both sides.

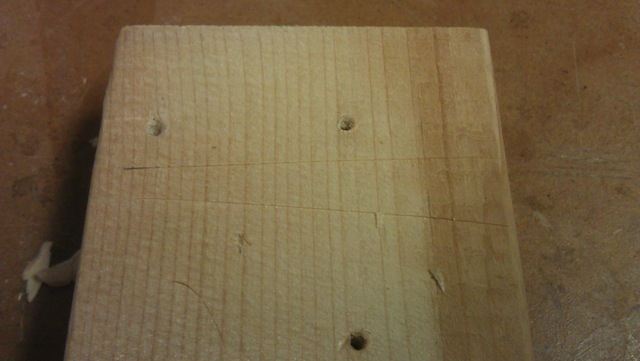
As you can see, the cuts across the grain are as clean as can be … sharp is the only way to go.

Taking a hint from Kari Hultman, rather than use this knife until it was dull as dirt, I kept my honing wheel charged and at the ready for regular stropping during the carving process. After all, it’s easier to maintain the edge rather than redo it from scratch.

The only thing I need now? Skill. But, that will come with time, right?


Carbide 101

I can remember my dad’s old table saw blades.  Those suckers were all high speed steel, with the teeth alternately set to clear a kerf in the wood. And, I can also recall my dad complaining that they were dull and had to be sharpened all the time.  What would have fixed this problem was maybe something that could stay harder and sharper between sharpenings …

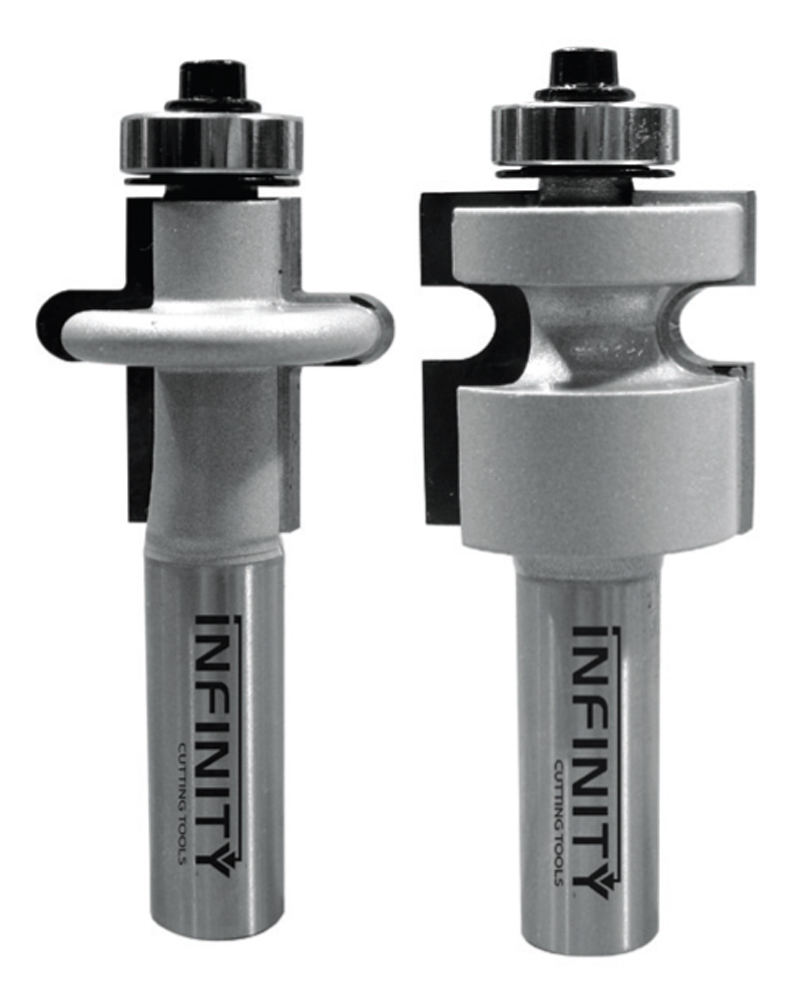
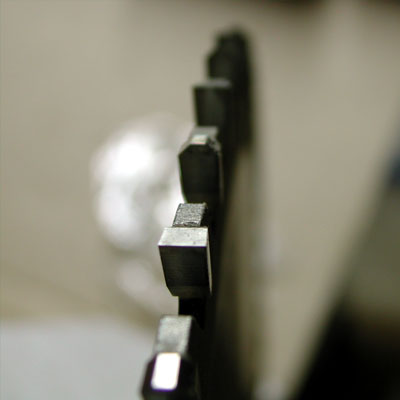
Enter carbide. These little bits of material are braised on to the teeth of these saws or the cutting edges of router bits help blades cut more cleanly while holding their cutting edge for a longer time. But, what the heck is carbide, and how can you tell what you are getting?

That’s the question I posed to David Venditto of Infinity Cutting Tools, and, boy, were my eyes about to be opened!

Carbide – more specifically tungsten carbide – is a combination of tungsten and carbon, arranged in  an elemental structure that resembles common grains of salt. The substance starts out as a powder, but then is cast in a process known as sintering with a metallic binder to form the individual teeth or cutting edges. Under a microscope, these carbide cutters resemble concrete with the carbide serving as the aggregate and the metallic binder serving as the cement holding everything together.

Carbide cutting edges are exceptionally hard, and can only be sharpened with diamonds or other similar abrasives. So hard, in fact, that the United States Army uses tungsten carbide in certain circumstances as a tank armor penetrator instead of depleted uranium in their anti-tank rounds.  That’s why you can’t simply use a water or oil stone to touch up your carbide cutting edges. The carbide would wear a track right through your stone. Diamond stones can be used to touch up an edge, but do so slowly… and just a few passes. For complex profiles  on router bits or for teeth on a table saw blade, you might want to look at sending the blade off for some professional sharpening.

While all carbide is made of the same stuff, there are many different grades of carbides out there, and grade selection can make or break how well your tools perform.  For instance, the C number of the carbide tells you just how hard the carbide matrix is.  Something like C2 carbide isn’t quite as hard as C3 or C4 carbide.  The harder stuff gives you a much better finish, but it’s far more brittle. So, while C2 may survive contact with a nail, C4 would be more likely to shatter.

The other think to keep in mind is that the size of the grain of the carbide which is sintered into the carbide cutter. The finer bits of carbide embedded in the matrix, the more finely the edges can be ground, giving a smoother cut. Larger, chunkier bits of carbide embedded into the matrix makes them less prone to handle impact with wood, so you could see the edges become dull faster.

Another thing to keep in mind – while all carbide is made of the same stuff, poor quality carbides will be sintered with a lot of bubbles in it. The more porous the carbide tips produced by using less expensive manufacturing processes fail to hold their sharp edges. That’s why premium carbide blades cost significantly more, but produce far superior results.

Just as important as carbide manufacturing is how the tips are attached to the blade or cutters. The process is known as brazing, in which a  blend of metals are placed on the steel of the blade or bit body, heated and then the carbide is attached. David told me that the formula they use for their blades and bits not only hold the cutters to the blade or bit, it also serves as a form of a shock buffer, helping the teeth better withstand the impact of cutting into wood.

While carbide is very tough stuff, there are some simple things you can do to help prolong the life of your saw blades and bits:

  • First, be careful when handling your blades and bits.  Because the carbide is just so hard, you can chip the teeth or cutters if you put them down roughly on a hard surface like your table saw top.
  • Keep your blades and bits clean.  Pitch build up on the blades can block the sharp cutting edges of the carbides, forcing you to push the work harder and increasing the heat generated by friction, leading to more burning.  You can use a number of different cleaning products, but stay away from caustic oven cleaners, which can affect the braising used to hold the teeth on the blade or bit.
  • And, finally, remember that carbide does dull. If you notice more friction and rougher cuts, or the edges of the cutters look chipped, bring the blade or bit in for a little TLC.  Your effort will be rewarded.

While my dad’s old circular saw blades without the carbide inserts aren’t going to get a lot of time in my shop, they are awesome for the obligatory saw blade shop clock.  That’s a pretty good use for them!


A mystery inside a riddle…

Pull up a chair and chat with a couple of woodworkers about – I dunno – table saws.  They’ll go on for hours yapping your ears off about horsepower, riving knives, accessories, dust collection, blade selection… the works.  How about routers? Holy smokes, where to even begin with routers?  Hand planes? You betcha – bevel up or down, Japanese or western, the best way to set the chip breaker…

How about this? Ever see woodworkers debate passionately about these?  Can you find lots of detailed books in the library about the care and feeding of them?  Probably not. An Internet search will leave you scratching your head, too.  There’ s not a lot out there.  That’s a shame, because the Stanley No. 80 cabinet scraper (and the ones made to look and work like it) is a handy tool to have around the shop for a lot of reasons. Unfortunately, your search for information may be shrouded in mystery… Heck, it took me years to figure out how to use mine!

Let’s talk for a minute about scraping. Hand scrapers, cabinet scrapers and scraper planes really don’t scrape, as it were. They work like extremely high-bevel plane irons, taking very fine shavings from the piece you are working on. What they create is known as a type III chip. This chip formation dealio was laid out shortly after World War II by a guy named Dr. Normal Franz to study the effects of cutting in industrial manufacturing . Scraping is a great way to get your project to an ultra-smooth surface – especially on highly figured wood. In fact, I like to break my scrapers out after I sand if I am looking to get the best possible finish for a project.

Many woodworkers love their card scrapers, but they can be a challenge to hold in the proper position at the proper angle for a long time.  The blade heats up, the edges can dig into your hands and your thumbs will be aching like nobody’s business.  Scraper planes are cool, but wow, some of them have big time price tags.


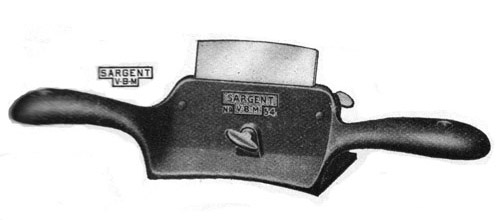
Then there are the cabinet scrapers.  These things are ubiquitous. You can find them at nearly every flea market, garage sale and online auction site. Why are they so plentiful?  Because they have always been – and still are – so darned handy!  These babies resemble large spokeshaves in many ways – a cast iron body with a pair of handles, a way to secure the scraper blade and a thumb screw to flex the blade to help it protrude from the bottom.

The challenge is that their blades aren’t like regular card scrapers. Those hand-held versions have square edges on all four sides and have a particular way of being prepared. The No. 80 is a different kind of animal. It’s scraper has two ends that have a 45 degree bevel on them. These bevels can both be sharpened and honed, and still need a burr turned on them to be effective.

For years, I have tried to get the one I bought online to work. Sometimes, I had moderate success. Other times, well, let’s just not go there.


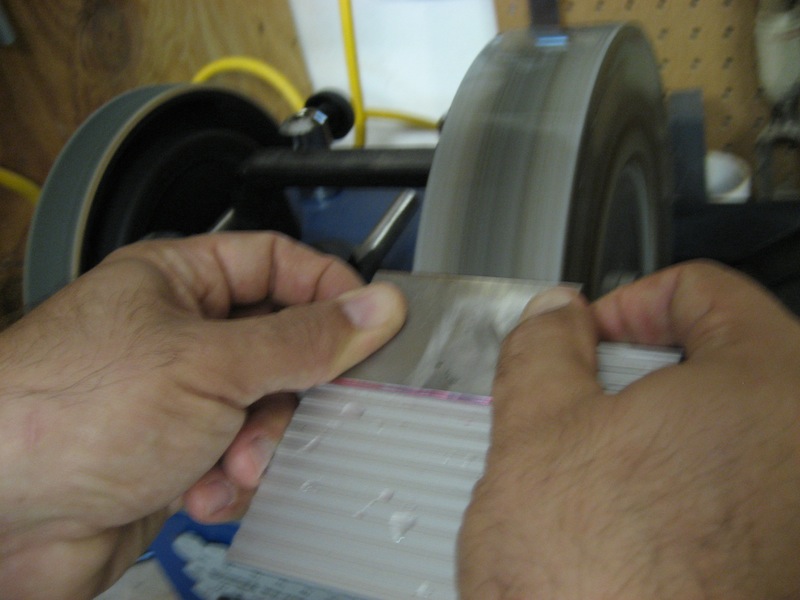
One thing I have discovered recently is that my Tormek does a pretty decent job getting the blade into shape.  I can use the tool platform on the guide bars, then adjust it so the blade kisses the stone at 45 degrees. By carefully moving the blade side to side, I quickly have a well ground bevel to begin my work with.  I will then flip the blade over so the flat side is down, and I’ll give it a quick pass on the strop side.

But, wait, aren’t I trying to create a burr to do the cutting?  I sure am, but I want to control how the burr turns myself.  The quick honing gets rid of the wire edge, giving me a nice, flat surface to start with. I also give the bevel a quick roll on the strop as well. Hey, sharp is sharp!

From there, it’s a simple matter to clamp the blade in my vise and, using a screwdriver as a burnisher, roll the burr about ten degrees toward the flat back of the blade.  When you insert the blade, do it from the base up. This protects the burr you have worked so hard to create. With the blade in place, set it on a flat surface and make sure the blade is contacting that surface as well. Tighten the screws that hold the blade in place, and then every so gently turn the thumb screw until it contacts the blade.  This is your fine adjustment.. the more you tighten it, the more the blade will protrude from the bottom, taking a heavier cut.

You can push or pull the scraper, depending on how comfortable you are with it. Just keep the thumbscrew on the back side of the scraper as you work and you’ll be golden. When you are making very thin shavings, you are in the butter zone. When the blade starts to make dust, it’s time to sharpen and turn a new burr.

Once you get this baby figured out, you’ll wonder why you have gone so long without having one in the first place!  Just think of the conversations you’ll have with your woodworking friends.

Patrick Leach of Superior Tool Works has a brief introduction to the No. 80 on his site.

Replacement blades for these classic tools can be found at Hock Tools, Lee Valley Tools and many other sites.

One of the best tutorials I have seen for this tool can be found at the Lee Valley Tools site.


Can you ever have too many?

One of my favorite movies of recent years was The King’s Speech. What an awesome film. It followed King George VI of Great Britain and told the story about his stammering problem and how he overcame it. The culmination of the movie was the memorable speech he delivered to his subjects on the occasion of the start of World War II, helping to steel the resolve of his island nation.

It’s a good thing he came to power, because his brother, Edward VIII was a real weenie. Rather than take the advice of his counselors, he chose to continue a relationship with American divorcee Wallis Simpson. She was less-than-reputable, allegedly having several suitors while dating the Prince of Wales, later the King of Great Britain. She also treated the future King George VI and his wife in a manner not befitting their status as members of the royal family.  Often seen as vain and self-centered, she was quoted as saying, “You can never bee too rich or too thin.”

This quote later became the rallying cry of fashionistas and super models strutting the latest designer clothes on the runways of Paris and Milan.
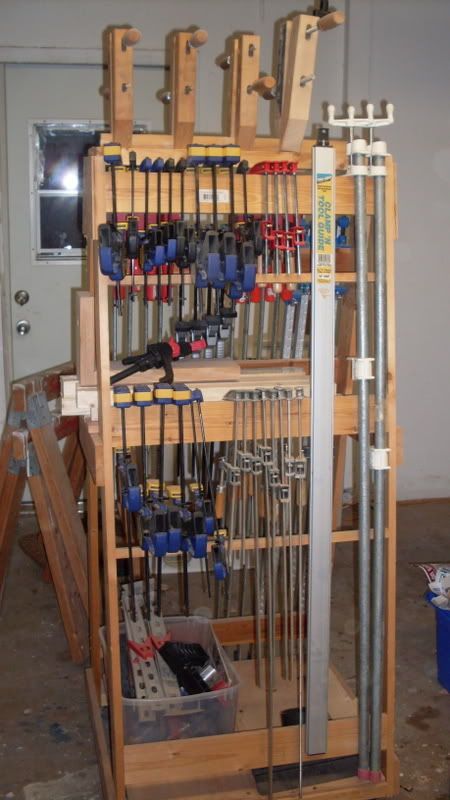
While I’m neither too rich or too thin, I do know of a similar expression in woodworking circles that seems just as applicable… you can never have too many clamps. Basically, you need the clamps in your collection to hold wood together while you glue, mark out joinery or otherwise work on a piece of wood. Clamps should be strong, hold well and easy to deploy when they are needed.

Since most woodworkers don’t have the financial wherewithal to afford every single clamp out there, we need to take the time to explore the different kinds of clamps that exist and which ones can create the basis of a workable collection. I’m sure that some of you will write me to ask why I didn’t include your favorite.  Just remember, we’re looking at clamp 101 here, so bear with me.  By the way, the awesome folks at Bessey Tools helped me with my research.  Nice folks.
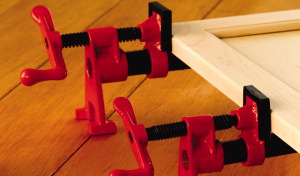
The pipe clamp:  What many people think about when they think clamps. They are exceptionally affordable – you buy the the head assembly and tail piece together, then attach them to a length of iron pipe you can find in any home improvement center. They are perfectly adequate for most clamping purposes, giving a lot of clamping power. You can even use a pipe coupling and attach two lengths of pipe together, making uber-long clamps.  The down side is they are heavy.  Black iron also reacts with water-based glues, staining your wood.
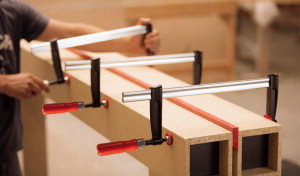
The F-style clamp: Also known as bar clamps, these  have a head that is fixed on one end of the clamp, and a sliding tail piece that allows you to make large adjustments. Once snugged up to the work piece, you apply pressure on the clamp by twisting the handle, extending the bottom screw of the jaw to apply pressure to the work piece. Much lighter than pipe clamps, they are more maneuverable. With their smaller clamp pads, aggressive tightening can leave crushed areas, so either watch how tightly you crank them down or use a caul to help distribute the load.
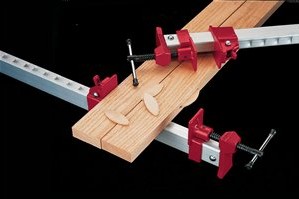
Aluminum bar clamps: Very similar in appearance to many other kinds of clamps, you’ll be able to recognize these things by their light weight. Made of aluminum rather than iron or steel, these babies are very easy to maneuver and give a great amount of clamping force. They also tend to resist bowing when pressure is applied because the aluminum is drawn into a rigid channel form. The best ones are made from aircraft quality aluminum, and they can cost a bit.
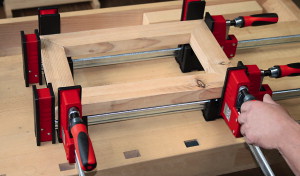
Parallel jaw clamps: These are the big daddies in the clamping world. Bessey’s K-Body clamps were some of the first out there, and they are the type I reach for most of the time. They have an enormous clamping area on both faces, and can be used in several different configurations. While they do cost more than your average pipe or bar clamp, they are solid performers and make clamping a whole lot easier.

Squeeze clamps: These one-handed clamps are as convenient and handy as the day is long.  For most of my small-project glue ups, I reach for these. Also, when I have to attach something like a stop block to my crosscut sled, I reach for these babies.  You can get a decent amount of pressure on them, and they release by tripping some mechanism that releases the clutch on the bar. I have seen these as long as 36 inches, but my collection seems to be mostly in the 6 to 12 inch range.

Spring clamps: Just like large clothes pins, these babies use spring pressure to hold the jaws shut. Again, these are light-pressure clamps and they have limited opening ranges, so don’t count on them for a lot of glue ups, but when you need to hold a molding in place or some other delicate job, they are more than up to the challenge.

Strap or band clamps: Not every project we build has 90 degree corners. Some projects have crazy angles (chairs come to mind)  or are round (or mostly round in the case of something like an octagon). In those cases, it may be tough to get a standard clamp to work right. That’s why these clamps are just so darned handy. Basically, they consist of a nylon strap, some mechanism to take up the slack and tighten the grip, and possible some corner guides.  These corner guides make gluing up miters very easy. You typically won’t use them every day, but you will enjoy the heck out of them when you need them.
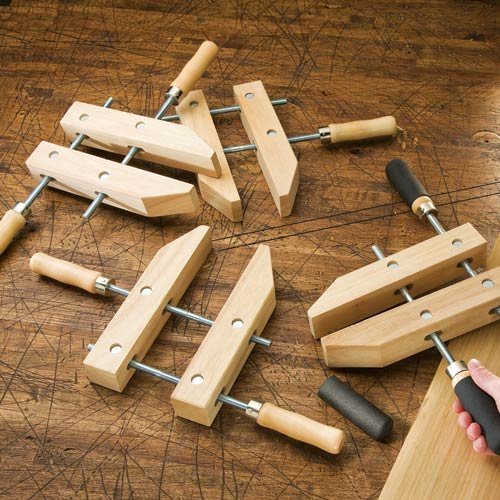
Handscrews: An old fashioned tool that still is a heavy hitter in most shops. They consist of two large wooden jaws joined by a pair of threaded screws with handles on the ends.  By adjusting the handles, you can get the hand screws to open to any angle you wish. You can also use these babies to grasp the back end of a long board when the other end is secured in a vise. This way, the board is supported while you edge plane. I have also used them as a holder for small pieces which need to be routed, giving my hands a little more distance for safety.

C Clamps: The old tried and true standby. These babies are made with a c-shaped frames and a threaded post that allows the clamp to be cranked into place. While they may seem small and even cute (a word my wife used to describe the first set I brought home), these clamps are capable of providing tremendous clamping power.  Again, either watch how much force you use when applying them or use a caul to protect your work.

Now, I’m sure that I have missed a bunch of specialty clamps out there… there’s no doubt about that. But, these are the kinds of clamps I rely on for the woodworking in my shop, and you will find many of them being put to use every day.  Hopefully, this is a starting point for you on your clamp acquisition adventure, and that you find it to be a good starting point on your way to having a King’s ransom of clamps … that STILL will never be enough.

The most powerful tool in your shop

Back when I was in middle school, my dad approached me one day. “Son,” he said, “when you go to shop class tomorrow, ask your shop teacher if he has any literature on raised panel doors.”

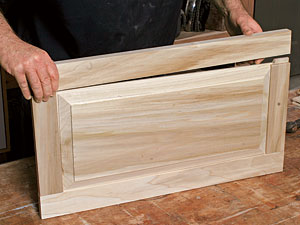
This struck me as funny because 1) I wondered why Shakespeare or Dickens would be writing about raised panel doors, and 2) How would the guy teaching me how to build a coat rack know how to build raised panel doors? Undeterred, I went to school the next day, worked through the hour long shop class and totally forgot to ask my shop teacher about how to build raised panel doors. Remember, that’s how the 13 year old brain works… I see that from time to time in my oldest son.

What my dad needed was something a little more – uhhh – available to him when he needed the information. Oh, sure, our library had books about woodworking, but its hours were limited, and my dad worked late. No, what he needed was… TA DA… the Internet.

It’s stunning to see how much the Internet has changed things since I first got into the craft back in 1999. Yes, there was an internet back then, and yes, there was information about woodworking on it. Compared to today, why, it was just a drop in the bucket.

If my dad had access to the internet today, he could not only found out about how to make raised panel doors, he could have also learned how to build a TV cabinet, stud a wall or  lay carpet– all tasks we tackled in the basement remodel at our house.

He could have even learned techniques to help his teenage son remember things.

The beauty about being a novice woodworker today is that there are thousands of sites out there, each available to teach you about the craft.  Are you interested in turning? Marquetry? Chair Making? Building kitchen cabinets? It’s all out there on the web.

Point is that it’s never been a better time to be a new woodworker. Your internet connection can put you in touch with tool manufacturers, hardwood suppliers, other woodworkers who want to lend a hand… it’s all out there.  Take advantage of the opportunities and get into the game.

And, to think, you don’t have to rely on a forgetful teen to remember to find information on how to do things.

For those of you who have Twitter accounts… check this out. Tonight at 9 p.m Eastern (that’s 2 a.m. on Thursday in Timbuktu), I’m going to be on WoodChat discussing Get Woodworking Week. If you would like to participate, sign in to your Twitter account, then follow this link to TweetChat. There, you can ask questions about why this week is happening and get further inspiration. Hope to see you there!

The links for Get Woodworking Week keep on coming… and, they are awesome!  Here are a few more…