Pull up a chair and chat with a couple of woodworkers about – I dunno – table saws. They’ll go on for hours yapping your ears off about horsepower, riving knives, accessories, dust collection, blade selection… the works. How about routers? Holy smokes, where to even begin with routers? Hand planes? You betcha – bevel up or down, Japanese or western, the best way to set the chip breaker…

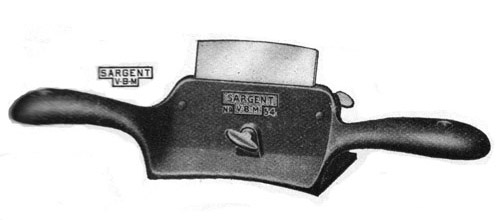
How about this? Ever see woodworkers debate passionately about these? Can you find lots of detailed books in the library about the care and feeding of them? Probably not. An Internet search will leave you scratching your head, too. There’ s not a lot out there. That’s a shame, because the Stanley No. 80 cabinet scraper (and the ones made to look and work like it) is a handy tool to have around the shop for a lot of reasons. Unfortunately, your search for information may be shrouded in mystery… Heck, it took me years to figure out how to use mine!
Let’s talk for a minute about scraping. Hand scrapers, cabinet scrapers and scraper planes really don’t scrape, as it were. They work like extremely high-bevel plane irons, taking very fine shavings from the piece you are working on. What they create is known as a type III chip. This chip formation dealio was laid out shortly after World War II by a guy named Dr. Normal Franz to study the effects of cutting in industrial manufacturing . Scraping is a great way to get your project to an ultra-smooth surface – especially on highly figured wood. In fact, I like to break my scrapers out after I sand if I am looking to get the best possible finish for a project.
Many woodworkers love their card scrapers, but they can be a challenge to hold in the proper position at the proper angle for a long time. The blade heats up, the edges can dig into your hands and your thumbs will be aching like nobody’s business. Scraper planes are cool, but wow, some of them have big time price tags.

Then there are the cabinet scrapers. These things are ubiquitous. You can find them at nearly every flea market, garage sale and online auction site. Why are they so plentiful? Because they have always been – and still are – so darned handy! These babies resemble large spokeshaves in many ways – a cast iron body with a pair of handles, a way to secure the scraper blade and a thumb screw to flex the blade to help it protrude from the bottom.
The challenge is that their blades aren’t like regular card scrapers. Those hand-held versions have square edges on all four sides and have a particular way of being prepared. The No. 80 is a different kind of animal. It’s scraper has two ends that have a 45 degree bevel on them. These bevels can both be sharpened and honed, and still need a burr turned on them to be effective.
For years, I have tried to get the one I bought online to work. Sometimes, I had moderate success. Other times, well, let’s just not go there.

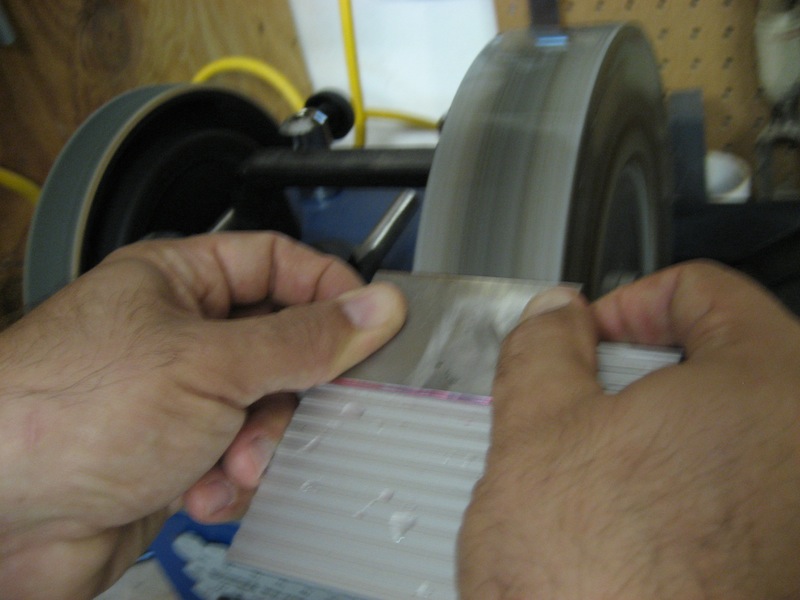
One thing I have discovered recently is that my Tormek does a pretty decent job getting the blade into shape. I can use the tool platform on the guide bars, then adjust it so the blade kisses the stone at 45 degrees. By carefully moving the blade side to side, I quickly have a well ground bevel to begin my work with. I will then flip the blade over so the flat side is down, and I’ll give it a quick pass on the strop side.
But, wait, aren’t I trying to create a burr to do the cutting? I sure am, but I want to control how the burr turns myself. The quick honing gets rid of the wire edge, giving me a nice, flat surface to start with. I also give the bevel a quick roll on the strop as well. Hey, sharp is sharp!
From there, it’s a simple matter to clamp the blade in my vise and, using a screwdriver as a burnisher, roll the burr about ten degrees toward the flat back of the blade. When you insert the blade, do it from the base up. This protects the burr you have worked so hard to create. With the blade in place, set it on a flat surface and make sure the blade is contacting that surface as well. Tighten the screws that hold the blade in place, and then every so gently turn the thumb screw until it contacts the blade. This is your fine adjustment.. the more you tighten it, the more the blade will protrude from the bottom, taking a heavier cut.
You can push or pull the scraper, depending on how comfortable you are with it. Just keep the thumbscrew on the back side of the scraper as you work and you’ll be golden. When you are making very thin shavings, you are in the butter zone. When the blade starts to make dust, it’s time to sharpen and turn a new burr.
Once you get this baby figured out, you’ll wonder why you have gone so long without having one in the first place! Just think of the conversations you’ll have with your woodworking friends.
Patrick Leach of Superior Tool Works has a brief introduction to the No. 80 on his site.
Replacement blades for these classic tools can be found at Hock Tools, Lee Valley Tools and many other sites.
One of the best tutorials I have seen for this tool can be found at the Lee Valley Tools site.

