All posts by Tom

I'm the guy who writes the blog...

Link of the week

The Wood Ninja


Deep down in Louisiana resides one of the most silent but dusty members of a shadowy strike team.  His name is Kenny Comeaux, but he goes by the sobriquet the Wood Ninja.

Kenny Comeaux working in his shop

Kenny some incredible stuff from his shop. As with many other woodworkers, he struggles to balance time between his family and his woodworking. He’s getting ready to build a new workbench for his shop, and he has many valuable insights on tool selection and workshop design.

Oh, and he’s a big time Louisiana State University Tigers fan… so, I’m guessing he must be practicing Tiger-Style Ninja techniques.

Laissez les bon temps rouller… Comeaux-san!

Another blog, Tom?

In case you hadn’t figured it out yet, I run a woodworking blog called Tom’s Workbench.  Been at it for a few years, and put up a few posts…

Yeah. And the Grand Canyon is just a hole in the ground.

The honorable John Nance Garner

You would think that would be plenty to keep me busy, but not so.  You see, last month, I was installed as the St. Petersburg Woodcrafers Guild Vice President. Yes, this is the same position that the honorable John Nance Garner said isn’t worth a bucket of warm spit. But, that’s beside the point.

One of my duties with this position is to serve as the external affairs officer for the guild. Yes, that’s an emergency management term, but stick with me here. What this means is that I am in charge of the guild’s website and social media presence.

The current guild website

One of the first jobs I was tasked with was a redesign of the current guild website. The current guild website needs some help. First, it’s not the easiest of things to update, since it has to be done in HTML editing, and only one person has access to it.  This one person has done a great job, but recent job commitments have limited the amount of time he can spend on the site.

But, hey, that’s OK. The tough job of gathering the material for the site has already been done. This is good. What I wanted was a platform where I could work easily with the content and have most of the functions of the site done automatically. It also needed to be easy to put graphics, videos, links and the like into. I had heard that last year, the guild had considered creating a site on WordPress, the same platform that I run my blog.

The updated guild site

So, with a little blogging hocus pocus, I was able to bring in some graphics and the content from the old site and voila – our new site. Please let me know what can be improved!

The guild's Facebook site

Another thing I was able to do was start up a Facebook page for the guild. I’m hoping that we’ll be able to do enough cool stuff to make a visit there worthwhile.

What’s next? I dunno… but I can tell you that I’m looking forward to it. Even though it’s a second blog…


Get Woodworking Week 2013

Last year, it was just a simple idea. With shop classes taken out of schools and the profusion of uber-cheap particleboard furniture designed to be tossed in a few years, the number of woodworkers out there is shrinking. Why not hold an event that encourages potential woodworkers to get off their butts and take the leap?

That’s exactly what we did last February during Get Woodworking Week. During this weeklong event in 2012, nearly 50 articles were written by woodworking bloggers around the country –  and the world. And, it was awesome.

Get Woodworking Week 2013

Well, this year, we’re doing it again. Get Woodworking Week is scheduled for February 3 – 9, and I am looking forward to this. This year, I am  looking forward to the articles on woodworking blogs. I am looking forward to getting additional promotional support from some big names in woodworking. I am looking forward to trying to line up a few goodies for budding woodworkers to win so they can help develop their skills.

And, most importantly, I am looking forward to nudging a few people who may be sitting on the fence to try their hand at our interesting, ever challenging and totally rewarding craft. After all, if we don’t reach out to future woodworkers, who will?

Stay tuned as we get ready to get this event underway!


Quick Poll

We survived the Mayan apocalypse. The Summer Olympics. Gangnam Style.

Yeah, 2012 posed a bunch of challenges. But, now that’s in the past, and we are now in the first weekend of the great new year of 2013. A year of new possibilities – and new resolutions.

make those resolutions, or not....

So, this week’s poll is a simple one. Have you made any new year’s resolutions when it comes to woodworking?


Link of the week

Mansfield Fine Furniture

Just outside of Boston, Massachusetts, in a hole in the ground, works a talented woodworker. Not a nasty, dirty, wet hole, filled with the ends of worms and an oozy smell, nor yet a dry, bare sandy hole with nothing in it to cut wood or finish projects: it was the workshop of Mansfield Fine Furniture, and that means comfort.

Nick, surrounded by a few of his favorite things

Sorry, I just saw the Hobbit, and couldn’t resist. Actually, in a comfortable, custom-built basement workshop works one Nick Roulleau, and the stuff he’s turning out in his shop is most impressive.

In his shop, you will find all manner of impressive custom woodworking – from the ornate to the terribly mundane (like the kitchen he’s currently building for his home). One thing you will find in all of his projects though – is a careful attention to detail and an eye for design.

Swing on by and say hi, but do me a favor, and don’t call him Rick… Just sayin’!


Bandsawn box beginnings

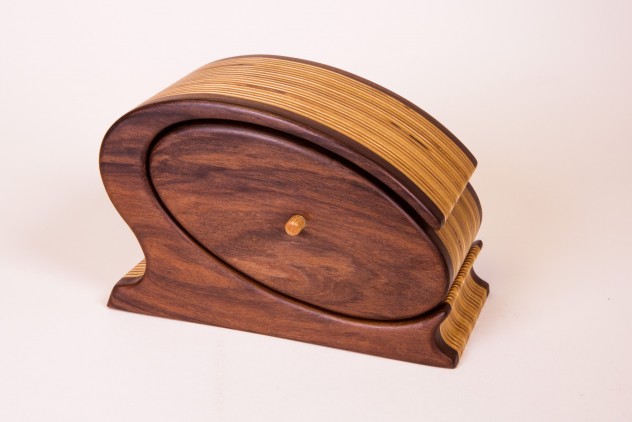
Now that we are in 2013, it’s only fitting we leap into a new project for the new year.

At the last Woodworking in America Conference, I met up with David Picciuto – a.k.a. the Drunken Woodworker. (Relax, folks, that’s just his title. He assured us that he never drinks and goes into the shop, and he told us that he has already had several folks comment on the name). He was showing pictures of a few bandsawn boxes that he had made of a strange – yet ubiquitous – material – plywood. Highly intrigued, I asked David if I could go back to my shop and make one for my job’s annual art contest. He told me to go knock myself out. Thanks, dude!

David's box with Rosewood and plywood

Anyway, the process is pretty simple. First, get yourself a couple of pieces of leftover cabinet grade hardwood plywood you have in your shop…

“Oh, but Tom, I only use superior quality hardwoods in my work…”  Yeah, right. Poke around for a few minutes.. I’ll be waiting…

Anyway, you can draw up a design similar to the ones David uses, or you can go do your own thing. That’s cool with me. Get the size of the box you want to build, then cut and face glue appropriately sized pieces of plywood together. You can build it however large you would like.

The items for the band sawn box

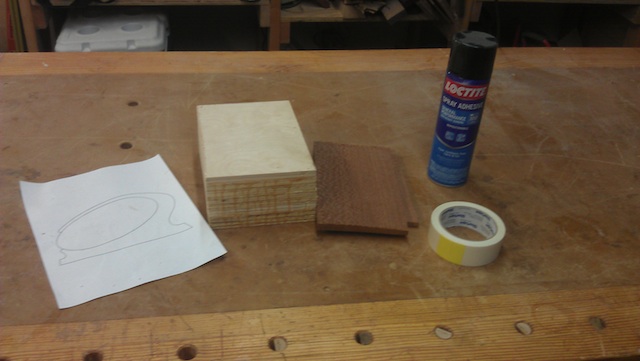
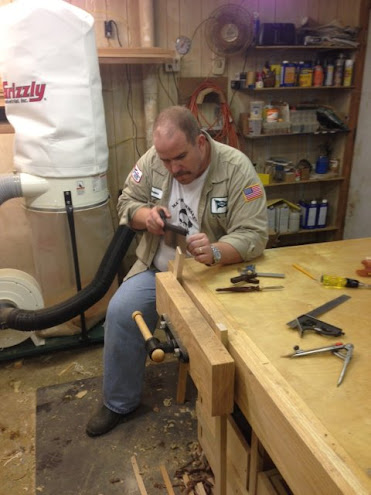
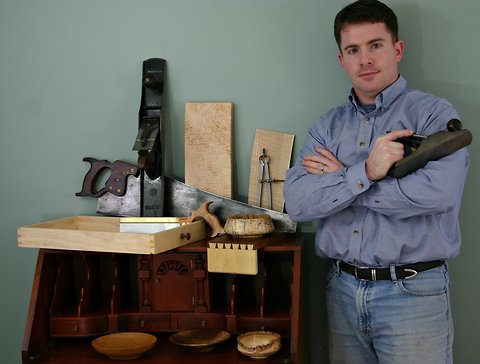
As you can see from the contents of my benchtop, I have the makings for a box. The glued up stack, two pieces of decorative hardwood (leopardwood in this case), the plan, a can of spray adhesive to attach the plan to the top of the stack, and some double stick carpet tape. That’s the secret ingredient, because with it, you can temporarily attach the pieces so they can all be cut at the same time, yet get them apart to do other work.

Cutting the box at the band saw

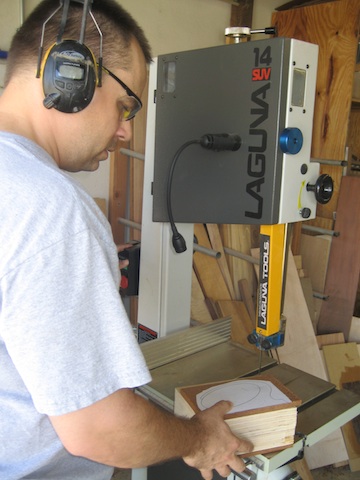
I carpet-taped the pieces to the plywood stack, and spray adhered the pattern to the top of the sandwich. Once that was done, it was time to move on to the cuts. I put the 1/4″ blade on my Laguna and fired it up. While the lines in the plan weren’t that tight, I took my time and rough cut large chunks of the waste off first. This way, I could work with a smaller piece, making it easier to work with. I got close to the line, figuring I was going to sand to it later. The really careful cuts were going to come when I had to get inside the piece.

Once I took it off the band saw, I did give it a good once over at my combo belt/spindle sander. That thing works great!

Cut to the line carefully

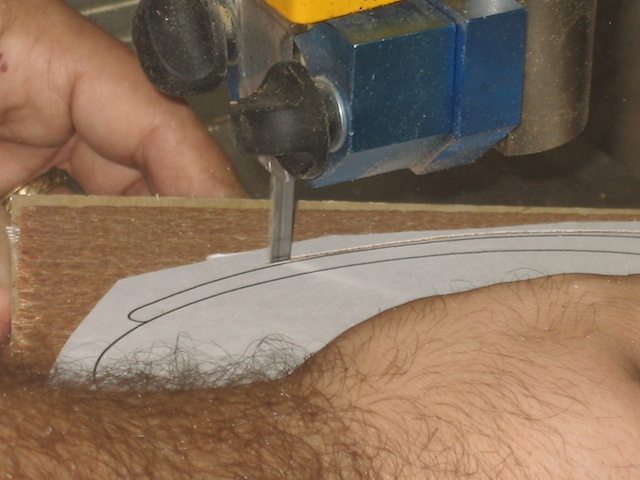
When it came to the inside, I had to remove the drawer slug from the big stack. But, first things first, I had to pull the back side off the box. I wanted to use the leopardwood back as a stop for the drawer, and there’s only one way to do that… pull it off before you cut.  I threw the remainder of the box on the band saw, carefully lowering the guides to get them closer to the work. This time, I took great care to split the line with the blade, pushing ever so slowly to ensure a more accurate cut. Once I made it all away around the inside of the cut out, I pulled the slug from the middle.  Ta da!  Not bad for a trained shop monkey…

The drawer slug

From there, I had to cut out the inside of the box to make the drawer. After all, what good is a bandsawn box without a working drawer?  So, I took the leopardwood face off the drawer slug, and proceeded to cut out he middle of the drawer. Here’s where I ran into a little trouble… I had glued up the last piece of plywood, not realizing that I was going to have to keep that loose so it could be pulled off to become the back of the drawer. Meh, I found a small piece of the same plywood, scribed and cut it to fit the inside of the box, then glued it in place. If I’m not happy with it, I might just flock the inside and be done with it.IMAG0796

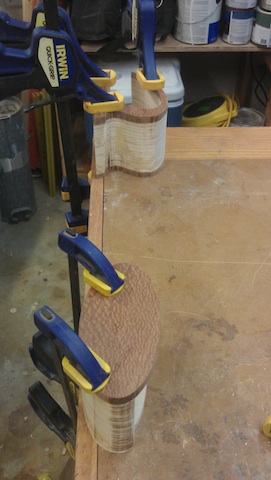
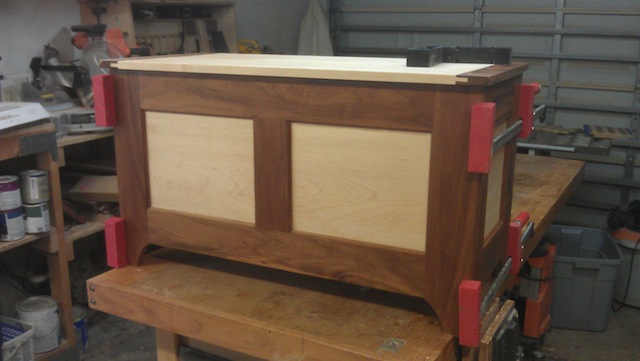
Now, before I could give this the final sanding, everything had to be glued back together in the right order. This way, I could ensure that everything was going to come together perfectly. So, I smeared glue on the meeting faces, and clamped everything down to my bench. That’s good enough for one day’s work. Next up, some sanding, maybe some flocking and a finish… pretty easy when you think about it!


Stuff I’ve Built: Lauren’s hope chest

As I had done for my oldest niece Carolina, my niece Lauren turned 16 last month, and I built her a hope chest for her birthday.

Well, here it is, stood up for viewing by the happy recipient. And, yes, I’m pretty darned happy with how it came out.

The hope chest assembled on the bench

The frame is made of Mayan walnut (I told Lauren that it was entirely appropriate to use Mayan walnut the year of the supposed end of the world based on the Mayan calendar) and the panels are made of maple. The lid has breadboard edges with through tongues to help keep the lid flat.

Since she lives in Maryland, and I’m in Florida, I had to build this hope chest so it could be shipped flat and assembled at her house. To make this easier for my brother-in-law, I decided to go with a frame and panel construction. The corners are assembled with a tongue and dado joint, requiring just a pair of short clamps to pull the front and back together for the assembly.

The corner joint

In order to make things easier for my brother-in-law, I took the time to label each of the corners with blue painters tape so he won’t get confused when the chest pieces arrive at his house. I also loaned him my assembly squares so he could ensure the assembly wouldn’t get all kittywumpus on him.

The panels are labeled for ease of assembly.

Now, for the most important part – did the client enjoy the final piece?  Hmmm… Let’s check with her and see what she thinks?

The happy client and the trained shop monkey

I dunno, that looks promising!

Now, just to get this broken down and off to the pack and ship store to make sure it gets there safely.

Whew, the bench is now clear and ready for 2013.