
 If you can remember the big Tom Hanks’ 1994 hit movie Forrest Gump, no doubt you will recall one of the movie’s most repeated lines:
Life is like a box of chocolates. You never know what you are gonna get.
If you have ever received a box of chocolate candies as a gift and had to negotiate it without the help of a map on the lid (those are for cheaters!), the first bite into a piece pulled from the box is always a surprise. Will it be one of the tasty caramels, or will it be something you just don’t like?
In many ways, when a sawyer slices into a log of a maple, cherry, walnut, ash, elm or hundreds of other species, it is a very similar experience. More often than not, you get exactly what you were after – beautiful boards of exceptional character.
But, every so often, there’s a big surprise.
A very pleasant one at that.
![]() Sometimes the boards will display a wavy pattern known as figure. This is not the same as the wood’s grain. According to Eric Poirier of Bell Forest Products, an online wood supplier that specializes in figured lumber, this distinction is very important. “Grain and figure are often confused with one another. The easiest way to differentiate between them is to understand that grain occurs in every board because it is how the tree actually grows. Figure occurs independent of the grain and is actually a defect, which happens to be very rare and sought after.”
Sometimes the boards will display a wavy pattern known as figure. This is not the same as the wood’s grain. According to Eric Poirier of Bell Forest Products, an online wood supplier that specializes in figured lumber, this distinction is very important. “Grain and figure are often confused with one another. The easiest way to differentiate between them is to understand that grain occurs in every board because it is how the tree actually grows. Figure occurs independent of the grain and is actually a defect, which happens to be very rare and sought after.”
Of course, there is an exception to every rule. A ray flake appearance in white or red oaks is actually part of the grain, but it is considered figure by the National Hardwood Lumber Association (NHLA). Go figure.
 Figure can occur nearly anywhere in a tree. According to Eric, “It varies from tree to tree and is different with the different types of figure. In bird’s eye, the whole log might be full of bird’s eye or just part of one side of the log might have it. Sometimes the bird’s eye can even start and stop at different points in the life of the tree. There may be some sort of defect in the log that also causes the figure to start or stop at a certain point in the log.”
While figured lumber is beautiful, it is considerably more difficult to work with than non-figured lumber. Curly, tiger, fiddle back, pecky, burl or other beautifully figured woods tend to tear out more, and demand exceptionally sharp tools and care in their milling.
![]() The number and variety of species exhibiting figure can be tremendous. Another great way to add these dramatic woods to a project is through veneering. Joe Goreleski, Jr. of VeneerSupplies.com, has seen a tremendous variety of figured veneers move through of his shop. “To the best of my knowledge, most domestic and exotic woods have the ability to display each type of figure. In my stock, I have some truly rare combinations of species and figure that some would think do not exist.” How rare? Think of such odd specimens as bird’s eye walnut and bubinga burl.
The number and variety of species exhibiting figure can be tremendous. Another great way to add these dramatic woods to a project is through veneering. Joe Goreleski, Jr. of VeneerSupplies.com, has seen a tremendous variety of figured veneers move through of his shop. “To the best of my knowledge, most domestic and exotic woods have the ability to display each type of figure. In my stock, I have some truly rare combinations of species and figure that some would think do not exist.” How rare? Think of such odd specimens as bird’s eye walnut and bubinga burl.
 While working with figured hardwoods can be a challenge, Joe says going the figured veneer route takes some practice, but is not very different than working with regular unfigured veneers. According to Joe, “some burls may require grain filler, but the basic veneering skills should be able to get you through with no problems.”
Looking at an unfishished figured board or sheet of veneer may not be impressive. However, once a finish goes on the piece, you’ll immediately understand why woodworkers search out figured boards. These imperfections in the log translate into lustrous whorls, stripes and other features that appear nearly three-dimensional under an oil-based finish.
One issue many woodworkers have during finishing is that boards tending to be splotchy are even more difficult to get finished perfectly. A sanding sealer of a one pound cut of dewaxed shellac applied and sanded down with some 320 grit sandpaper helps to control the blotchiness. Again, these rare specimens require care in all stages of woodworking.
While both Eric and Joe get some incredible specimens through their shops, each has his own preference for his favorite.
Eric leans toward curly maples. “I love the way that the figure runs from the flat-sawn to the quarter-sawn grain. I use it whenever I can in different projects around the house. It is my favorite wood to use because I love seeing the ‘tiger’ stripes when the sunlight hits it just right!”
Joe is more of a tamo ash and walnut burl kinda guy. “But, I have not yet found a figured veneer that I didn’t like.”
Momma always said to keep your options open…
 When I turned 14, my dad had a surprise for me.
 No one is going to argue with the fact that sharp tools are a pleasure to use. They are safer, cut more cleanly and make your shop tasks a whole lot more pleasant. Dull tools will ruin more boards – and hurt more woodworkers – than we can ever fully account for.
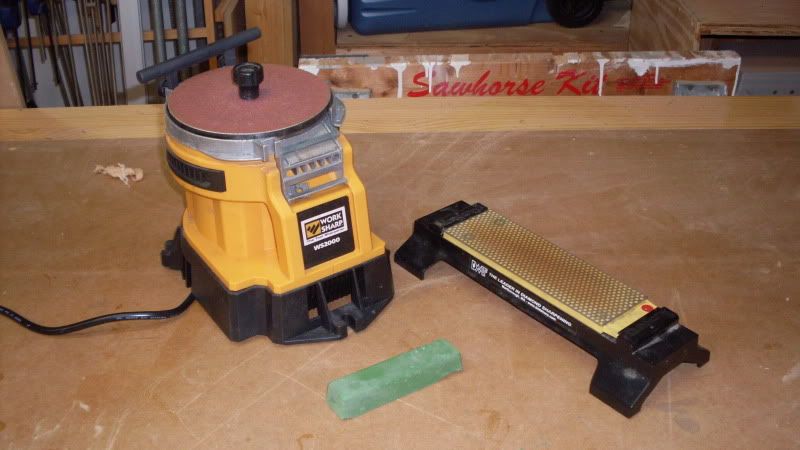 When I buy an old plane or chisel, I will regrind the bevel on my Work Sharp 2000, and then either use the Scary Sharp method (sandpaper glued to a piece of float glass) or the DMT Diamond Stone my wife gave me a few birthdays ago. I’ve gotten so I can regrind and hone an old chisel in about five minutes, and have it cutting easily through wood. It takes even less time to hone blades that just need some touching up after a project.
 It’s any woodworker’s worst nightmare – an injury while working in the shop. Whether a kickback from a table saw, a slip of a chisel, a router bit gone wild or something much worse, a woodworking injury can make you sit up and take notice.
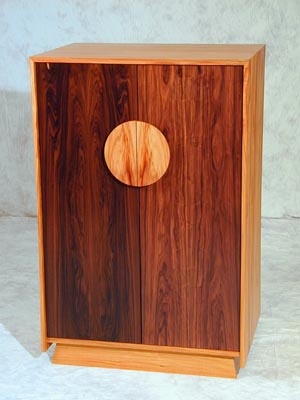 In his Bellevue, Washington shop, Peter Loh uses beautiful boards to create unique works of functional art.
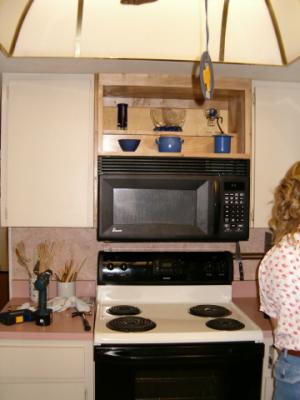 My neighbor Chris is a handy guy. He’s been a sushi chef, has rebuilt carburetors and today cleans rugs for the local school system. He’s a hustler, never allowing grass to grow under his feet. So, it came as no surprise that he was installing a new range in his home for his wife as a Mother’s Day gift.
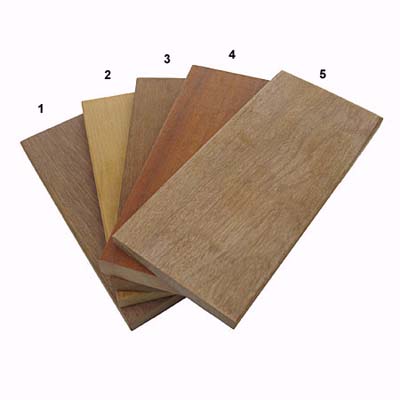 While local hardwoods can be a pleasure to work with and can leave you with a gorgeous project, tropical hardwoods can be eye-poppingly beautiful. Whether the vividly colored bloodwood or purpleheart from South America, the highly desirable bubinga or wenge from Africa or the hard wearing teak or rosewood from Asia, these boards from the planet’s tropical areas can be a woodworker’s dream, giving your projects a style all their own.