So, at the last meeting of the St. Petersburg Woodcrafters Guild, I was asked to do a quick presentation about different types of glues that woodworkers use. Not only do I like glue, I also like to talk. So, this was an easy one for me to do!
Once I found out I was doing this, I asked for a little bit of help from my friends over at Gorilla Glue. They sent over a few sample packs of their product – one to use for the demo, the other to give away. So, I packed my stuff this past Tuesday, grabbed the iPad to record the happenings, and, well, let’s roll the video!
The one thing about writing a blog for so long is that year after year, you start to repeat things on an annual basis. And, when it comes to Memorial Day here in the states, it’s a holiday that you can quickly run out of ideas for – from a woodworking angle.
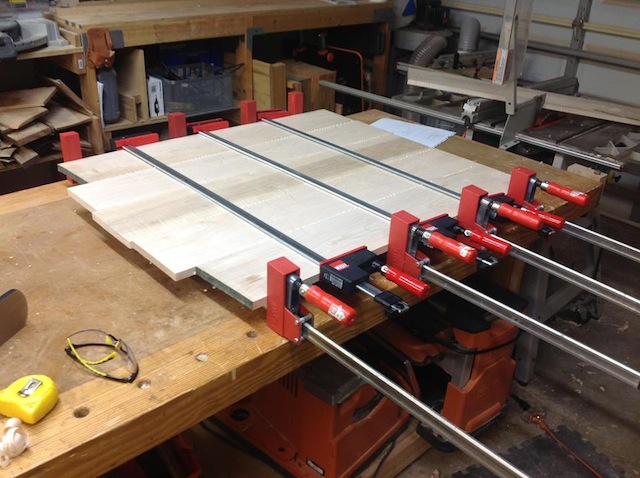
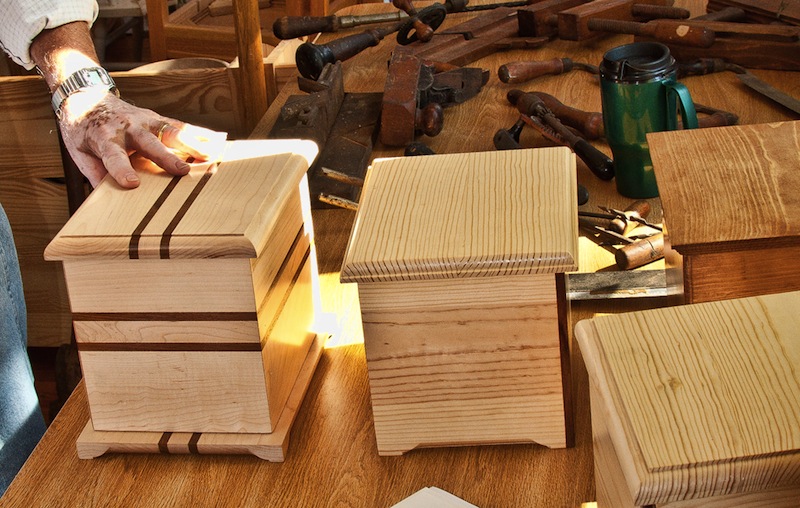
Burial urns built by the St. Petersburg Woodcrafters Guild
I do have to confess, however, that I failed to research something for the article in honor of Memorial Day 2014. I’m not happy with myself – I should have thought ahead a little more. But, I am glad that I was able to tackle a project that allowed me to properly hang my American flag outside today to commemorate the holiday.
And, this evening, the city where I live is having a ceremony at their Military Court of Honor. It’s something I want my family to see.
Before I sign off, I want to thank our veterans and the families of those brave men and women who gave their lives in defense of our country.
When a veteran passes, one of the most important things that is presented to the family is a folded American flag. This is one of the most solemn parts of the ceremony, and one of the most significant for the family.
Whether you know someone who has received a flag from this ceremony, or another flag for a significant event, a well-built flag display case is a suitable place to display one.
This plan, offered by Wood Magazine, simplifies the construction of the flag case, doing away with the narrow 22.5 degree angles at the bottom corners, making building one a snap.
With Memorial Day right around the corner, it’s a good idea to feature a group that does a lot of great work for disabled veterans through woodworking. That’s exactly what happens at the Patriot Woodworker.
The Patriot Woodworker was founded on the principals of providing the woodworking arts and crafts world a place to join and share their love of woodworking and the tools and machinery related to the industry.Their members are encouraged to mentor, learn and teach others woodworking and to participate in sharing projects and personal experiences in their own life.
The reason The Patriot Woodworker exists is to provide fund raising for veterans organizations and to support American and Canadian Veterans through community outreach, volunteerism, and to create awareness of the service and sacrifice our men and women have performed in the name of these nations.
Here in the Tampa Bay area, we are known for a lot of stuff. The beautiful sandy beaches. The glorious sunshine. Water recreation like fishing, swimming and boating.
Oh, and we’re apparently also well known for our ‘adult dancing’ establishments. In fact, not too far from where the Tampa Bay Buccaneers play football (On Dale Mabry Highway), there are a number of – ahem – ‘reknowned’ businesses. Namely, Mons Venus and 2001. Yes, that’s the picture of 2001’s building, and I’m willing to bet they don’t screen the Kubrick classic there.
But, that’s not the kind of stripper I am referring to in this post. There are some times when you have to cut a number of narrow strips of wood to build a project. Maybe you want to build a curved lamination. Maybe you are creating strips of wood for stringing. If you turn to your table saw, your first inclination to cut these thin strips might be to push the rip fence close to the blade, turn the saw on and start pushing.
Not so fast. This can be a very dangerous act. First of all, that small strip of wood is pretty much assured get bound between the rising teeth of the table saw blade and the fence and be thrown back at you. And, just how narrow of a push block are you planning on using to maintain control over that thin strip?
It is a much safer option to rip the piece from the outside of the board – away from the rip fence – so the piece will fall free after the cut is complete. But, how do ensure that all of the strips are the same thickness?
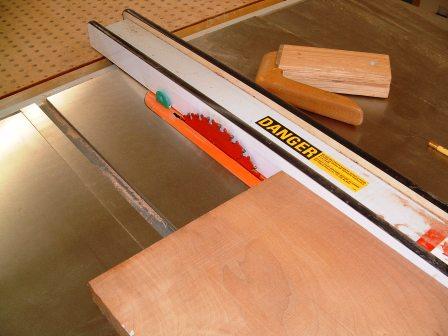
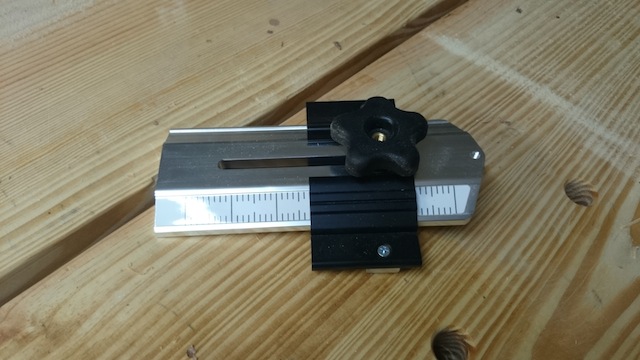
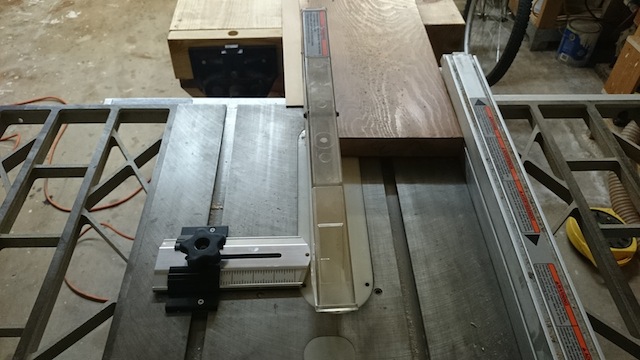
That’s where I got some help from my friends over at Infinity Cutting Tools. I picked up one of their thin ripping guides, and it has helped make what could be a challenging job a piece of cake.
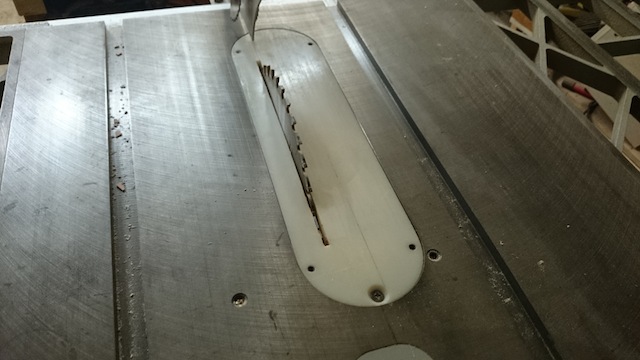
But,before you use it, it’s always best to switch to a zero clearance insert for your table saws. This jig allows you to rip some VERY narrow pieces, so you want to improve the odds that you will get a clean cut that won’t get sucked into the table saw cabinet.
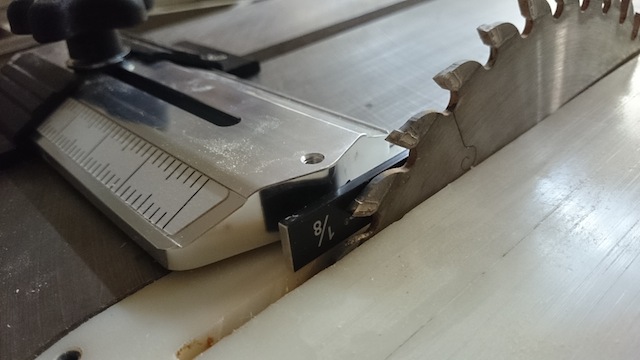
With the jig set in the miter slot, you can use a spacer to measure the clearance between the end bearing and the teeth of the blade. By using a feeler gauge, I was able to set the gap exactly at 1/8″… a nice thickness for bending.
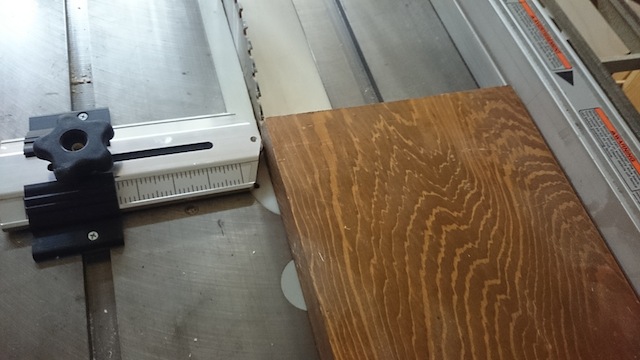
Once the gap was set, I slid the jig until the bearing was about one inch behind the front teeth of the blade. Using the rip fence, I captured the board between the roller bearing and the fence. With this done, it was a simple matter to fire up the dust collector and start cutting.
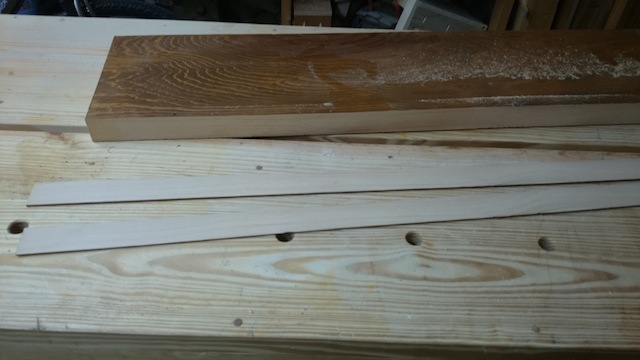
With the first pass done, you can see the strip lying to the outfeed part of the table, with the board under plenty of control pushed past the blade. To set for the next cut, I retrieved the board, reset the fence until the outside edge contacted the bearing, and repeated.
With this jig, I was able to make identical, repeatable cuts in the board, which will come in handy the next time I need to cut a series of strips.
After all, I’d much rather be working in the shop than cruising Dale Mabry. Besides…
I love my drill press set up. Since I put that table on it and mounted it on the rolling tool stand, it has been a real solid performer. Sure, it could be more powerful or have a larger throw, but for the number of times I use it, it’s not that bad.
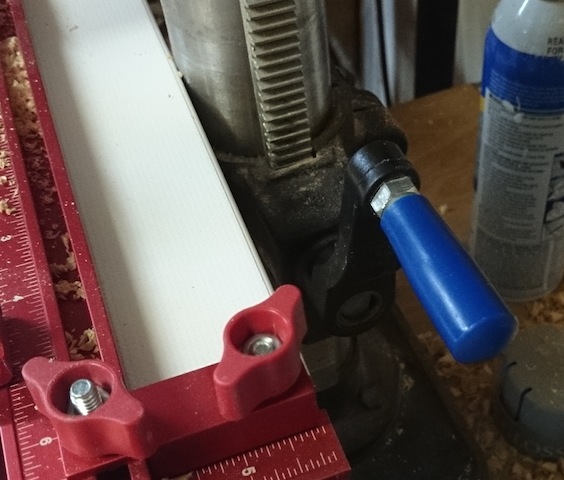
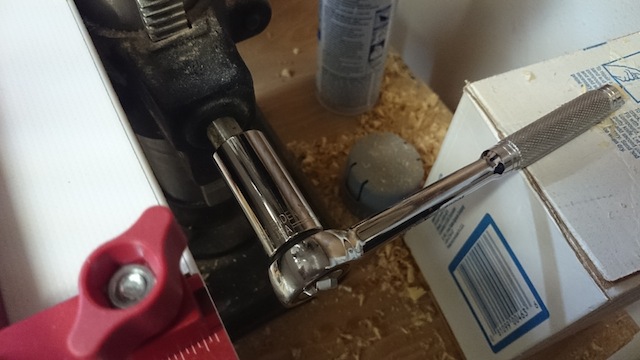
The only problem with it is this little bit of joy down behind the table. It’s the crank that raises or lowers the table. When the drill press had only the small metal table mounted on it, this was perfectly adequate. It would allow me to move the table up and down to adjust the piece in relation to the drill.
But, with the new table mounted to the press, it has become a real knuckle banger in the back. The crank handle barely clears the table, making this simple chore a real pain in the posterior. Which means that I am less likely to use the feature, which means I’m really not getting the most out of my tool. I needed another solution.
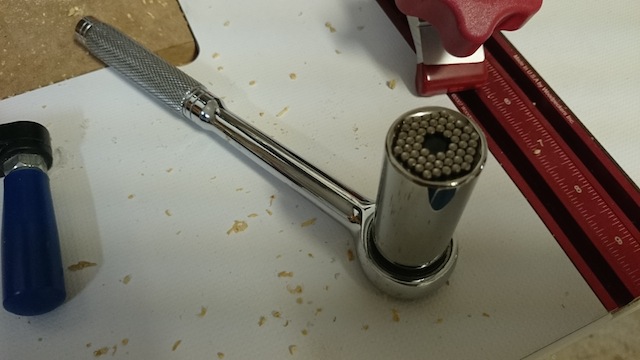
And, I found it at an automotive store. It is known as the Gator Grip, and it had really helped me solve this problem. Basically, it’s a ratchet socket that is filled with spring-loaded steel pins, allowing the socket to grip nearly any shape bolt or nut head and turn it.
The piece that the handle was mounted to is a steel dowel with one flattened side, and the handle has a set screw that fits onto the flat side of the dowel. So, the Gator Grip is able to fit onto the dowel and give me the control I need to raise or lower the table. With the ratcheting action, the table’s location is no longer a concern.
Now, I can adjust the table however I see fit, and it takes only a few seconds to outfit the ratchet properly. With the tool only costing about $10, it was a pretty cheap fix for a challenging problem.
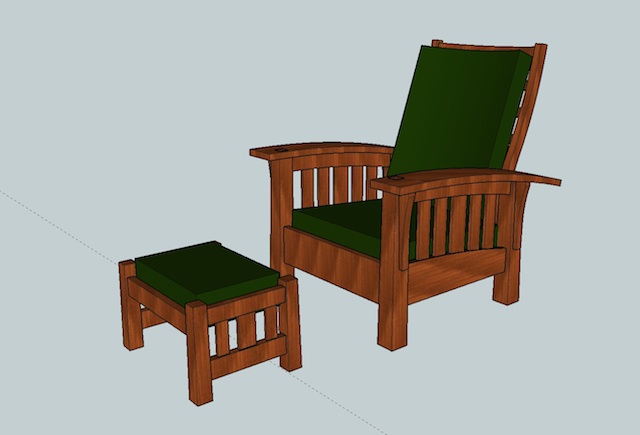
This week’s plan comes to us from the Capo di Tutti Capi of woodworking… Marc Spagnuolo. For those who may not be aware, Marc has both a free site that offers extensive content, as well as a paid Guild site.
The current project the guild crew is working on is this classic Morris chair. With its Craftsman lines and gracefully curving arms, this chair is bound to become highly desirable territory in your living room, sought out by all seeking a comfortable spot to watch a movie, read a book or just take a load off.
In addition to the plans, Marc also offers extensive step-by-step videos that clearly show each phase of the process.