All posts by Tom

I'm the guy who writes the blog...

A questionable collection

This year, my family and I are not making our annual pilgrimage up north.  Bummer.

The fact that we live in Florida means that – as with many of our friends and neighbors, we didn’t start here.  We have family stretched along the length of the east coast of the United States.  North Carolina.  Maryland.  New Jersey.  Keeping those family ties strong is the prime mission on these trips.

During the summer break, we typically load the kids into our minivan and begin the epic odyssey.  By the end of the trip, we have logged nearly 3,000 miles, slept in six different homes, two hotel rooms and eaten countless dinners out.

No wonder I needed a vacation after those vacations…

Chain restaurants on the highways are our friends during these trips.  Subway and McDonalds get a decent chunk of our change on the highway, but, for breakfast, it’s hard to beat the Cracker Barrel.

If you want down-home kitch, Cracker Barrel has it in spades.  From the offerings on the menu (that’s where this New Jersey boy first ate collard greens) to the rows of rocking chairs out front, the restaurants attempt to exude the whole country cookin’ theme.  That follows through to the decorations up on the walls.

That’s where I have issues.

During last year’s trip, we had just crossed the Florida/Georgia state line on I-95 when we pulled into the parking lot.  We were seated in the dining room and had just placed our drink orders when I took the opportunity to scan the items up on the wall.  Sure, there were the various antique signs, family portraits and various farm implements from bygone eras.  But, up near the front of the restaurant was a collection of old woodworking tools.  Saws.  Chisels. A nice old brace with some bits.  And a large wooden jointer plane.

I got up to stretch my legs and check out the display.  The plane caught my attention.  It was in gorgeous condition, complete with its wedge and iron.  The body was in perfect shape, with only a few very minor checks in the end grain at the heel.

And, it had been screwed to the wall through the body.  Ouch.

Part of me was tempted to go out to the van and get the screwdriver, remove it from the wall, sharpen the iron and show the restaurant patrons what a plane like that could do.  Many tools from that era are exceptionally serviceable and with a little TLC can outperform many modern models.

The question that ran through my mind was, “Are the things on these walls real?”  Once I got to an internet hot spot, I did a little research. According to an article written by Cecil Adams of the Straight Dope, the answer is yes.  Restaurant chains such as the now-defunct Bennigans, Cracker Barrel and other establishments do have buyers who scour the country looking for these old bits of Americana. They do attend auctions, yard sales and other events to find the elements to add to their restaurants.

While displaying old items in itself is not a terrible thing, my concern is about they way these tools are handled. Screwing through the body of an antique plane is certainly not the best ending for something as noble as a properly built hand tool.

Remember, these are the tools which helped to build our country.  Artisans toiled for for years with these tools in their hands.  These tools were their livelihood.  They were part of their identity and should be treated with some care.

I have held and used some very old woodworking tools over the past decade.  There is a connection with the craftsmen and women of old when you swipe a properly fettled plane across the surface of a board, raising a fine fluffy curl of wood.  These tools are more than just ‘stuff’ from the past.

Should every old tool be refurbished and used in the workshop? Nah.  If you have a sentimental attachment to a tool – say one owned by a grandfather – there’s nothing wrong with putting that tool up on display to show off the family heirloom.  Other planes could have major defects – shot soles or cracked castings – and not be salvageable.  That’s what happens when you work with old tools.

And, since I don’t own these old woodworking tools hanging on the walls, I really have no say in how they are handled or displayed.

I guess I’m just a firm believer that these old tools should be treated with the utmost respect and given a new life in a woodworking shop, not screwed to a restaurant wall.

Pulling out the stops

Hand planing has been a zen-type experience for me in the workshop.  Sure, I could have plunked down some dough to buy a powered jointer, but I do enjoy using a sharp jack, smooth or jointer plane to get a board into shape.

The rhythm… the sound… the whole experience takes my mind to a new place, making me appreciate my shop time that much more.

The only problem I was running into was that I was spending quite a bit of time securing boards to the bench top.  I would clamp the  board between a bench dog and a Wunder Pup or a pair of wedges, plane, then have to reposition the piece.  Surely there is an easier way to do this?

Turns out I had the answer back in my shop.  When I was planning for my bench, I had bought two of these planing stops from Lee Valley.  They were cheap, and I had planned on installing them when I completed my bench this past January.

Well, I never got to installing them.  They just sat in a bag on my side workbench, collecting dust.

Finally, this weekend I was starting to do some planing and thought, “Why not just go ahead and do it?” It was settled, I was moving ahead with it…

As I got started, I discovered that a 1 1/2″ chisel was the perfect width to mortise the stop into the benchtop.  I carefully scribed the outline of the stop top and began chiseling out the cavity.  Once I got the face place fully recessed, I marked the other contours of the stop and chiseled and drilled them to the right depth. Finally, the stop secured to the bench with two screws for extra support.

Believe me, it took some guts to take a chisel to the wooden sides of my bench…

The stop is easy to use and works very effectively.  Turning the dial allows the toothed spring loaded top to pivot up, giving solid support to the board being planed.  With a few minute’s practice, I was able to effectively and quickly plane a thick walnut plank smooth on the face side.  It was easy to reposition the board against the stop as necessary to keep the stop in line with the force of the plane.

The new stop did show I had to improve my technique a little.  For instance, I discovered that I tend to drag the plane backward as I do my return stroke. A minor hitch in my technique which was easily overcome.

Was this a good addition to my bench?  You had better believe it!  This will help make my planing faster and more effective… guiding me further down the path of woodworking enlightenment…

Quick poll

Getting involved in electronics can be tricky business.  Every time a new technology is invented, processor speed increased or new storage medium is heralded as the next great thing, your computer, stereo or television is one step closer to needing to be upgraded.

Fortunately, this isn’t the case when it comes to woodworking tools.  Power tools built in the 1950’s still slice through lumber and planes and chisels more than a century old still slice and dice joinery as well as they day they were made.  And, they can still do their work despite the fact that many of these babies sat languishing in some cellar or out building for decades before being brought back to life.

This week, let us know how old the oldest tool is in your collection.  Power or hand tool – it doesn’t matter. The one caveat is that the tool still has to do work for you in a your shop – no living room display case models are allowed.

[poll id=”78″]

***

Please help support Tom’s Workbench by visiting our advertiser Eagle America. Thanks!

Link of the week

The Norse Woodsmith

So, you consider yourself a galoot?  Do you love hand tools and their methods of work?

If so, you owe it to yourself to pay a visit to the Norse Woodsmith.  This site offers a wealth of information about hand tools, old-school methods of work and jigs and fixtures which can make your woodworking easier and more accurate.

And, if you ever wanted to make your own tools, there’s a great section on that as well.  Recycling old hand saws into scrapers, building your own veneer hammer and creating marking gauges are some of the projects offered – and the construction isn’t as tough as you might believe.

Yes, there are even reviews of some powered tools, for those of you who won’t operate a tool without a power tail on it.

Woodworking Spotlight: Paul Meisel

The pace of change in our schools has been tremendous.

Paul MeiselThe incessant clatter of students taking typing classes has been replaced by the more muffled sound of computer keyboarding.  Many schools have abandoned ordered rows of students for a more collaborative ‘working group’ arrangement.

And, in many cases, classes like phys ed, home economics and wood shop have been replaced with video production and internet design.

There are, however, people working to ensure that kids get a far more rounded education than they can get from sitting in front of a computer.  Paul Meisel is one of those people.

At the Flagship Academy – a private school just outside of Minneapolis, Minnesota, Paul teaches his 10 – 14 year old students just how analytical, mathematically engaging and fun woodworking can be.

Paul’s system for teaching woodworking is called Study Technology.  Basically, he breaks all functions down to their elemental parts, and then instructs his students to repeat those basics until they have them down cold. Hammering.  Drilling.  Cutting. Smoothing.  Not only does this ensure accuracy in work and – most importantly – safety, it also builds a great deal of confidence in his students.

Student at the drill press
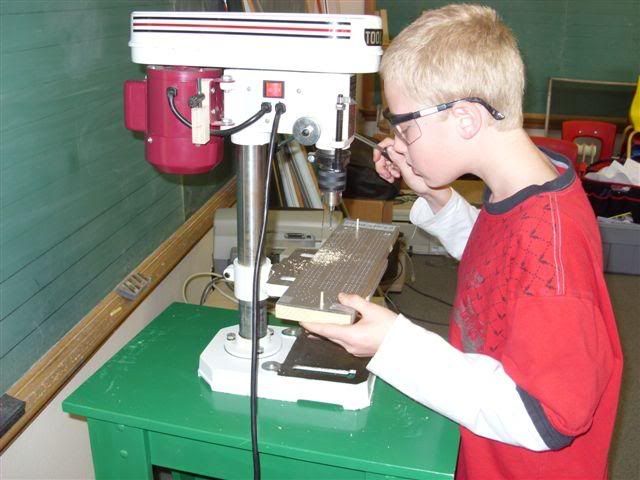
“Many of the students in my classes have never used a woodworking tool in their lives,” said Paul. “Giving them the skills they need to overcome their fears and inexperience is a liberating experience for them. Many of the students are so energized by the process, they actually become shop assistants, shepherding their classmates forward.”

Once those basics are mastered, well, they sky is the limit.  Just as a martial arts student is drilled on the basics, and then turns those basics into a flowing routine, Paul’s students advance to make projects.  Simple at first, the projects provide ample opportunity for Paul’s eager learners to reinforce what they learned and to see exactly how the skills build upon each other.

The projects are some of the basics you would expect to find taught to children in this age range – bird feeders, window planters and peg jump games.  However, some of the projects are not quite what you would expect. “One group of students built a series of bee houses to provide shelter for our local wild bee colonies.  With the current colony collapse syndrome wiping out entire bee populations, our students wanted to do something to help make a difference and provide a safe haven for the wild colonies.”  Paul even pointed out that the project got the attention of the local TV news programs, giving more exposure to the effort.

Paul is currently in the process of writing a book about his teaching techniques featuring many of his hard-learned lessons. He has offered to send me a copy once published, and I’ll be sure to post a review once it’s available.

But, why woodworking as the medium?  While this method could be used to teach other subjects, the ‘industrial arts’ provide a tangible way to gauge progress and  a visual tool to instruct the finer points. “If one of the students becomes confused or makes a mistake in the project, it’s easy for him or her to to retrace the last few steps to see where the error crept in. This way, we can go back to the point of confusion and see how they can improve their basic fundamental skills.” Paul joked, “There are many adults who haven’t mastered that skill yet.  I believe these students will have a much better grounding and can apply these skills regardless of their field of study.”

If you have an interest in teaching woodworking to kids, e-mail Paul at Paul@Meiselwoodhobby.com.

Try the ply…

When my brothers and I were young, we got some tremendous thrills out of playing with our Hot Wheels and Matchbox cars.  Those race cars, army jeeps and tractor trailers had some tremendous adventures.  Some were involved in epic battles. Others were involved in rescuing people from tremendous disasters.  Still others met their ultimate fates at the end of a hammer or with a firework stuffed inside the plastic interior…

Hey, we were boys.

While rolling the cars over the carpet in the living room was fun, the scenery never really changed.  Sure, we could imagine that the carpet was a snow-covered tundra or a steaming jungle, but we wanted more realism.

That’s when I decided to grab a piece of plywood from the garage near my dad’s workbench.  I painted it up really well and glued cacti made of twisted up tissues to the board.  I even spray painted some cotton balls brown to give the impression of tumbleweeds.  In my mind, it would have made George Lucas blush…

That was until dad came home.  Apparently, I was using a piece of cherry veneer cabinet grade ply for my scenery, and dad wasn’t too amused.

That was my first experience with really sweet quality cabinet grade ply, and since then, I have come to appreciate its value.  Well made ply is stable, nearly ready to finish and beats the heck out of gluing up solid wood to make large panels for projects.

What is plywood? Basically, thin veneers of wood are sliced from a log and then glued to each other.  In the vast number of cases, each layer is glued perpendicular to the next, giving tremendous strength and rigidity to the panel.  Some plywood is glued with all of the layer parallel to each other, and this plywood can be used to build bent pieces of cabinets.

I did learn the hard way that not all plywood is made equally.  First, cabinet grade ply is not the same as construction grade ply – regardless of what the home improvement center signage tells you.  Sure, you can grab a piece of AC fir or southern yellow pine plywood and try to build something, but, if it’s going into fine furniture, you will be disappointed with the results.  That construction grade stuff is great for shop shelving and furniture, but it’s too rough for building bookshelves.

For that, you want to look for plywood with a larger number of plies which are more finely cut.  while construction grade material may have five plies for a 3/4″ piece, the cabinet grade stuff usually starts at nine.  The cabinet grade stuff also has a much more refined face than the construction grade stuff.  So, if you want to paint your piece, there’s a whole lot less prep work and you will get a superior finish with cabinet grade stuff.

The most commonly see ‘entry’ level cabinet grade panels are usually faced with birch, however I have seen some other kinds of woods.  Some are faced with a generic ‘tropical hardwood’, while others are faced with a South American hardwood called Gutambu.  These low-end panels are often hit or miss – some are beautifully built, others will have their glue fail and the layers separate if you look at them funny.  Buyer beware!

From there, you have scores of choices available to you.  Some, such as Baltic Birch or Russian Birch, is made of many very fine layers of wood veneer – maybe up to 15 or more – and is exceptionally stable – perfect for jigs and as a substrate for veneers.

Other sheets have similar cores as the birch plywood, but can be faced with veneers as plain as red oak or cherry to to as exotic as teak or zebrawood.  These pieces can be cut as impressive parts of a cabinet, table top or other project.  And, yes, the standard wood finishing regimens you use on solid wood will work on plywood veneers.  Lacquers, varnishes and oils all work well on the plywood surface.

While plywood is durable, strong and relatively easy to work with, there are some warnings which should be heeded.  First, plywood is very heavy stuff.  A sheet of 3/4″ cabinet grade ply can tip the scales at 60 pounds or more.  Sure, you could muscle the sheet around by yourself, but wow, you could end up with a serious backache – or worse!

Secondly, it’s very awkward.  Standard sheets of plywood are 4′ wide by 8′ long.  That’s taller and wider than most folks, so you have to be careful when handling.  Again, a friend is always appreciated when working with plywood.

The veneers which face the plywood are often beautiful, but they are also very thin.  Extreme care should be used when moving sheets (to avoid damage) and when sanding them (you run the risk of sanding right through the veneer into the core!).

This also means you have to be very careful when cutting plywood, so you don’t chip up the facing when you cut the sheets.  Some tried and true methods for reducing or even eliminating chipping include taping the cut line with masking tape, using a blade with the highest number of teeth available and scoring a line along the cut line with a utility knife.  The new track saws made by Makita, DeWalt and Festool also do an outstanding job of preventing chip out when they cut.  If you plan on working with a lot of  plywood, one of those saws might not be a bad investment…

Finally, when you cut plywood, you have the ugly exposed edge to deal with.  Edge tape, molding and setting the panels into frames or a rabbet are three ways to hide the unsightly edge from view.  Of course, if you like that kind of look, just refer to your pieces as post-industrial modernism and enjoy the compliments as they flood in.

While those days of playing with my toy cars are distant memories, I can look into my sons’ rooms and see the plywood bookshelves I built stuffed to the gills with toys and books.  What memories will those pieces of plywood will my sons bring with them into their adult lives?

Quick Poll

Finding time to woodworkIn the nearly two years I have been blogging, I have seen a great number of projects built by you, the readers of Tom’s Workbench.  Some are modern, others are traditional.  Some are elaborate, others have strong, clean lines.

But, the one thing I have always wondered is when these creations were built?

Some of us are early birds, grabbing shop time when the sun is on the rise.  Others are night owls, working well into the wee hours of the morning.  Your time preference may be dictated by work or family situations, when you can access your shop or just a personal preference.  Heck, you might enjoy using daylight to give you a consistent light source in a hand tool shop.

So, where do you fall?  What is your favorite time of the day to grab some shop time?

[poll id=”77″]