As a fan of the James Bond series of movies (Goldfinger was my favorite movie in the franchise), I was thoroughly amused by Austin Powers, the Mike Myers spoof of the classic spy films.
One of the most memorable scenes happened after the hero Austin Powers and his partner Vanessa Kensington were captured by Dr. Evil’s minions and brought to an elaborate dinner party in Dr. Evil’s lair. In a nod to the the first movie in the Bond series, 1962’s Dr. No, Austin and Vanessa, clad in their quasi-futuristic costumes, are sat between Dr. Evil’s henchmen while Dr. Evil explains in great detail his fiendish plot to destroy the world if his demands are not met.
That’s when Dr. Evil’s son Scott enters the room from his bedroom. Dr. Evil, in a grand gesture, introduces Scott to Austin by saying, “Scott, meet daddy’s nemesis, Austin Powers.” Scott, incredulously, asked, “And you’re feeding him?”
In my shop, there are few tools I have yet to at least have a working relationship with. Sometimes, the tracking on my band saw gets a little ‘drifty’. Sometimes, a few of my hand planes can be finicky. But, with a little bit of time and effort, I can get them to do what I need them to do.
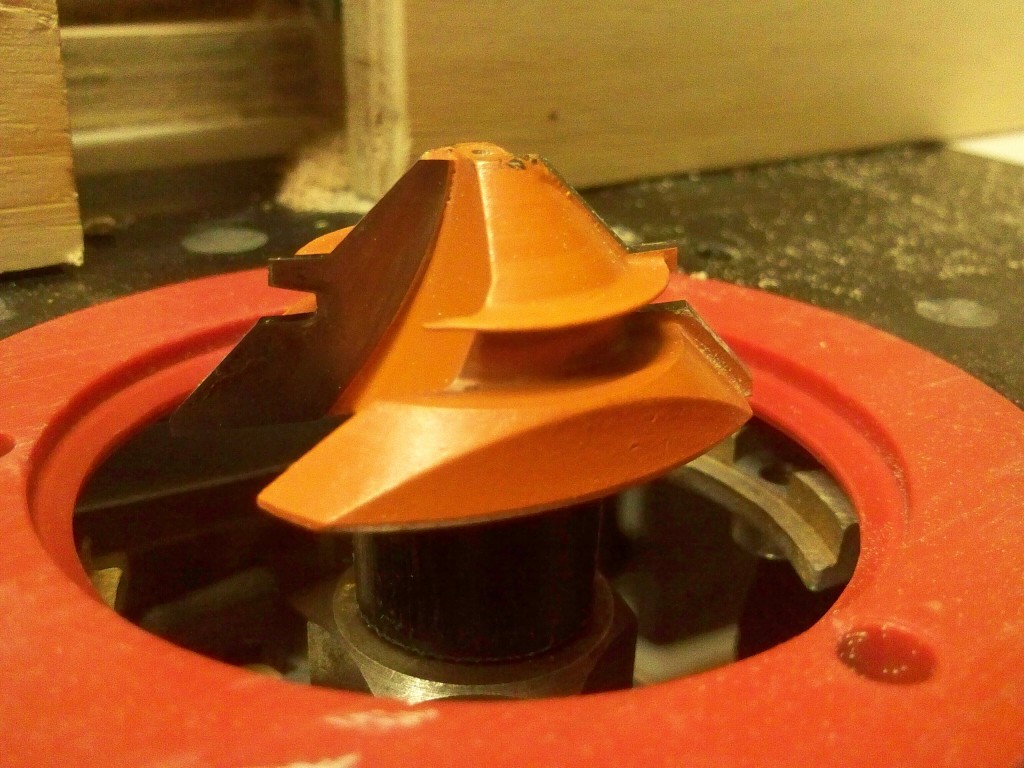
Then there is this. My lock miter bit. This little router bit called to me at a woodworking show a few years back. The slick talking exhibitor showed how useful the joint is. How quick to cut. How easily the joint goes together. He cut joint after joint, winking to viewers as his smooth voice lured others over.
I had to answer the siren’s call. I dropped my money and took this miracle bit home with me anxious to make things happen.
Boy, did stuff happen. Some head scratching. Some grunts of frustration. Some cursing. And lots of wasted test boards. And, worst of all – a lot of wasted precious shop time.
I’ve used the so simple a child could do it ‘adjust the height until the boards match up’ method, with no success. This time, armed with the Groove Center made by Prazi, I was bound and determined to make things work out.
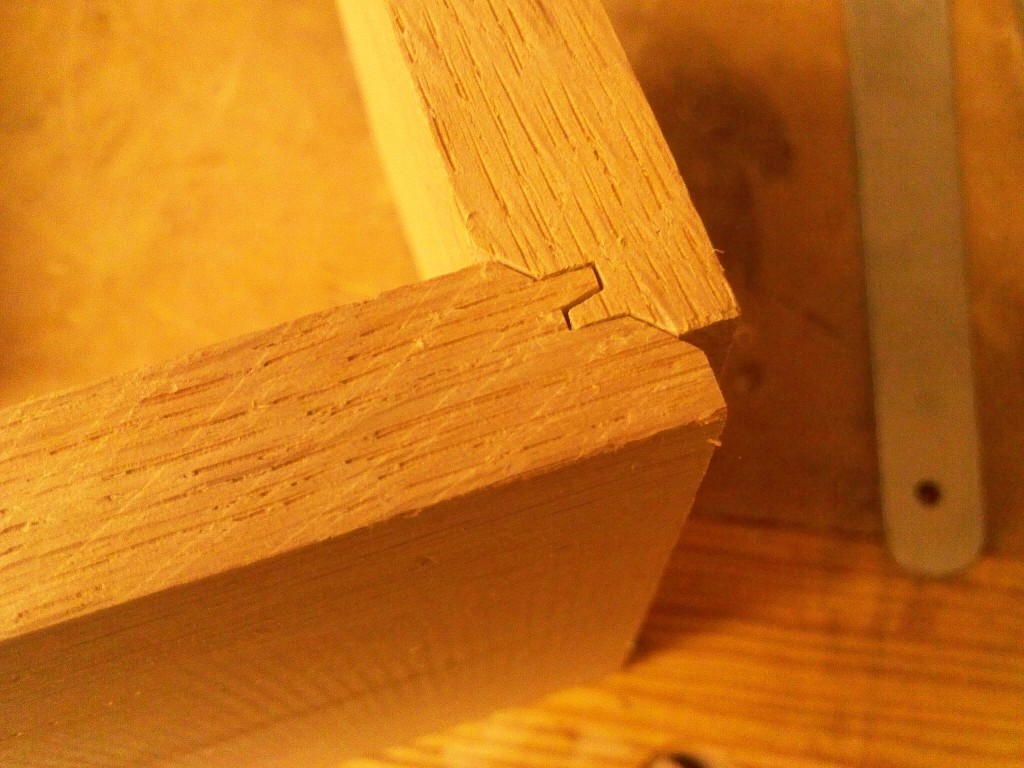
I followed the instructions to the letter, but still found myself scratching my head with yet another bad result. Now, I’m sure the problem with this bit is that there’s an id10t error going on somewhere in my setup. Maybe it’s because I’m not getting the accuracy I need in my router setup. Maybe it’s because I’m not using the tools properly. I’ve seen both the bit and the Groove Center work flawlessly in demos. I just can’t make it work in my shop.
I’m sure I could continue to fiddle with this bit again and again, and maybe after a few more hours of shop time, I might be able to make one of these joints work.
But, ya know what? The heck with it. I’ve given too much to this time vampire. For the love of Pete, I could just cut a basic miter joint and break out my biscuit jointer if I needed to reinforce it. Or, maybe set up for a Kehoe dovetail spline or just a basic spline reinforcement if I wanted – either through the joint or hidden within.
One thing is for certain.. using this bit has been one of the most frustrating experiences I have ever had in the workshop. I just might put this baby back into its case and set it somewhere in the back of my tool storage cabinet and keep it there for a very long time… I don’t think I’ll be feeding this one any more of my shop time.


I’m with you Tom. It’s not an easy setup at all. I eventually got an OK result, but not great and I spent lots of time and lots of material to get it.
I have one too, and I have never gotten it to work right either. I think if I dedicated a router table just to this bit, I might keep fiddling with it, but that ain’t happening.
I had a client “require” that I use this joint when making a custom display cabinet. I experienced the same set of frustration. I used it for that cabinet and a subsequent one he ordered, but otherwise, the bit sits unused.
Probably the most useful thing you can do with it is to post it on CraigsList and find some clueless sucker fresh, enthusiastic new woodworker who’s eager to explore the temporal black hole endless joinery possibilities that it offers.
If I tried that, karma would come back and kick my butt… Somehow… some way… some day…
Tom,
*WARNING* I do not recommend you bother with Lock Miters, ever.
There’s actually _2_ adjustments to a lock miter bit: the bit height, and the fence position. The only time I ever got a lock miter working right was with a copy of an article from Wood (or was it Woodsmith?) magazine in hand about setting up a lock miter.
Also, I find that lock miters only work well on a certain ‘sweet spot’ range of wood thickness. If you do plan to use these, I suggest you get it set up just once, then make a test jig so that you can quickly set the bit back up again next time.
Is your bit designed for 3/4″ thick wood or larger sizes?
It seems they market 2 different sizes.
They do, Bob. I have the smaller size… 5/8 up to 1, I believe…
that wood you are showing looks likeit may be too thick for the size of bit youre using.
Have look at this video and double check your set up.
http://www.youtube.com/watch?v=POvBhQo2ivQ
I’ve had one of these in my router bit box for 20 years – never used. My father suggested I buy one to aid in the glue up of cabinet tops. When I went to use it, it’s diameter was greater than the hole in the metal router table top.
I have seen this bit multiple times in my stack of woodworking catalogs and have wondered how much quicker it would be to use this bit versus a spline miter or biscuit reinforcement I think your post and its comments have answered that question for me!
Tom,
I will be glad to help. This is a photo of a thick leg I made:
Al
Al – I don’t think the photo took… Do you have the URL?
Sorry – the html for the image did not work. Here is the link: http://sandal-woodsblog.com/2009/06/07/a-simple-stop-for-the-fence-on-the-router-table/
Looking at the photos of the bit and the joint, it appears you might have what I would call a “baby” lock miter bit. But I am not sure. I know Sommerfeld sells both the “baby” version, and the full size bit, which is scary at first 😉
Al
Al – You have the patience of a saint to make that work… or you are just that darned good!
Yes, I do have the ‘baby’ version – but the literature states that the bit can handle boards from 3/8″ to 3/4″… the stuff I was using was just shy of 3/4″ – within the range….
That one is tedious to set up, but not impossible. It took me about an hour and a half to set it up for the first time, with lots of test cuts. While not the first joint I’d choose (hello Domino!), I wouldn’t not use it again.
I have been looking at this bit for quite a while and even had it on my Christmas wish list. But after Reading your article and all the comments it has come off the list. (Fortunately my wife had not bought it yet.) Thank you all for your honest comments on this particular bit.
I know I’m an oddball, but once you get used to this bit it could become one of your favorites. Test cuts are mandatory you just have to remember that the fence and height adjustments need to go in the opposite direction than what your instinct tells you. At least that’s the way it was for me at first.
Also on the Kehoe jig don’t forget that you can use a straight bit with it instead of a dovetail bit for the times you want the traditional spline look. Much quicker than building a jig for the table saw or router table and that way you’ll still have that imperceptible 1 degree of taper that will make the spline lock in tighter than a regular spline.
Hey, Kevin, this is Tom’s Workbench… oddballs are all welcome. 🙂
I use mine all the time. Just remember, lay the board flat and raise the bit until the top edge of the board is just about 1/8th inch below the top of the bit. then adjust your fence to take off light passes until your fence is ‘splitting the bit’ in half. by this time, you should be there. It also helps to pre-cut 45deg angles on the boards if you can. you should cut all edges then adjust the fence. and repeat until the fence ‘splits’ the bit in two.