
Tonight, I was out in the shop getting the hope chest into its final stages of finish … and I hope to show you the finished project shortly. Since I was going to use my regular finish formula, I wanted to give the opportunity for someone who learned the process from this blog the opportunity to share his experience with it. His name is Steve Stutts, and we met at the St. Petersburg Woodcrafters Guild a few years back.
Take it away, Steve:
I don’t know all there is to wood finishing. No one knows it all but I have learned a couple of things that have given me some very nice results. Until I read an article on finishing, my technique was a hit-or-miss experience for me. I sprayed it out of a can or slapped it on with a brush and it turned out after it dried. Then I read an article by my first and favorite wood blogger. Tom Iovino and he writes “Tom’s Workbench.”
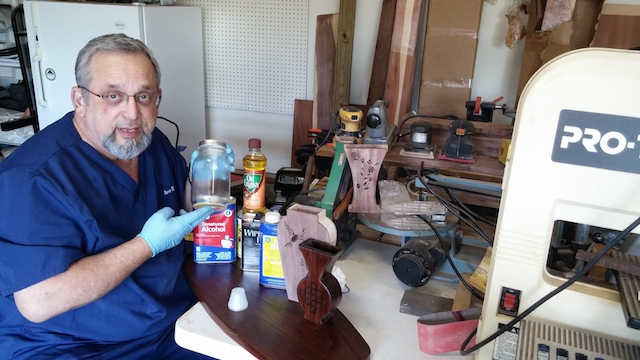
I was surveying his past articles and I found an article entitled Become your own mixologist where he gave us his formula for finishing that has been the basis of all my finishing techniques since that time. First, it makes sense to sand and seal any wood that is worth finishing. Whether you paint it with a pigment stain or leave the wood to a natural color, my theory is that all woods need to be sealed. Tom recommends mixing #2 dewaxed shellac with 50% denatured alcohol. First you want to sand the surface of the wood with progressively finer grits until you get the surface to at least 220. I have four palm sanders and I put a different grit of paper on each sander (I bought them all at the guild “used tool” sale for $10).
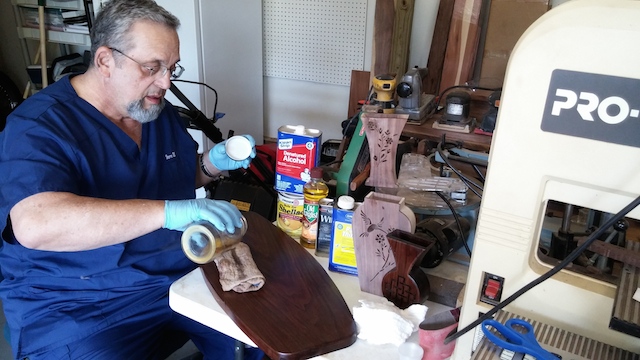
After sanding, I wipe on the shellac by hand. I wear rubber gloves – they keep my hands from getting messy. I leave it to dry for a few hours. The alcohol makes it dry fast. Then I sand it down to 220 grit and repeat the process. I apply 6-8 coats and it takes me a few days. The final few coats I sand further to 330/360. The wood is well sealed and will not blotch. Even cherry seals – and it is the worst for blotching.
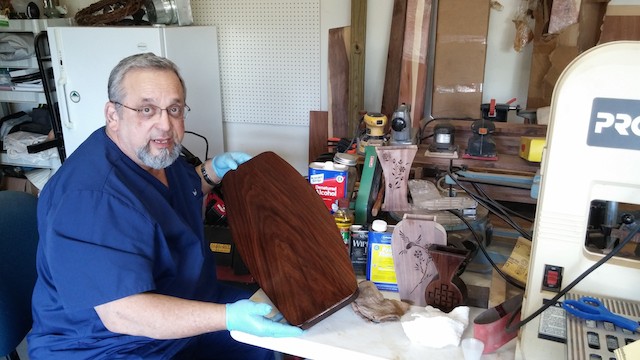
Then I like to wipe on polyurethane that has been thinned with linseed oil 10% and paint thinner 20-25%. This is Tom’s formula for the perfect “mixologist.” The wipe on poly sits on top of the smooth shellac and is not much absorbed.
It just shines!!!
I let it dry for at least 24 hours since the linseed oil tends to sit on top of the finish. I wipe off the excess. Then once the surface is dry, I sand it again to 330/360 or 400 grit and wipe the poly mix on again. I do this for 5-6 coats again. So far, my results have been very nice. An even, lustrous finish that looks deep and rich the darker the wood. If you don’t want a high shine it works well with satin finish too. Sometimes I have to wait a day or two between coats of wipe-on poly. Particularly if its below 65 degrees. Once the finish is cured I like to wipe the surface down with a good furniture polish, oil or paste wax. It preserves that shine. Then once or twice a year I reapply the polish to preserve the work.
Like I said, I don’t know everything about wood finishing but I have confidence in this method.
Thanks, Steve. Glad you liked the process! It looks like you have had a lot of success with it. Hey, don’t be afraid to mess around with finishing. With some good techniques, you can have a blast with it!