So, at work, my bosses asked me to dress up a little bit more, which means no more work boots for me – unless, of course, I’m working on conditions like these:
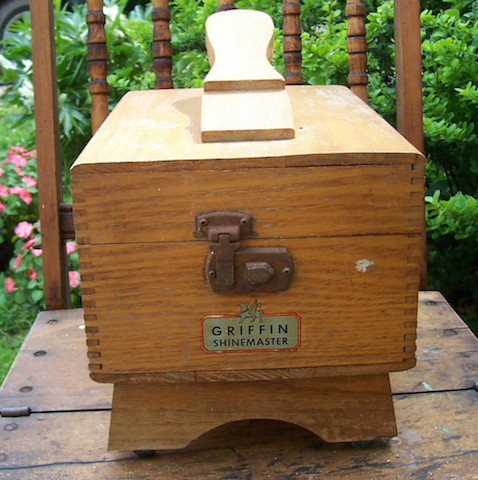
This now means that I’m going to be wearing more dress shoes. With dress shoes comes the inevitable chore of shining those dress shoes. Now, my dad served in the Marine Corps, and he is a whiz at shining shoes. He keeps his kit in an old Griffin Shinemaster box. It’s a classic.
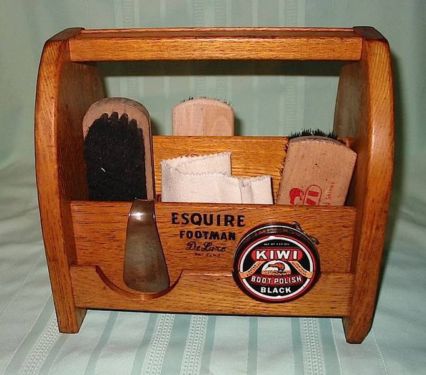
While it’s a neat, self contained design, a different shine kit caught my attention – the Esquire Footman Deluxe. (Dang, I need a hobby).
There’s something about this design that I really like. For instance, I can get at the items in the kit mid-shine with the open design, instead of having to take all the stuff out and lay the items on the floor, or ask the shoe shinee (is that a real term?) to move his or her foot to get that forgotten item.
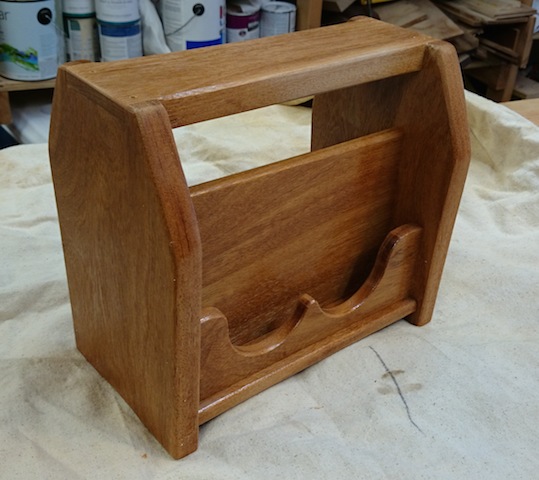
Fortunately, there are TONS of these babies for sale on eBay, and the sellers all provide measurements, so I knew the kit would have to come in at about 11 inches from end to end, stand about 10 inches tall and be about 7 inches across. I had a board of some unknown wood (maybe one of you species types can help me out) that had been in my shop for the better part of ten years. Once I planed it down, it was the right width and looked handsome.
I started by cutting the two end pieces, and shaping a taper on the bottom halves of the boards, This is a very minor design feature, but I think it makes the piece look a little more graceful. I could have tried to taper in on the band saw or table saw, but a hand plane did the job in no time flat.
After that, I used a 1/4″ router bit to rout a series of grooves into each of the side pieces. Since my plan was to capture the 1/2″ thick dividers in these grooves with 1/4″ tabs, I knew I had to make mirror images of each side so they would fit into the grooves. It took some mental gymnastics, but the grooves came out looking pretty sweet, with just a minimum amount of chisel work to make things perfect. And, yes, I did bevel the edges of the piece before I grooved it to ensure that the grooves would parallel the outside of the box profile.
Some quick work with a rasp helped curve the top of the box sides, making it look a little more elegant.
From there, I marked out where I wanted the top handle/step to live. I kept that piece at 3 inches wide to allow for a secure step, so I mated the two end pieces together and notched out the 3 inch wide by half inch deep recess for the board to sit in.
Once I did this, I cut the top piece to size, and made a rabbet on the end, ensuring the 3/4″ thick top piece could fit snugly into the 1/2″ deep notch, making a great fit that registered against the side of the box.
From there, I milled down the side pieces to 1/2″ thick, then using a rabbeting bit in my router table, gave each piece a 1/4″ thick by 1/4″ long ‘tab’ that would fit into the grooves.
I knew that only the bottom board would be glued in place, as it wouldn’t have a cross-grain situation. The dividers that break the piece into compartments just float freely. Assembly took a little bit of time to get everything into its respective groove, but it worked out great. I just took my time, glued the bottom board, slid the bottom and dividers in, then tapped the handle/foot rest into place, and clamped everything up.
 After the glue dried, I sanded everything down, then opted for several coats of lacquer for the finish. First, because it’s an easy, quick finish to apply that gives great results. But, also because it’s a spray, which can get down into the assembled compartments, saving me the work of having to reach in there with a rag or brush.
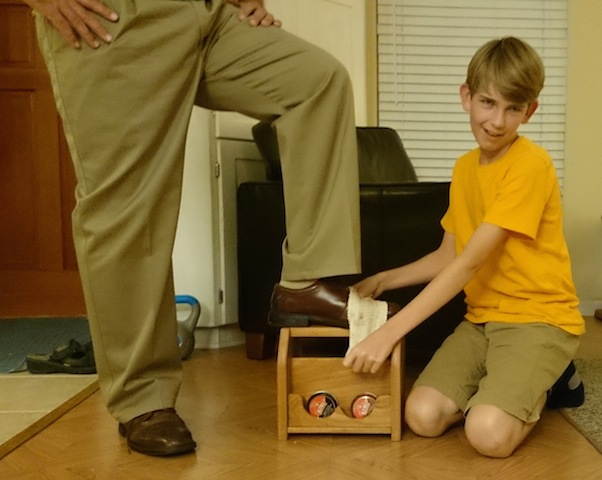
I really dig the front compartment with the cutouts that holds the cans of wax. The large compartment is easy to reach for the brush, applicators and shine rag. It’s solid as a rock, and just the right size for me to stash in the closet for when I need it. And, the beauty of it all – this truly was a one-weekend project, with the work being done in about four hours.
How well does it work? Well, I may need to make another one soon to give my son Steven, so he can start building his college fund. Hey, son, I have a nickel with your name on it!


That came out great Tom.
We used to have an old version of that kit, which has been lost to the ages.
But I think, after seeing the nice one you made, another one will be made for our closet.
(And you look like a big kid in your PIO rain gear.) lol
Looks like hickory to me.
Tom
First of all, I thank your father for his service to our great country. Being a vet myself I am always grateful for all of the veterans. It does bring back memories of spit shining my low quarters and jump boots at night for the next day’s inspection.
Nice job I always look forward to and enjoy your posts.
Laurence
I will be sure to pass your regards on to my dad. And, I’m glad you read my blog. Thanks for your compliments!
I like the Life of Pi shot at the beginning…
Nice project. A good way to get experience and use up some shorts from previous projects.
Looks like it may be Butternut? I can’t be certain on that, though.