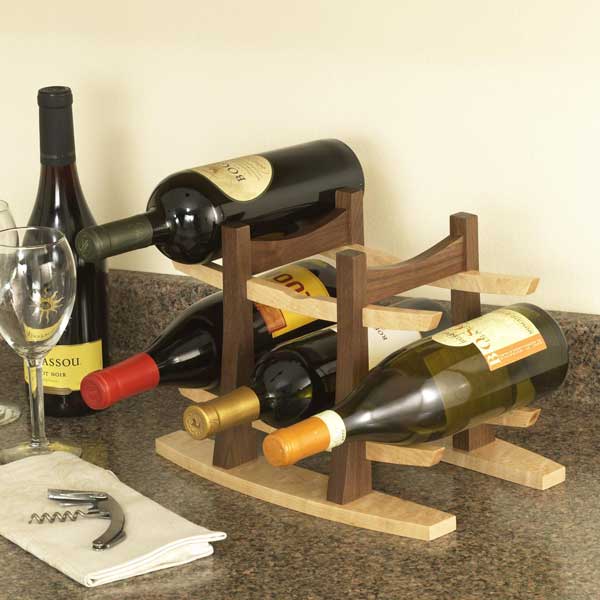
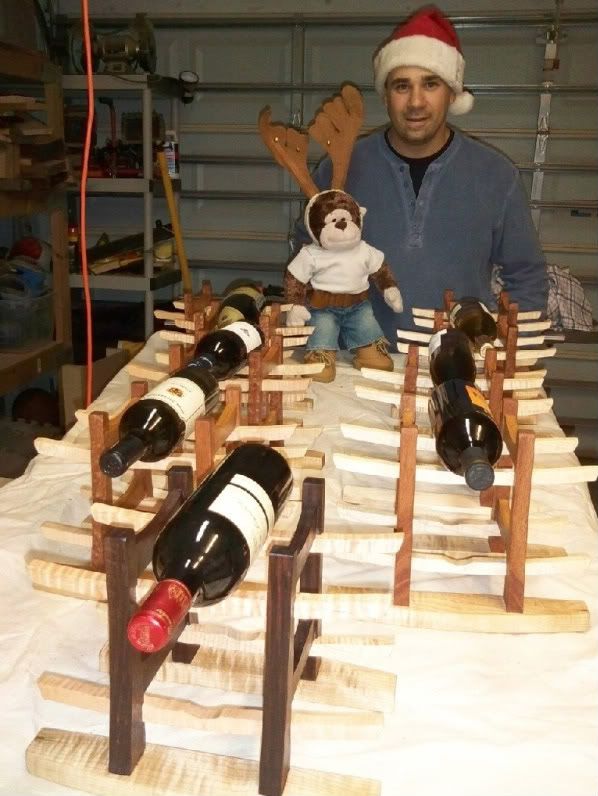
A few years ago, I embarked on one of my most ambitious projects. It wasn’t just one woodworking piece – it was nine copies of a wine rack plan I had seen in Wood Magazine. The holidays were just around the corner, and I knew that the wine lovers in the family were just going to love having their very own Tom Iovino creation to rest their fine bottles on.
The one thing I hadn’t counted on was just how many pieces I was going to need to cut in order to make these projects. Each one had four uprights, four stretcher, four curved bottle holders and two feet. Add in that each stretcher needed to be tenoned on both ends and each upright had to have two mortises cut to receive each tenon… well, I quite literally had my work cut out for me.

I also knew that I wanted each of these projects to look identical. Well, maybe not identical – I was using different kinds of woods for the project pieces – but similar in shape and form.
Cutting each of these pieces individually was going to be out of the question. I mean, if I had to set the cuts for each of these components by eye looking at pencil marks, it was going to take a long time to set up for each operation, and there was little to help ensure that the cuts were going to land on exactly the right place. With the time ticking down toward the holiday season, I was going to have to work smarter, not harder, to make my deadlines.
That’s when I turned to some tried and true shop short cuts that helped to knock this big job down to size.
The first had to do with the measurements. Now, I’m sure I could have brought out a steel ruler to mark the depth of the tenons I had to cut, but how was I going to be sure that I hit the right tick mark every time? And, a combination square would work well, but, ya know, if it ever got reset for another measurement, how was I going to remember the exact point I had set it to at the beginning? No, my friends, I needed to work with a known distance. That was conveniently provided for me by a set of set-up bars.
These handy little blocks were perfect for setting the depth for my mortising gauge so I could scribe the depth line for the shoulders of the tenon. This way, I could keep coming back to the correct measurement time and again without having to re-measure. Pretty convenient.
Another thing I did was to set stop blocks on my miter gauge to establish the width of a set of notches I had to cut. This way, there was no need to eyeball a pencil mark on each piece to ensure the right width of notch.

I was soon using shortcuts like this in other parts of the project. MDF spacers to ensure that glue ups were nice and square. Templates so I could mark and cut the curves on the pieces, and later pattern rout them to the proper shape. Why, with the proper short cuts, I was nearly invincible!

As near as I could figure, my little short cut tricks saved at least one day in the shop on some very monotonous, repetitive operations, and made the pieces look pretty darned sweet.
And, the proof for me was the sight of so many happy faces when the recipients opened their presents. It just goes to show you that simply taking the right shortcut to completion can make your shop time a whole lot more rewarding.
==================
And, remember everyone – this Saturday at the Tampa Fairgrounds, we’re having the first ever Modern Woodworkers Association Florida meeting! Be there or be out of square!


Having a nice set of thickness gauges and a 1-2-3 block has really helped me save set up time.
The next time I knock out a set of Palm Boxes for Christmas presents, I’m going to try and incorporate some templates. That should save a boat load of time.
http://lumberjocks.com/projects/50872
See you on Saturday!
Looking forward to it, Eric!
Maybe it’s because I’m an engineer, but I approach almost every project as though I am going to make a hundred of whatever. I rely heavily on jigs, stop-blocks, and templates, if for no other reason than it takes a lot of the guess work out of layout, cutting, etc. It also makes me think about two things while I’m working: how do I build this thing, and how can I build it more efficiently?
Great post Tom.
I’m looking at making some of these for gifts. It looks like you used different types of woods. I’m wondering about making some out of mahogany instead of walnut. It looks like a great gift idea.
Thanks again for the post.
Hey, Todd. These were fun to build.
I couldn’t see why mahogany wouldn’t work. They should look sweet !
Tom,
I’m finally getting around to building these (5 of them) for the holidays and I’m building them just like the Wood article. What type of short cuts (if any) did you use to speed up the process? Did you use any templates with a router table to create the same shapes or use an OSS to sand each shape.
Also what type of finish did you use?
Hey, Todd, they are some great little wine racks!
What I did was use the templates to pattern rout the parts to shape. I also jigged everything up before I cut it. Basically, I made a prototype from the plans, then cut everything else to match. Once you do that, it’s off to the races. You can’t go wrong!
Tom,
What finish did you use on the wine racks? Thanks
A quick coat of 1# cut shellac, followed by sanding with 320 grit paper, then two coats of wipe on Danish oil