A router is the Swiss Army Knife of the workshop. It can cut dovetails and box joints. Dadoes and rabbets. It can excavate a mortise and cut the tenon to fit. And, that’s without even looking at decorative edges.
Some of these applications require a special bit. Others require the router to be mounted upside down in a table. Still others require you to remove the baseplate to replace it with another. That’s where I sometimes have issues.
You see, when I get into woodworking, I REALLY get into woodworking. Somewhere in the flurry of activity, it happens. I knock one of the router’s baseplate screws to the ground. This requires that I stop everything and sort through the dust on the shop floor to find the screw. That’s if I notice that it was knocked over. And, in order to fit the majority of routers out there for sale, these baseplate accessories either come pockmarked with dozens of holes, requiring you to spin the plate to try to get them to line up, or require you to drill your own holes and hope you get them right the first time.
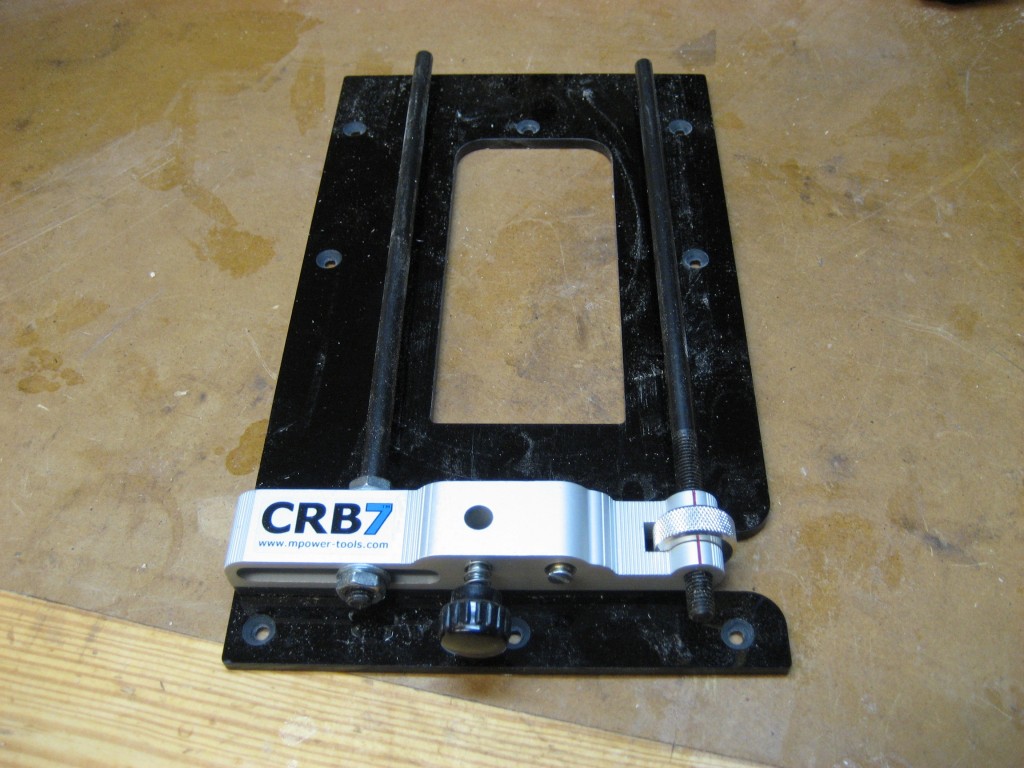
But, this isn’t always the case for router accessories, David Venditto of Infinity Tools recently sent me one of mPower Tools new CRB7 router guides. After using this, I may take all of my old baseplate-swapping guides and throw them in the trash.
Unlike those others, this guide comes with a pair of guide bars that fit through the fence holes in your router’s base. These can be adjusted for any number of different router models. Now, instead of unscrewing the baseplate when you want to use it, you simply slip the guide bars through the holes and tighten them down. Easy as pie.
What can the guide do? There are seven functions you can use it for:
Offset Base Plate – Increases overall router stability and reduces errors when edge molding. The CRB also moves the pivot hand guiding the router toward the center of the panel smoothing out the router pass action, reducing the chance of burn marks.
Circle Cutting – Rout precision circles and holes that are smaller than the base of the router – The CRB can route circles and wheels from 1½” to 17½” in diameter (38 – 450mm) using a ¼” (6mm) straight router bit.
Mortising – Allows “Centered and Off Centered” mortises plus you can control the actual width of the mortise.
Stable Foot – Most of the router’s base remains unsupported when edge routing – The CRB anti-tilt leg eliminates router tilt which is especially important when routing work-pieces with a high aspect ratio.
Straight Edge Guide – Set the clamp guide once and adjust the position of the router via the CRB7’s Micro Adjuster. The CRB increases router to clamp guide surface contact area and reduces clamp guide set up time.
Indexing – The CRB provides a simple and exceptionally quick way of accurately repeating a molded dado for production batch quality faux or false paneling.
Flush Trim Edge / Edge Kit – With virtually no set up time – quick fit the Trim Jig riser pad to accurately machine trim hard wood and iron on edge molding flush with the core board in seconds.
Ralph Bagnall put together an awesome video showing the features. Check it out here:
At first, the jig seemed intimidating, with all of the accessory parts it came with. But, after a few minutes of reading the manual and watching a great video the company produced, I was able to start putting it to the test.
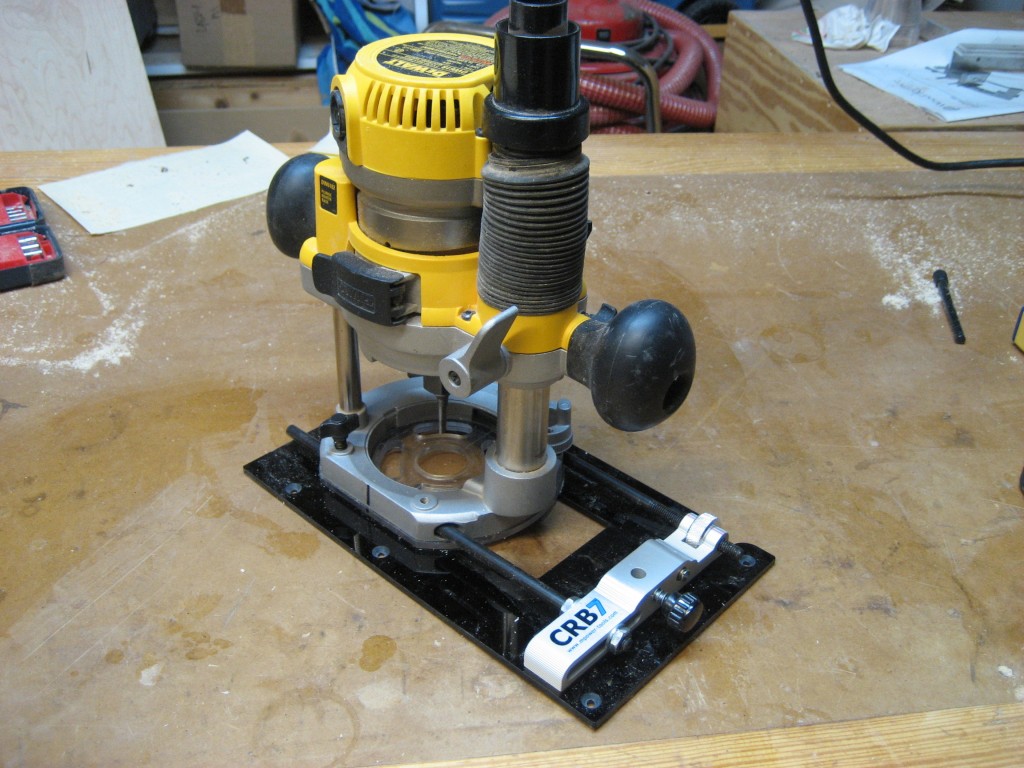
I got the jig lined up with my DeWalt 618 multi-base router. That took about ten minutes, and I was going slowly to ensure I had everything set up the right way. The router slid smoothly onto the guide rods and a few twists of the thumb screws on the base made short work of securing the router in place.
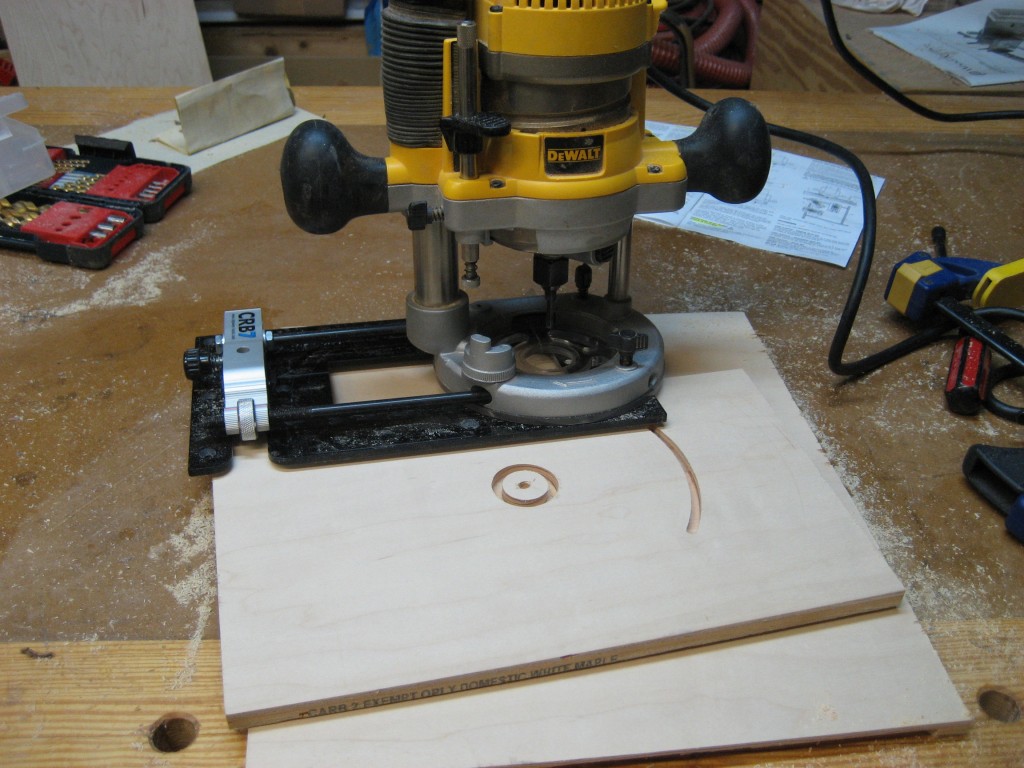
The first test – cutting circles. I have done this task before with a plywood base I cut on the band saw. This worked great, but I could never figure out how to get circles where the diameter was smaller than the diameter of the router base. The mPower jig came with a screw in pivot pin that dropped into a hole I drilled in the board. My first test cut was a larger diameter arc, which the router handled with no trouble. The pivoting action was very smooth, and I never wondered if I had control of the router. The next test was to cut a much smaller circle. With an adjustment to the router position, I was easily able to make the cut. No muss, no fuss.
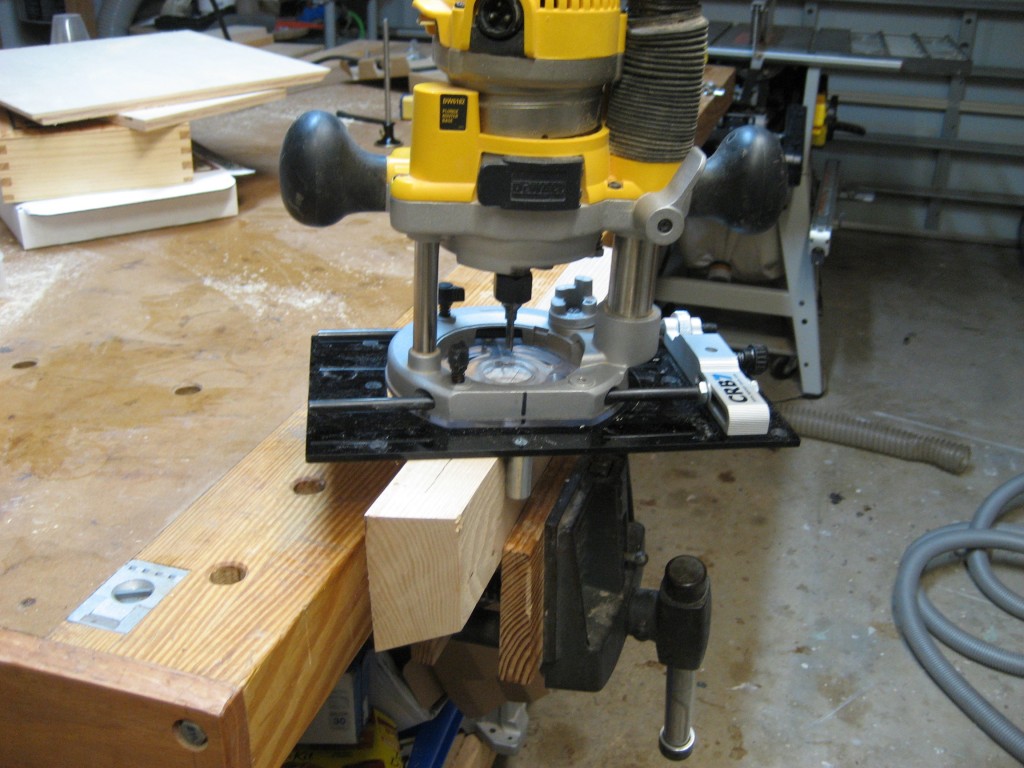
The next test I wanted to do was to cut a mortise. I had a large, thick chunk of ash I had planed down from another project, and thought I could try my hand cutting a mortise into that. I swapped out the pivot pin from the last test and replaced it with two mortising pillars. These mounted again with screws through predrilled holes in the baseplate. I set the jig on the board and twisted it so the router trapped each side of the board against one of the pillars.
A simple adjustment of where the router rode on the guide bars, and I fired up the router and began to plunge. Again, the control of having two positive points of contact with the board was – well – empowering. I knew I had total command of the router, and the results were on the money.
I still have other features of the mPower base to try out, but even if they didn’t work at all, I would say that this jig belongs in my router collection. It’s a real winner in my book.


That looks pretty sweet. Thanks for the review Tom.
I couldn’t tell if the track guide came with. I imagine that’s an accessory.
Yeah, that would be an accessory. However, I did buy one of those things years ago and never got much use out of it… this could help…
Tom
Thanks for the review ,I’ve been wanting something like this for a while now . That other Micro guide ( I forget the name ) is too $$ . This looks prefect , it should be in my hands this week , look forward to using it . Thanks again .
I just bought one it works great