I’m currently in the middle of a project, and I needed to build a set of inset frame and panel doors. Time to break out the cope and stick door frame bits, right?
Not so fast, bub. I thought this project would look better with some mitered door frames instead of the plain old plain old. To make this happen, I reached back for a trick I had used on the first project I built with doors – a mitered door frame.
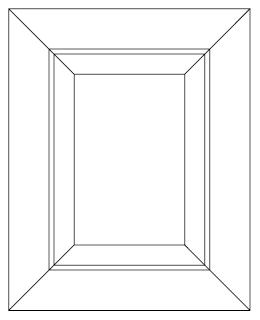
 As you can guess, each of the four sides of the door are joined at the corner with a 45 degree miter joint. A few benefits of building a door this way are that you don’t have to buy specialized router bits to do the joinery – a table saw, miter saw, hand saw and miter box or any other method you use to make crisp, accurate 45 degree cuts will fill the bill. Also, if you want to rout special features into the face of the panels (Maybe a bead on the inside edge and other fancy molding profiles), when you cut the miters, the design will wrap all the way around the frame. Also, if you carefully measure the inside opening, the long side of each mitered piece will be the exact measurement of the opening you are trying to fill. No crazy math with subtracting style width and adding on tenon length.
The downsides? Your miters have got to be very accurate, or you are going to spend a lot of time and use a lot of wood putty to make the piece look good. Also, miter joints are very weak when compared with other traditional joints – and they slip like crazy when you try to glue them up. That’s why some method of reinforcement when building a mitered door frame is a must. And, if you have to fine-tune the door to fit the opening, you have to remove equal amounts from each side to maintain that crisp miter point (you can fudge a little, but not too much).
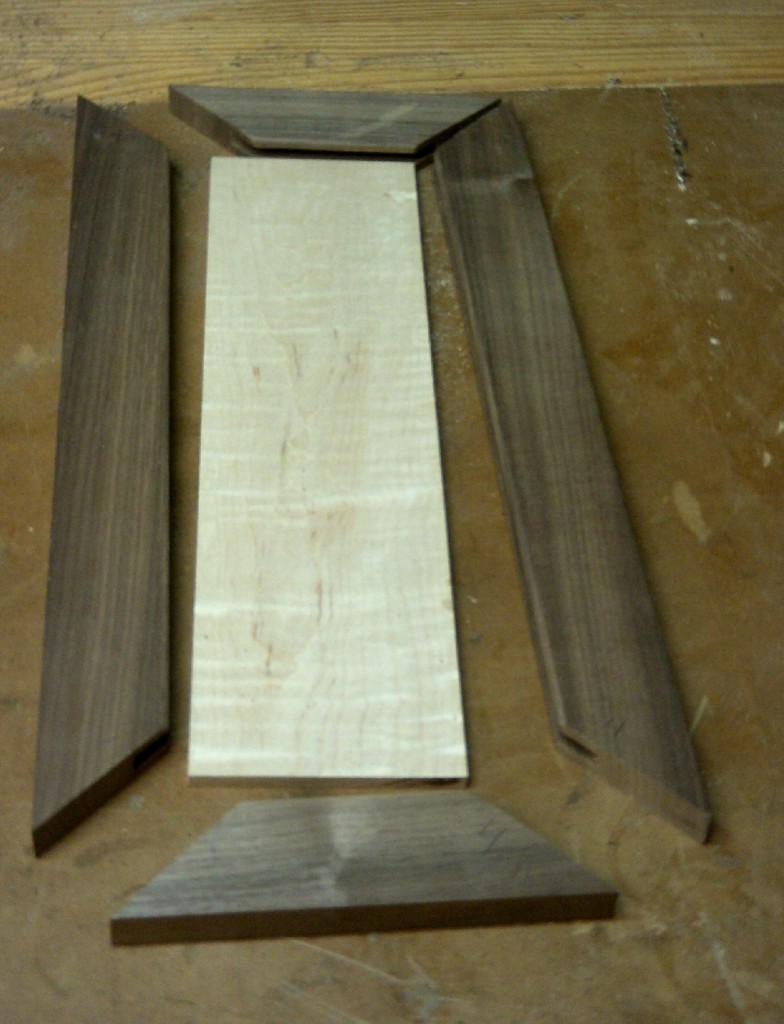
For my doors, I milled a piece of tiger maple for the door panel and milled up the door frame pieces out of walnut. After plowing a groove in the edge of the frame pieces (using my table saw blade and moving the rip fence to center the groove) and mitering them to size, I laid everything out on my bench. It looked pretty good. After I rounded over the inside edges of the panel, I moved to the next step.
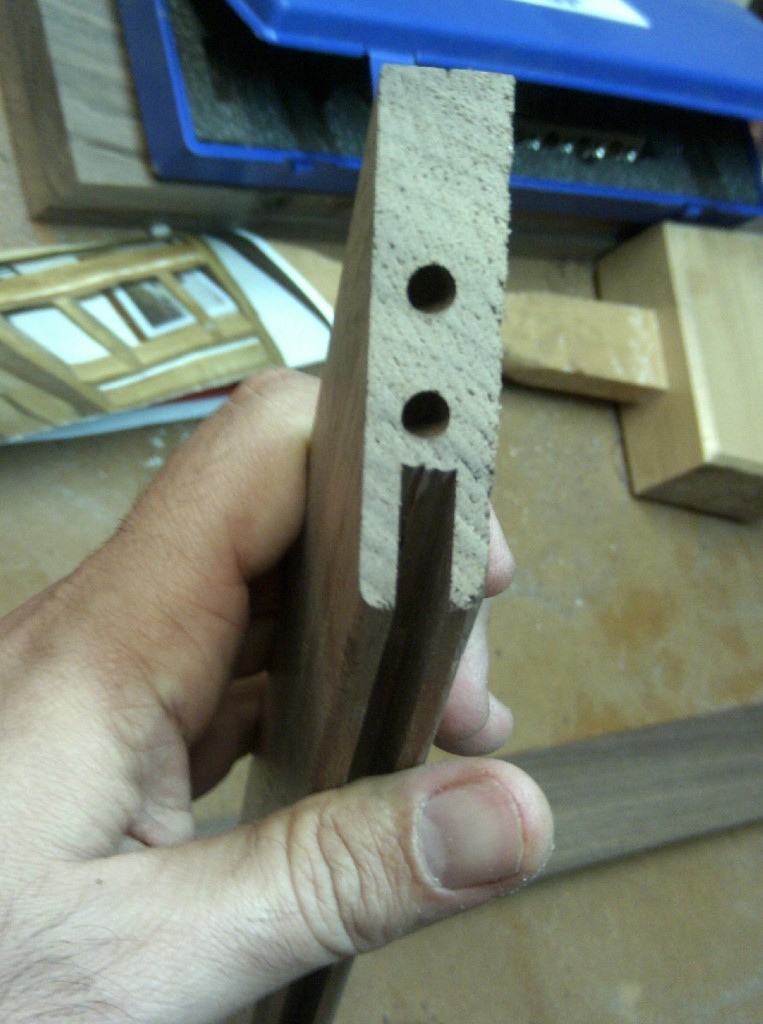
For reinforcement, I went with a pair of dowels in each corner. I could have gone with biscuits, pocket screws, splines or the like, but I have my fancy Joint Genie dowel joint jig, and it took mere minutes to get things lined up. Notice how I kept the dowel holes away from the outside of the miter, lest I drill all the way through the board. I was going to slather on the glue really well, and I knew the dowels were going to hold really well.
Of course, when you are assembling a frame using dowels, you should join two opposite corners together first, and then bring those two halves together… don’t ask me how I came across this valuable piece of information…
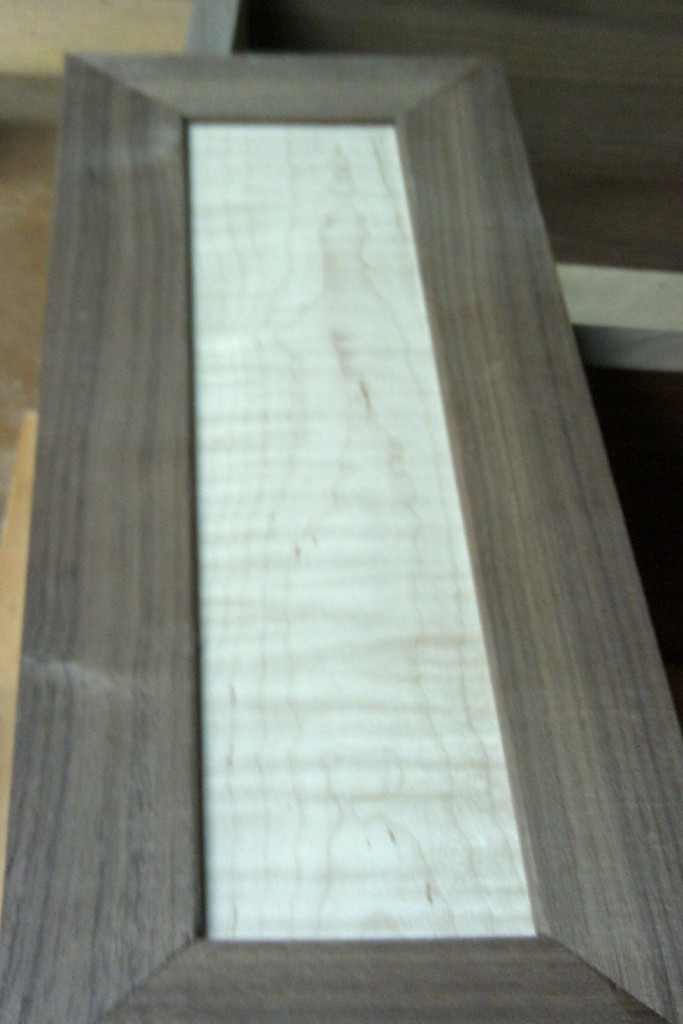
The result? Not too shabby. The door needed some sanding to even things out and get the glue marks off of it, but, all in all, it wasn’t a bad little door to work on.
What is it a door to? Well, you are going to have to stay tuned… I should have the entire project put together this weekend, and you’ll see it this coming Monday…


I like it!