Link of the week

Woodsmith’s Pocket Hole Joinery basics

You do realize that next week is Get Woodworking Week, right?  It’s an internet-wide effort to get those curious about the craft of woodworking to try their hand at the craft.

While learning how to cut classic joints is a great skill to develop with time and practice, many prospective woodworkers want to see something go together quickly to fill a particular need in their home. Maybe a bookshelf. Maybe a student desk for a child.

Pocket screw joinery can be that first, fast and strong joint that turns the desire to build something into a real first project. This guide, offered by the folks at Woodsmith magazine, gives you the basics on how the process works and the tools that you will need to crank out your first project.

About face(s)

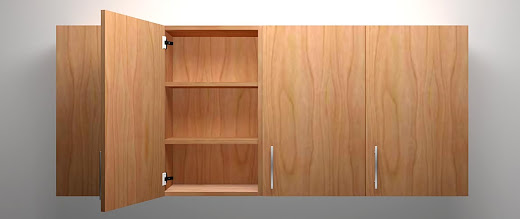
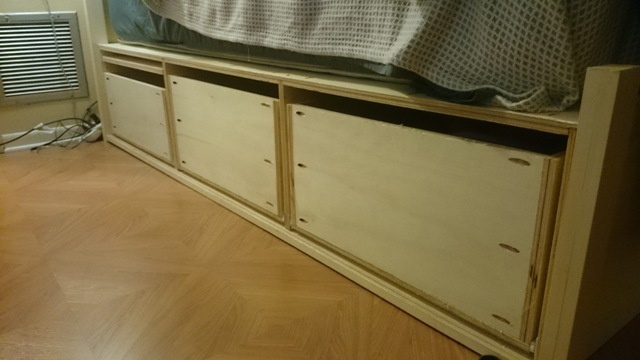
As you may have guessed from yesterday’s plan of the week, the bed I am building is basically a pair of frameless cabinets. This means that unlike North American cabinetry, there are no face frames, meaning that the drawer faces have to cover the openings and dividers between the drawer cabinets.

Face Frame vs. Frameless cabinets

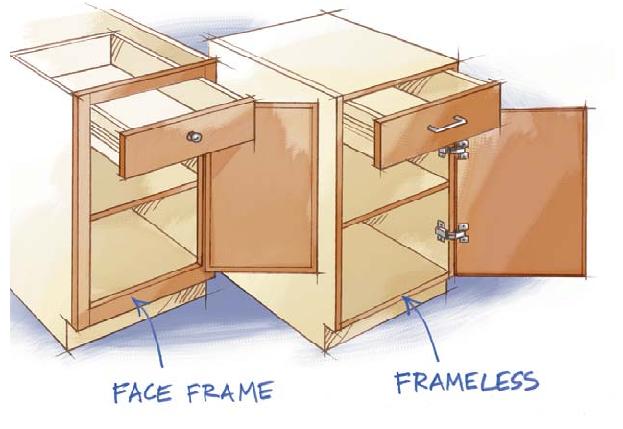
It’s not a better system. It’s not a worse system. It’s just different, and just as with face frame cabinetry, it poses a set of unique challenges that need to be overcome.

Story stick

So, I started out making a story stick. Basically, you have to start with some quality measurements, and there’s no way to get more accurate ones than by taking direct measurements. I had attached a strip of plywood to the bottom of the cabinet faces before I placed them in the room, so I accounted for that in addition to the other strips and pieces I had to cut.

Table Saw setup

Using the story stick, I set up the table saw fence so I was absolutely positive that I was going to be on the money when it came time to cut. Again, instead of remembering fractional measurements, I used the exact measurements, making this brainless.

Tile spacers

Another handy little trick I used to ensure that everything was going to work was I picked up a bag of 1/8″ tile spacers at my local home improvement center. Since the kerf on a full-sized blade is exactly 1/8″, using these spacers allowed me to throw away the tape measure and ensure that everything was spaced properly when I did the layout. Why didn’t I think about doing this years ago?

Spacers in placers

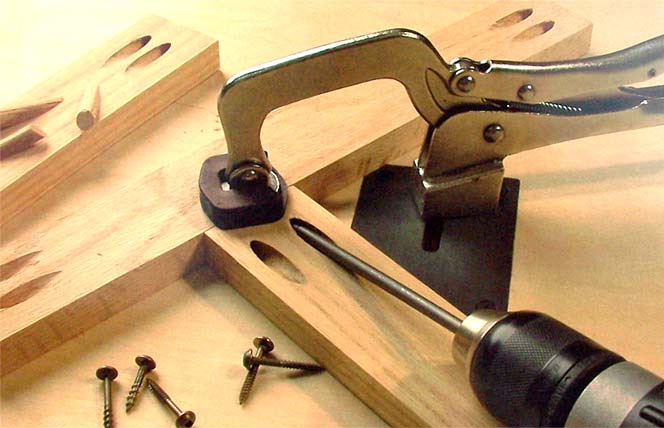
One I cut the top strip free from the piece of plywood I was using for drawer faces, I was able to use the spacers to properly align the top strip and attach it using pocket screws, and measure out the drawer faces. They were easy to mark out by simply tilting the entire piece out toward me and using the cubby dividers to mark where everything had to go.

Check out these drawers

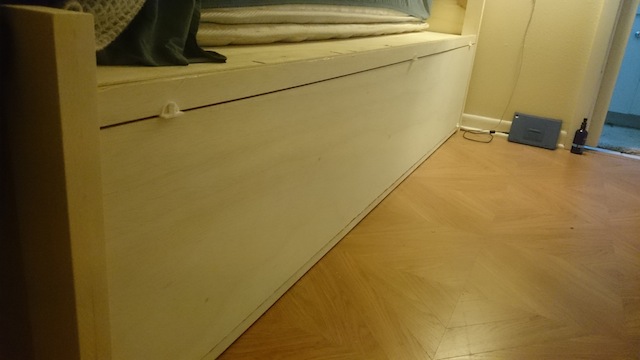
After I cut the pieces for each drawer free, I simply went back and screwed them in place. As you can see, I didn’t go for pulls for the drawers. Instead, I used a pattern I had built a long time ago to cut out handles on another project, and went that route to allow for the drawers to be opened and closed. Why? Well, Rhonda asked me if I was absolutely, positively sure that no one would ever bang his or her leg against a handle in the middle of the night.

Good point.

Now, all that’s left to do is a little bit of sanding, some finishing and a whole butt load of gloating. I think this one is just about done!

The weekly plan

Frameless wall cabinets

OK, I have to admit that for me building cabinets is fun. Working with large sheets of plywood makes the construction go quickly, and before you know it, you have completed a pretty sweet looking piece of work.

Frameless wall cabinets

The bed I am finishing up was my first foray into European style frameless cabinetry. Unlike North American face frame cabinets, these projects go together quickly, don’t get involved in time-consuming face frame construction and are as strong and as nice to look at as their face framed cousins.

So, how do you build them? Well, today’s plan from some other guy named Tom (honestly, he didn’t list his last name!) shows how to build the frameless uppers. He also has a great tutorial on building frameless base cabinets as well.

If you are interested in learning about this cabinet construction method, this is a pretty sweet place to start.

Link of the week

The British Museum’s Egyptian Woodworking tool collection

OK, so you like old school woodworking tools. Maybe some 19th century coffin smoothing planes? How about some 17th century chisels?  How about something just a little older?

Egyptian Tools

Believe it or not, the ancient Egyptians were accomplished woodworkers. And, as woodworkers, they had sweet woodworking tools. This collection at the British Museum features the bronze axes, saw and a bow drill – a standard carpenter’s tool box from approximately 1500 BCE.

While it may seem difficult to believe in such an arid place, the ancient Egyptians were proficient woodworkers, with evidence of dovetail, dowel and mortise and tenon joints in preserved furniture found in the tombs of the pharaohs.

The final push

So, did anyone happen to hear about a big football game that happened last night?

Super Bowl Interception

Rumor has it that there was some big play at the end of the game that determined the outcome. Maybe I should pay better attention to these things…

Part of the reason why I wasn’t into the big game was that I was busy pushing to the last parts of the bed project. Yes, my sinus/double ear/bronchitis issue slowed me down, so this weekend, I had to finish the last of the drawers. It took some time, but each of the drawers was relatively easy to finish, and they all roll like a dream on the 3/4 extension hardware that I picked up for the project.

The drawers in place

Now that they are all in, the next step is to create the drawer fronts that will cover these drawer boxes and unify the sides of the bed. Since these cabinets are built without face frames, it’s going to be critical that I get everything lined up nicely so the fronts look balanced. The added bonus is that they will also serve as drawer stops, preventing me from pushing the drawers in too deep.

After that, I will need to put the finish on this project. Again, I am going with some water based finish, which should make this look pretty sweet and limit the amount of fumes in the house.

The next project is waiting...

And, I had better get that done soon, because the wood for the next project has already arrived. What will it be? I can’t tell you, but I know that there is a young lady who will be expecting it sometime in the not too distant future!

The weekly plan

The Drunken Woodworker’s beer caddy

So, I hear there may be some kind of big football game on today… and I hear that this game – more than any other – may require some tasty snacks and a few adult beverages.

David's Beer Caddy

Well, if you are going to watch the game in style, there’s nothing more awesome than bringing those adult beverages to the celebration in a hand-crafted beer tote. This plan by David Picciuto, the Drunken Woodworker, allows you to build an awesome tote for your favorite beverages and show off your woodworking skill.

So, I would recommend you get out to the shop ASAP so you will have yours read for kickoff!

Link of the week

OSHA’s page on saw dust

No, I’m not taking a job in a cabinet shop or sawmill. However, I have been laid up the past few days with a sinus and ear infection (can you believe at age 46?), and while it’s probably not related to the sawdust in my shop, it’s not a bad time to remind folks about the potential dangers of breathing sawdust.

Sawdust

Simple steps, such as hooking up a shop vac to dust creating tools and using dust masks can make a huge difference in the comfort and safety of your shop. Plus, I mean, the better you can capture sawdust right at its source, the less cleaning you will be doing later.

Never a bad reminder…

part of the Wood Talk Online community