Hey, folks, I’m taking the day off to do a little grilling and take in some fireworks. For my countrymen and women, happy Independence Day! For everyone else, I’ll see you on Sunday with the new weekly plan.

Party on!

Hey, folks, I’m taking the day off to do a little grilling and take in some fireworks. For my countrymen and women, happy Independence Day! For everyone else, I’ll see you on Sunday with the new weekly plan.
Party on!
When I started woodworking, I brushed on polyurethane. And, it was good.
Then, I developed a wipe-on finishing regimen with some home-mixed stuff. And, it was better.
Now, I’m on a new type of finishing kick, and it’s fast as lightning and does a very good job. Let me start of by saying that, yes, I do own an HVLP spray setup. I picked it up for pretty cheap over at the Lowe’s mega mart, and it does a good job. I think I have sprayed some water based poly and some shellac with fair results. I will need more practice. 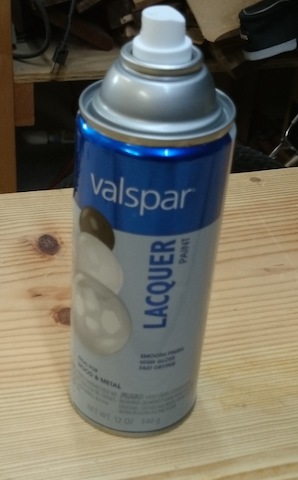 But, for speed and convenience, it’s hard to beat a can of lacquer. This stuff is the cat’s pajamas. Well, actually, it’s not – it’s nitrocellulose lacquer, made by the nitration of cotton. I’m not sure what the heck that means, but I can tell you boy howdy, does the stuff stink. If you are going to use it, make sure you use the appropriate respirator and PLENTY of ventilation, or you will be – how should I put this – overcome with the fumes.
But the finish it produces … wow. The lacquer dries very quickly when you spray it, minimizing the amount of time that dust or other stuff can collect in the finish. Like a shellac, the solvents in each new coat dissolve some of the coat laid down before, making the finish easy to level and easy to repair. It take a beautiful polish as well, and it’s plenty durable, which makes it one of the primary finishes used on musical instruments.  To help make applying the lacquer easier, I bought a simple spray can handle from the spray paint section of the store and attached it to the can. This way, I can hold my hand in a more comfortable position and apply the product in a smoother fashion.
 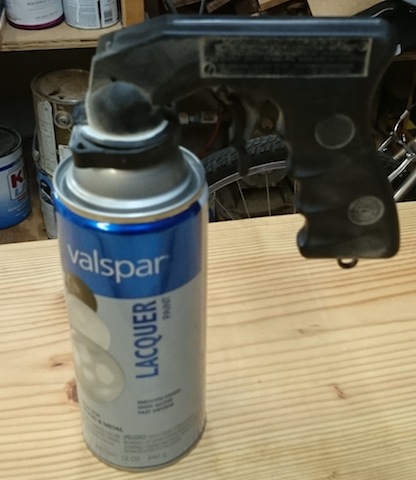 The regimen is pretty darned simple. I sand the piece down to 220 grit, then make a decision. On the dedication plaque I made for my friend Len, I first applied a coat of my wipe-on finish to give the wood a bit more depth. I had to let that dry for at least a week, since the finish contained boiled linseed oil and poly. Once I had that on and let it dry, I applied six coats of clear lacquer.
  Woah, you’re thinking. Six coats! Won’t that take an eternity to dry? The fun part of spraying lacquer. You have to wait – maybe – five minutes between applying coats. If that. And, since the solvents in the next coat bond with the previous ones, there’s no need to sand between coats as you build. You simply shoot layer after layer. To finish the piece off, I did sand it down with some 320 grit paper to ensure I had a very smooth surface, then hit it with one last coat. I can tell you, the finish on that piece is gonna be there for a while.
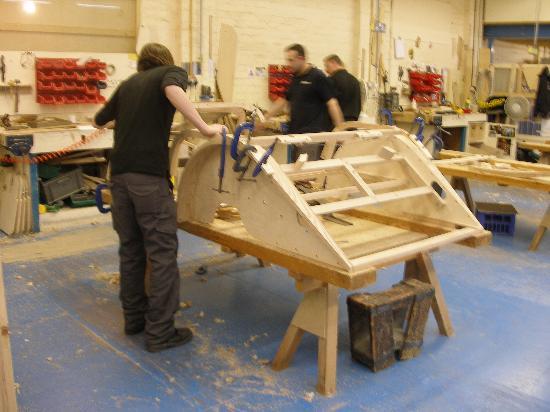
 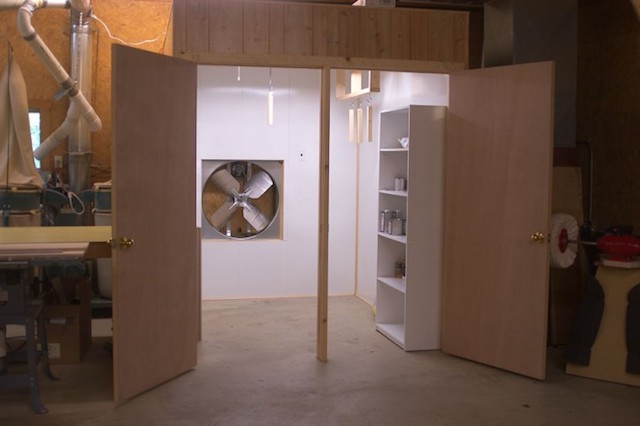 Now, if you are going to move beyond the simple spray can of lacquer, you are probably going to want to build a dedicated spray booth with an explosion-proof fan to provide TONS of air flow, plus an appropriate filter to get the solvents out of the air before you expel it into your neighbor’s yard. Kind of like the folks at Dogwood Guitars build in the picture above here. But, that will be a post for another day.
Until then, if I need a high-quality hard film finish on a smaller project, I’ll get my can out into the shop.
I have got to confess, I feel as if the past few weeks I have been going through the motions here on the blog. Once I had my health scare earlier this month, I really didn’t have the strength, energy or – quite frankly – confidence to get out back into the shop to do any woodworking. It’s also a tough time of the year to be in the shop. After all, the ‘feels like’ temperature is well over 100 degrees, which really didn’t help.

But, this weekend, I took a page out of cowboy legend Gene Autry’s playbook. I identified a job that had to be done, headed out to the shop early in the day (when it was cooler) and got back in the saddle again.

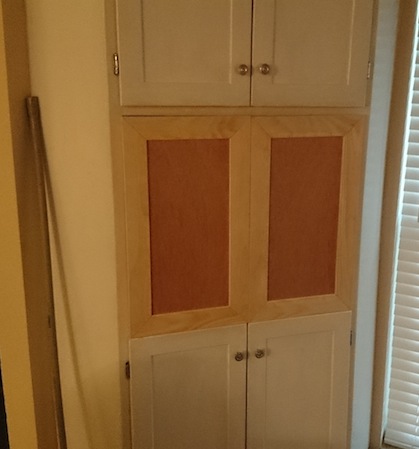
The project was a simple one – to build a pair of doors to enclose the old TV area of the corner entertainment center. With the new front unit, this piece is now being converted to full storage for our old photo albums, school yearbooks and other miscellaneous stuff we have stashed around the house.
This was a very early project I had built, and, at the time, I built the doors using mitered frames grooved to hold some 1/4″ plywood. It was an easy way to do the deed without any real fancy joinery, and the results have lasted more than 12 years so far with no issues.
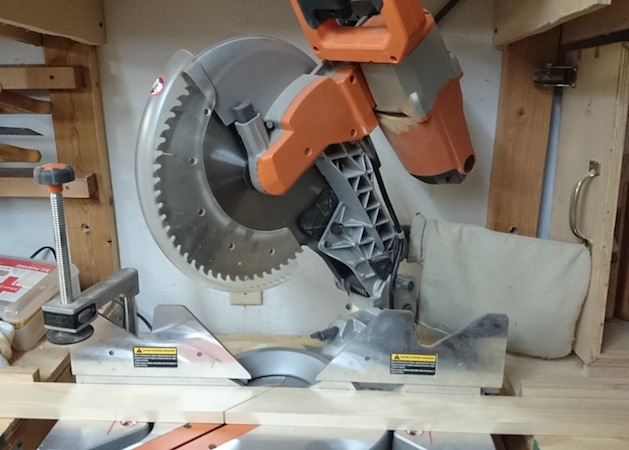
So, I got to work. The beauty of building doors this way is that you don’t need a whole lot of tooling. I first measured how tall and wide I wanted the final doors, then cut them to size using my miter saw. Since I have it measured out to cut accurate 45 degree angles, I was able to get all of the frame pieces cut accurately in no time flat.
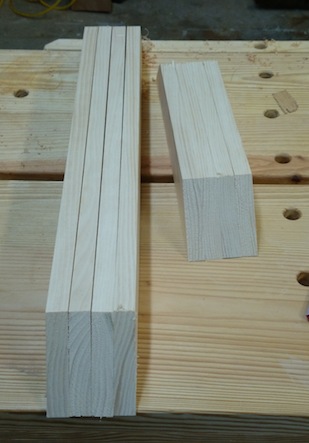
With the pieces cut, I laid them out on the bench and marked where I wanted the groove for the plywood panels. With those marked, it was easy to test cut on some scrap to make sure two passes over my standard combination blade would cut a sufficiently wide kerf to house the panels. Very simple.
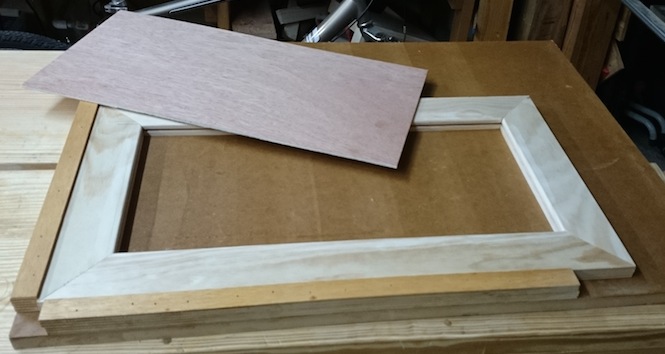
I used my square assembly jig to lay out the pieces and mark the corners. From there, I measured for the size of the center panels for the plywood and got everything together for the assembly.
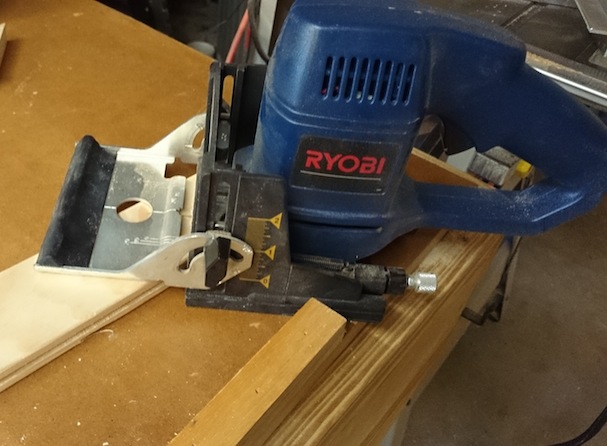
To help hold the miters together, I went with a biscuit joint like I had used on the four original doors. It had been a while since I used that tool, but when I was building this piece back in 2002, it was state-of-the-art for me. Fortunately, it was easy to get back into the swing of things with the jointer, and before I knew it, I had all four corners cut and ready for glue.
Once the glue dried, I brought them inside for a quick dry fit. They worked nicely. Now, I just have to sand, prime and paint the doors to match, then attach the hinges and handles, and that project will be off the list of things to do.
And, I’ll be back in the shop once again to get some more work done…
So, here in the United States, we’re getting ready to celebrate a long Independence Day weekend. Our friends in Canada will be celebrating Canada Day on July 1. And, everyone north of the equator is moving their food preparation to the great outdoors to enjoy some quality outdoor grilling time.

Without the handy conveniences of kitchen countertops nearby, having a solid work surface to prep your food and hold your ingredients and tools is a must. That’s what makes today’s plan so darned cool. Offered by Popular Mechanics, the cart gives plenty of room to make your outdoor grilling experience a fun and convenient one.
Now, get out there and become the master of your grill.
At one time, just about every single car that was on the road had at least a wooden frame to handle the load of the car’s components. It was a holdover from the days when wooden carriage makers got into the new world of car building.
Today, there is still a company that builds its cars with wooden frames. The Morgan Motor Company in the United Kingdom still sources ash for the frame components due to its strength and flexibility.
While most of us may never be able to afford a Morgan, the thought that these beautifully crafted cars are out there made in a very traditional way is enough to warm the heart of any woodworker.
No, it’s not former Secretary of Defense Leon Panetta…
 Nor is it famous Communist mover and shaker Leon Trotsky.
  It’s not even former heavyweight boxing champion Leon Spinks…
 Although, wow, that giant toothless grin really speaks volumes…
No, today is June 25. Yes, the 25th day of the sixth month of the year. What happens on the 25th day of the twelfth month? You got it. Noel – also known as Christmas. (Just where did the first half of 2014 get off to?) This, of course, also means that Hanukkah and Kwanzaa, along with every other winter holiday – is about six months away as well.
Which means – you guessed it – it’s time to start the process of thinking about building holiday gifts.
Now, I’m sure that most of us are probably thinking about summer vacations, but it’s my duty to remind you that – for many of us – our productive shop season is when the temperatures are warm and comfortable. When we have time to look at and evaluate dozens of potential plans. When we have the time to order not only the lumber for our gifts, but the appropriate hardware and tooling we are going to need to complete the job.
Maybe even it’s a good time to develop those necessary skills that we are going to need to call upon at the last possible minute to pull the holiday miracle out of our hats.

Well, my promise to you is that I will be holding the second annual Last Minute Elf week from December 7 through 13 this year, and I hope that this year’s event will be bigger than last year’s.
For now, however, why not take a look at the entries from last year’s Last Minute Elf entries to get some good ideas of projects and finishes you might want to try in your shop this year.
You know, to get ahead of the massive holiday rush, before it rolls up on you.
Until then, Happy Leon, everyone!
Wood Magazine’s Planter Box and Trellis
Summer is here in the northern hemisphere, and now is the time for everything to be lush, green and in bloom. It’s the time for those of us who live in more northern climes to forget about the seemingly never ending blizzards and ice storms and focus on enjoying the great outdoors.

What better way to enjoy the great outdoors than to do a little gardening? Today’s plan is from Wood Magazine, and it’s great one for those with a green thumb in your lives.
The planter can be built as is, or you can also add the handsome trellis made of wood and common copper water pipe to snazz things up and provide a great surface for climbing plants to grab on to.
Best of all, the plan is free…