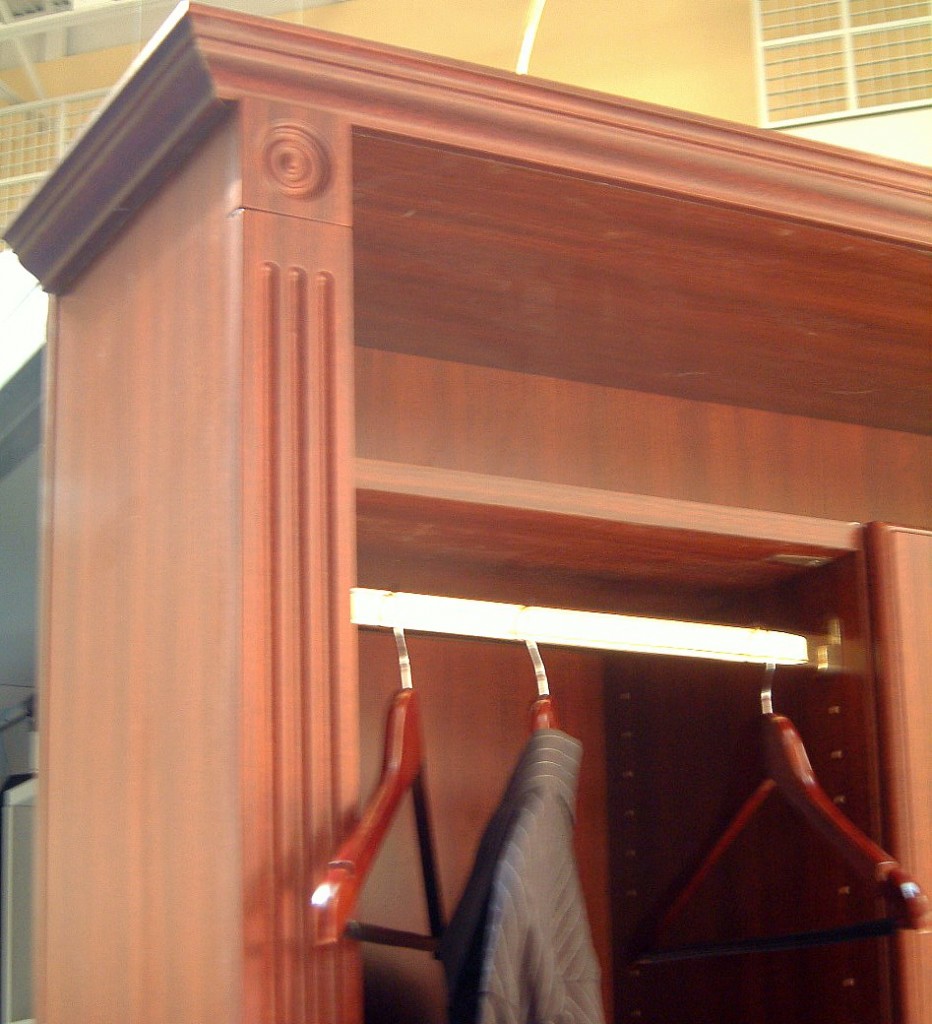
Woodworking projects can be embellished in so many different ways.
Pick out some sweet boards with impressive figure. Mix contrasting wood species. Lay in an awesome piece of veneer. Choose some outstanding hardware. Even a highly-polished finish can make a piece pop.
But, even the most basic woodworking projects made of the most common species of wood can be jazzed up with molded details. You can add a purchased molding to your work, rout a profile on the edge or, if you really want to get fancy, you can do some fluting.
No, I’m not writing about the tall, narrow glass you drink champagne from, nor the side-blown high-pitched instrument frequently used in marching bands and orchestras. Flutes are the shallow grooves that sometimes ornament the faces of columns and flat vertical moldings called pilasters. In stone and woodwork, they are usually in a parallel, evenly-spaced series vertically to a surface.
The flute is actually the groove itself. The area between the flutes is known as the fillet.
The first flutes ever observed in architecture were carved into stone columns adorning buildings in ancient Greece and served as a visual design element. They can create dramatic shadow lines, and make the vertical elements of a piece seem taller. Surprisingly, Roman columns were typically smooth and polished unlike their Greek predecessors. And, yes, all of those flutes were painstakingly carved into the stone by hand. Hey, neither Rome – nor ancient Greece, it appears – was built in a day.
Today’s woodworker has more than a few options when it comes to adding flutes to pieces. Many lumber yards and hardwood suppliers have a stash of pre-milled fluted material on hand. While this is an easy way to go, it often limits your options. “Many of these pre-milled fluted moldings come in only a few common species, and you are limited on the size, spacing and number of flutes,” said Tim Walter of Eagle America. “You might be stuck with something that looks out of place – either too large, too small, or the wrong grain pattern going the pre-milled route.”
An option that gives the woodworker more flexibility is to mill your own fluted moldings. One way to do this is to set up a router table with a plunge bit (a core box, v-groove, etc) in your router and a router fence. If you route one flute, then flip the board end-for-end, you can route a groove with identical spacing on the opposite side. From there, you can cut the boards to length and apply them to the piece you are building. “That’s one option, but it might look a little choppy,” said Tim. “After all, you are just cutting the flutes at the end. You’ll have to find a way to cap the ends of the molding, and those flutes will end abruptly, leaving an pretty jarring transition.”
A better way to make the fluted profile look neater would be to create stopped flutes. This can be done by lowering a board onto a spinning router bit, running the board the desired length and then pulling the board up from the bit at the end. “That’s one way to do it, but it can be tricky to get all the grooves to start and end the same distance from the end of the board.”

Another, easier way would be to rout the grooves from the top of the board with a plunge router. “This way, you can plunge the bit into the board right on a pencil mark and run them the length of the board. You can get much better results because you can see where you are routing.”
The challenge with this method, however, is keeping the router on track as you make the grooves. On long pieces, a groove that jogs or slants one way or the other will stick out like the proverbial sore thumb. To ensure the router stays on track, many woodworkers turn to a dedicated edge guide. While that prevents movement in one lateral direction, there is the chance that just the briefest loss of concentration can allow the woodworker to pull the edge guide away from the board’s edge. “That’s one way to create custom, hand-crafted firewood in a hurry.”
To prevent this, many woodworkers rely on a jig that clamps the board between two fences, preventing any lateral movement across the face of the board. Tim showed me the jig they sell at Eagle America. It consists of a 3/8” polycarbonate base that mounts to your router’s sub base. The two edge guides are mounted to the main base plate with bolts and knobs that ride in two slots. “You can get infinite adjustments between the two edges that way, and you can rout pieces from 1” wide to 12” wide… more than adequate for the vast majority of woodworking operations.”

The added benefit of the jig lies in the shape of the edge guides. Not only can they be used on straight moldings, they can also be reversed and the smaller edge with ball bearings can be used against the work. This way, woodworkers can rout flutes into a curved or arched piece. “Imagine if you had to trim out the top of a Palladian window. This guide can allow you to make accurate flutes that match the curved profile of the molding. The results can be stunning.”
Eagle America is also throwing in a free round nose bit for woodworkers who order the jig. “We want to make sure that anyone who orders this jig will be ready to go as soon as it arrives at their shop. We don’t want them to have to wait longer to pick up the right bit to make it work.”
While flutes in your moldings won’t guarantee your work will be around 2,000 years from now like the stonework from ancient Greece, they can make your work a real piece of art.


