
What has gotten into me? I spent most of the summer kind of lazing around, barely able to get out into the shop. Now, you can’t keep me out! I’ve been bitten by the bug.
So, last week, I built a shoe shine box. And, on Friday, I came home from work to shine my shoes (actually, I had Steven shine them, but that’s a whole other story…) So, they were looking good, but the problem was that I was just throwing them onto the floor of my closet. Now, how the heck were they going to stay nice and shiny? It was time for me to get off my behind and add to the organization… by building a shoe rack.
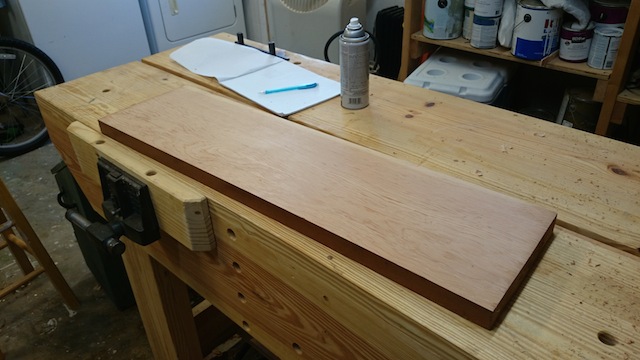
It was insanely easy to build, and while it didn’t involve a lot of fancy joinery, it is serving its purpose well. I started with a Douglas fir board that a friend gave to me when she was having work done at her house. It had been finished with some varnish, but that was easy for me to peel off using my thickness planer. Fortunately, the board had little twist in it, and it was beautifully clear. I planed it down until I had a nice uniform thickness – approximately 1 1/4 inches thick. I then straight line ripped both board edges until I had a piece that was four-square.
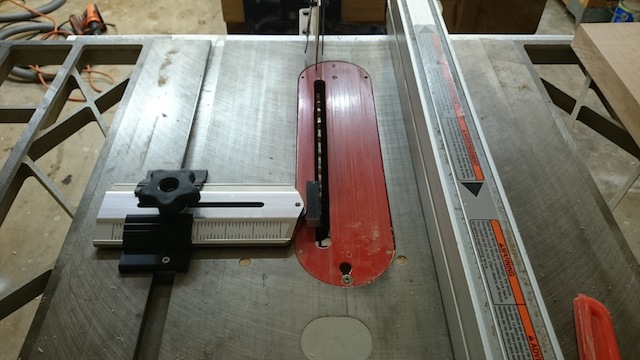
Since the idea I had worked on separate slats, I set up my table saw using my Infinity thin strip ripping jig to ensure I was going to get consistent strips for the piece. I used a spacer to get 1/2″ thick strips for the cross slats, and set up for 3/4″ strips for the end pieces.
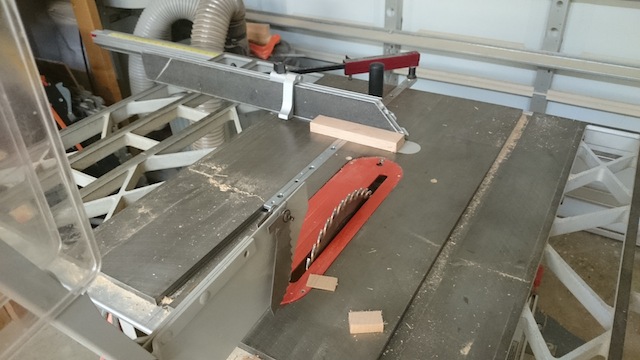
With the strips ripped, I turned to my Osborne EB-3 gauge to cut my strips for the end pieces to the right size – four 9 inches long, and three 7 inches long. That was a piece of cake.
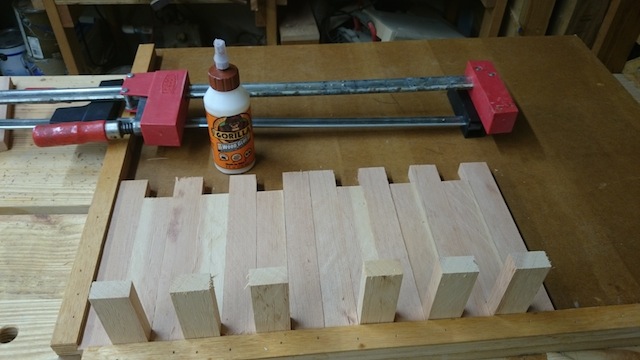 I turned next to my square assembly jig for the glue ups. I laid out the pieces, alternating the long and short ones. I used some 3/4″ spacers to set the short pieces at the right height. Once I had those suckers lined up, I turned to the glueup.
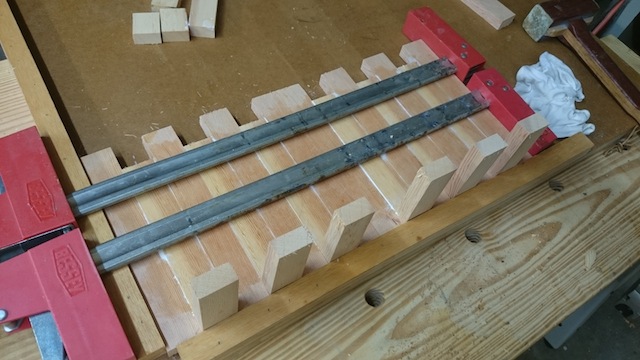
It took some juggling, but I was able to get all of the pieces lined up, glued up and clamped up. As you can see, I glued up both sides at once, making this run a little faster. Of course, I had to remember to not glue the two middle pieces together…
After I got these babies out of the clamps, I ran both assembled sides through my thickness planer again to clean them up. That went faster than sanding, and it gave me a very good look. Remember, you just want to skim them, not remove a ton of material.

After that I cut the cross pieces that were 1/2″ thick to 26 inches wide. They fit perfectly into the slots formed by the short pieces. It was a snug fit, and that was good. I dabbed some glue onto the upright pieces and used my brad nailer to tack one brad into every intersection. Were the brads overkill? Who cares… they worked!
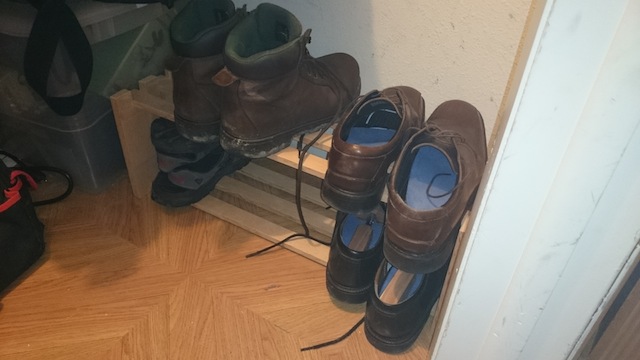
I sanded, paying special attention to round over the corners of all the boards. Douglas fir can be very splintery… Once I dusted the piece off, I could have finished it, but I just opted to set it on the floor of the closet and start stacking my shoes onto it. I might finish it later, but who knows, maybe there will be another project I want to start!