
I have cut mortises a few different ways over the years, but I think I may have found my new favorite way. You see, about a year ago, I got a gift card and decided I would purchase a Mortise Pal jig. I had read a lot of good reviews about it, and short of shelling out the cash for a Festool Domino, it seemed like it would be a fast and repeatable way of making mortises.
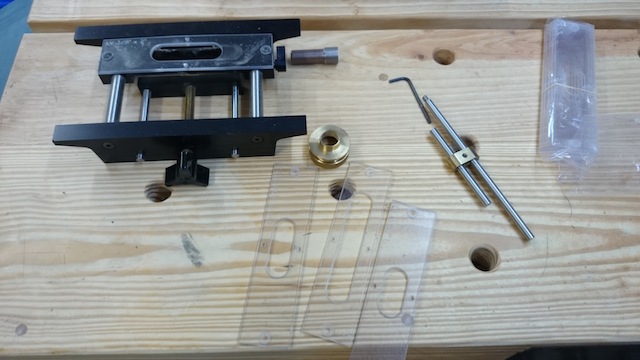
The kit comes with the jig itself, an end stop, a bushing for the router base and several replaceable plastic bases that are gauged to allow you to cut a variety of mortise sizes.
Using the jig is pretty simple – first you draw a line about where you want the mortise to fall. You can center that line, or you can vary the setback from either face… the jig is adjustable.
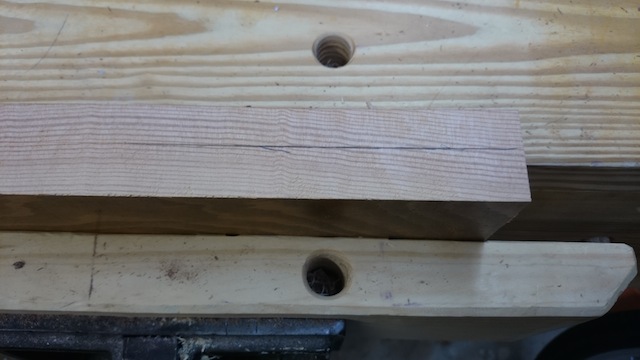
Once you get the line drawn, you clamp the jig to the board you want to cut the mortise in. As you can see with this piece of inch and a half thick fir, there is plenty of room for a considerably wider board in this setup.
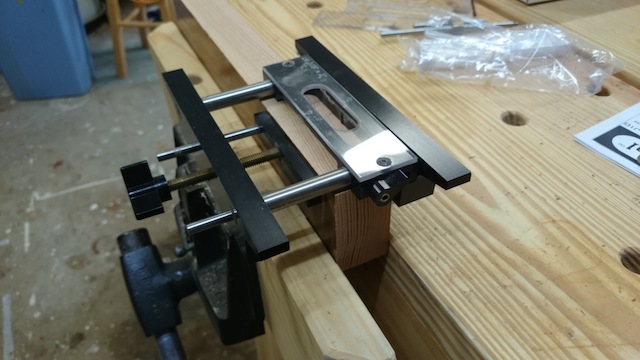
Using the line where you want the mortise centered, you can line up the center mark on the guide block. As you can see, it’s a pretty simple adjustment to make, and you can lock down the guide block with a cam lever. Pretty easy stuff.
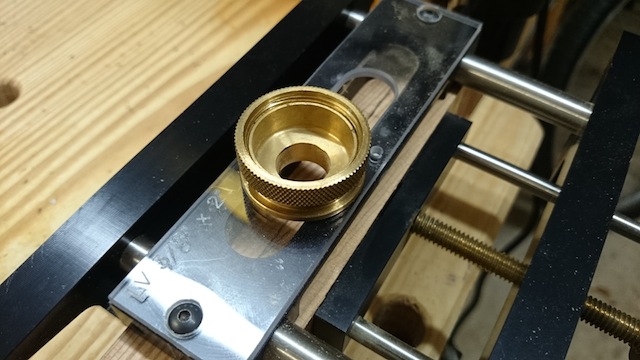 The system works well because it is geared around a guide bushing for a router base that ensures the router can’t move the wrong direction. It fits a standard router baseplate, and works best when used with a plunge router.
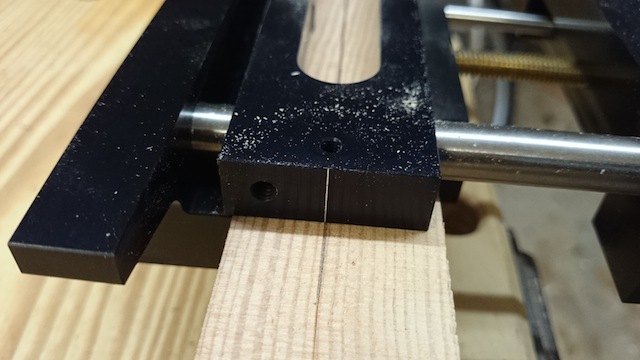
 Using an upcut spiral bit, simply set the router bushing into the plastic guide and get ready to cut. As you can see, the jig itself provides a stable platform for the router to ride on, preventing the router from tipping over and ruining the cut. Pretty clever.
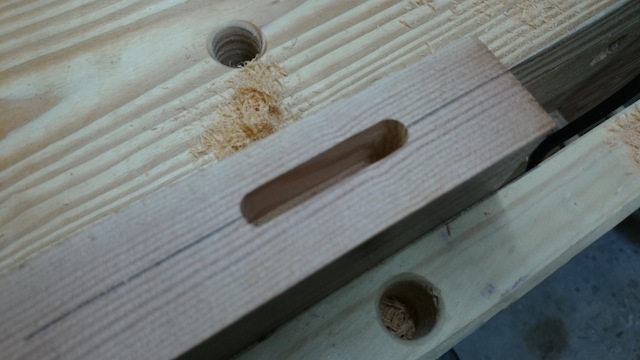
As with all router bit cut mortises, you will end up with rounded ends. That’s cool. You can either round over the edges of your tenon, cut your tenon a little shorter than the mortise or – if you are feeling froggy – you can square up the ends with a chisel.
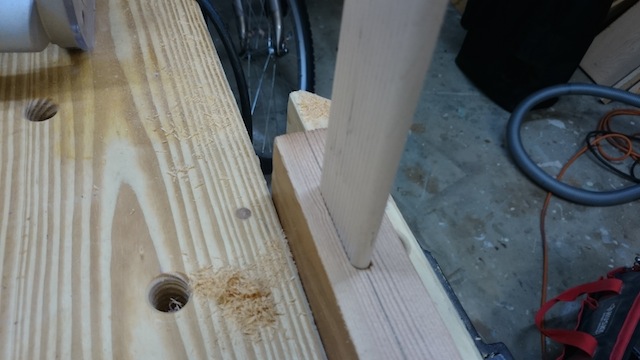
Or, you can go even a totally different route. The company also sells loose tenon stock, which allows you to cut matching mortises into the different components and join them that way. You can even cut your own loose tenon stock and keep it on hand if you want to do that. This way, one machine setup can answer your joinery needs.
Now, all I need is a project that requires some mortise and tenon joinery…
That is KOOL!
But, like so many of these specialized jigs, it is hardly worth it if you don’t do a lot of this type of work. I do such a wide variety of different projects in wood that I think I will just keep doing the few mortise and tenon joints that I do by hand for now.
I will keep in mind however if I should ever need to do 50 or so M&T joints in the future.
Thanks for the post.
Rog
Pretty cool!!
I did my first M&T a few weeks ago and was lucky to find a mortising machine at the local guild shop here in Birmingham. So darn cool to have this close to the house. I figured it out fast and had the shop supervisor right there watching me. He had never done one either. I was joining the side stretchers for my bench and I wanted to make darn sure that I had a secure joint. I cut a two and a half inch mortis for a two and one quarter inch tenon. The supervisor said “man that is is little overkill, don’t you think? I said “Nope. That sucker is gonna hold.” I knew that I was gonna apply more than enough glue so I left a glue pocket in the bottom of the mortis. When I put it together it fit like a charm. The bench is steady as a cement floor.