The captain made one last sweep of the horizon before pulling his eye from the periscope’s eyepiece and snapping the handles into their storage position. “Down scope! Weapons officer, flood tubes two and three and get ready to fire on my command!” The crew sprang into action in the hot, cramped quarters, adjusting dials and pulling levers to get the warship ready to fire on the unseen but very dangerous opponent. “XO, with our range to target, how long will the fish run until impact?”
“Thirty seconds until the impact, sir,” barked back the boat’s Executive Officer, “But, I don’t have to remind you, Skipper, that those destroyers are very close and we’re going to have to begin evasive maneuvers as soon as we fire.”
“Very good. Conn, once we fire, make your heading three-two-zero degrees, go to all ahead full, crash dive to 300 feet and rig for depth charge attacks. Fire on my mark…”
When movie directors want to create a film with a tremendous amount of tension, pressure and claustrophobia, they turn time and again to the silent service – the submarine fleets. Run Silent, Run Deep, Das Boot and the Hunt for Red October – while taking place in different eras – each captured the pressure cooker environment in the service below the waves where one misstep can take the boat from the ultimate stealthy killing machine to a helpless hole in the water where submariners await their fates.
While the aim of Hollywood is to create the pressure-filled environment when it comes to sub warfare, woodworkers have their own kind of subs to deal with which can actually reduce stress and make things considerably more easy in their shops.
I’m talking about sub assemblies for larger and more complex projects. The idea is very simple – you break down an involved assembly into manageable parts, tackling each in turn to ensure the joints are tight and everything is square before moving to the next step. Most woodworkers have made the mistake of trying to assemble everything all at once. Usually, they run out of hands, clamps, open time with the glue they are using and patience, leaving their project gappy, ill fitting and out of square.
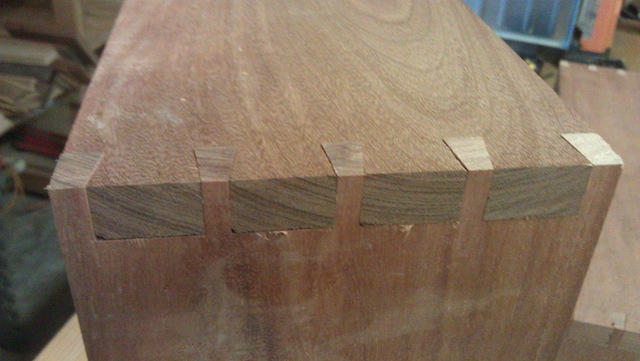
I had the chance to go with some sub-assemblies on a step stool I am building for my mom’s house. Sure, it’s your average, run-of-the-mill Shaker style step stool you have probably seen about a thousand times before. I’m making it out of some nice Santos mahogany, and I want to make sure it’s built strong, so I turned to my Leigh R9 jig and decided to crank out a few dovetails.
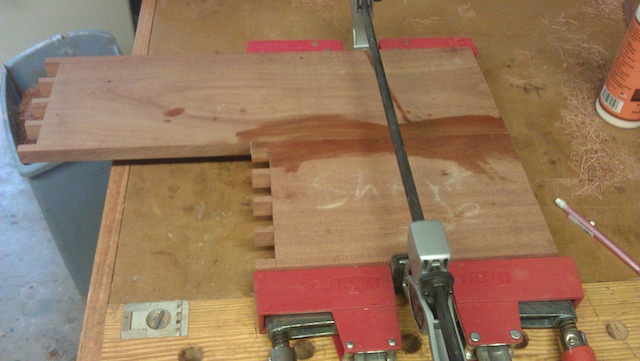
Now, I have made these kinds of stools before, but I have nailed or screwed the top to the sides, but never with dovetails. I had always wondered how you can make a two-step stool with dovetails – I mean, wouldn’t the top step get in the way of dovetailing the bottom? That’s when it hit me (I know, I am a dope) – I saw that you make two separate one-step step stools – one high and one low – THEN you glue the high and low side pieces together to make both sides of the stool. Duh…
Of course, as you work in sub-assemblies, it’s critical to ensure you have everything oriented properly. Creating two left sides or two right sides of a project may seem like something not too important at first, but the final assembly will involve a lot more cursing and anger if you don’t take that into consideration.
This allowed me to first cut all of the dovetails to make each of the sub-assemblies. Then, I broke everything apart and glued up those side pieces so I could cut a decorative curve into the bottom so the stool would stand on four points before I glued the treads and crossmembers into place for the final assembly. Heck, since it’s flat on my bench, why not just sand that sucker down inside and out? I might even do a little pre-finishing on what will become the difficult-to-reach areas once the stool is finally assembled.
Gosh, that wasn’t that tough, was that?
I wonder what kind of woodworking solutions I can come up with after seeing one of those superhero movies?


