
Spring is here – which means that lots of couples will be saying ‘I do’ as they tie the knot. Here in Florida, we are no exception to the rule. Two friends of mine recently sent out their invitations, and – as I am wont to do – I offered to build them a project as their wedding gift.
 Last weekend, I had a day where I was going to be free to do some intensive woodworking. To offer a glimpse into my shop habits and the speed of my work, I decided to start a stopwatch in order to time how long it is taking me to build this box. This way, I could measure the amount of elapsed time for each step in the process.
Was I trying to break a record? Nah… But, this exercise did offer me an interesting glimpse into how long it takes to build and what steps I was doing at each point in the process.
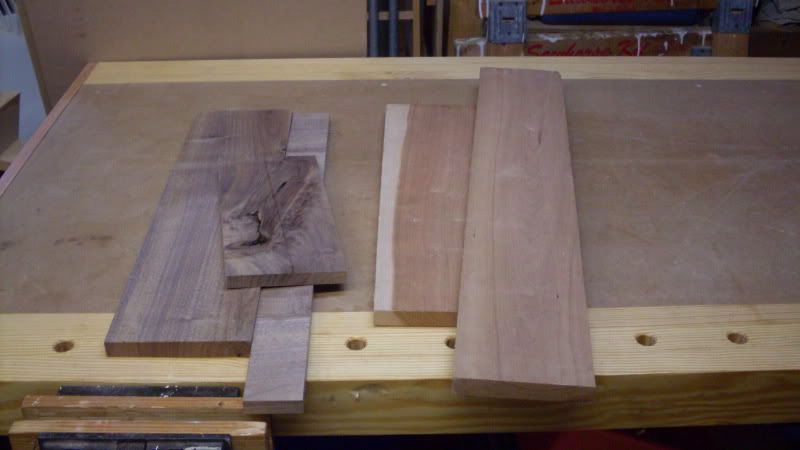
The project is a small cherry box with mitered corners reinforced with dovetail splines. It will have a lift-off lid and a solid cherry bottom. Kind of basic, but still a nice piece which will prove to be an interesting project.
Now, I did choose my boards before I started, and I did edge-glue a wide piece of walnut for the splines. And, the wood I was working with was already surfaced and dimensioned, so that milling step wasn’t necessary, saving time.
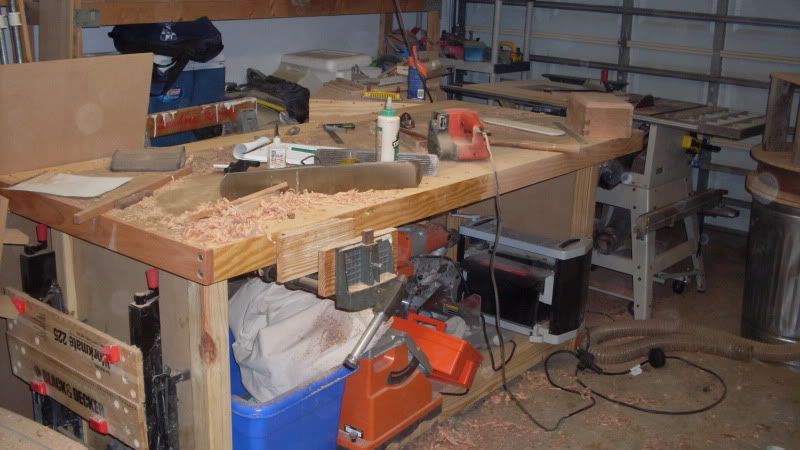
Before I started, I made sure that I had the basics: Radio tuned to favorite station – check. Refreshing beverage – check. Eye and hearing protection at the ready – check. Measuring devices at hand – check.
I started the stopwatch, and kept notes as I went along:
- 0:00:00 – 0:03:50 – Rip Boards to width. My saw is tuned up, so the cuts came out very smooth with minimal additional work required.
- 0:04:00 – 0:13:00 – Sweeten boards with a jointer and smoothing plane.
- 0:13:00 – 0:28:00 – Cut sides to size, cut miter joints on edges of boards with the compound miter saw.
- 0:17:45 – Ask kids where the shop vac is. After three choruses of ‘I don’t know’ my oldest son remembers that it was on the porch and brings it back. Good boy.
- 0:18:40 – Ask my oldest son if he knows where the hose attachments are for the vacuum. “Oh, I forgot them.” Brings them to the shop.
- 0:23:14 – Discover that it’s too warm in the shop I turn on the A/C unit.
- 0:28:00 – 0:33:00 – Groove sides to receive the bottom.
- 0:33:00 – 0:40:00 – Discover I had cut the grooves too wide and make a note that I have to make the tongue on the box bottom thicker. Sweeten up the groove with chisel and router plane.
- 0:40:00 – 0:56:00 – Carefully cut top and bottom of box. Mill tongue on bottom.
- 0:56:00 – 1:11:00 – Wife checks in. Begins to ask in great detail about upcoming party plans for my youngest son’s First Communion. Spend 10 minutes discussing the merits of cubed cheese tray vs. sandwich ring. Ultimately tell my wife to order whatever she thinks works best. She leaves shop in a huff. “You don’t care about planning this event!” Oy….
- 1:11:00 – 1:25:00 – Regain composure, glue up mitered sides of box. Clamp assembly.
- 1:25:00 – 1:33:00 – Spend time to clean up work area. Stare dumbfounded at bench wondering just how many tools are pulled out just to get this far…
- 1:33:00 – 1:50:00 – Mill top elements.
- 1:50:00 – 2:20:00 – Glue up top and inside ‘plug’ of walnut for lid. Take immense care to ensure the plug is centered and doesn’t shift when the clamps are installed. Plug shifts anyway. Minor oaths uttered.
- 2:12:25 – Wife enters shop wearing bathing suit and informs me she’s bringing the kids to the beach. “You sure you don’t want to come with us?” Uhhh, I’m doing a little woodworking.. I’ll pass. “OK, we’ll give you some time alone in the shop.” Ahhh, what a woman!
- 2:26:18 – Wife comes back out to garage to gather beach accouterments. Asks why A/C unit is on and reminds me of the cost of the power bill. I nod, distracted. She leaves for beach with boys in tow.
- 2:20:00 – 2:35:00 – Cut and glue walnut pieces to build walnut ‘legs’ for the box.
- 2:35:00 – 2:40:00 – Take a break.
- 2:40:00 – 3:00:00 – Use Kehoe jig to cut dovetail slots in corners of the box.
- 3:00:00 – 3:25:00 – Cut dovetail splines on table saw and glue splines into slots. Wonder what I did wrong – this took what seems like just too little time. Shrug shoulders and continue.
- 3:25:00 – 3:30:00– Fit lid to box. Tune edge of walnut ‘plug’ with shoulder plane to ensure proper fit.
- 3:30:00 – 3:45:00 – Edge profile lid with an ogee bit.
- 3:45:00 – 3:55:00 – Start working on lid handle.
- 3:55:00 – 4:20:00 – Realize that the shop is now a mess with sawdust and router cuttings all over the floor. Knowing that the no one else would clean this up, I break out the shop vac and start to clean. Stare in dumb amazement at pile of tools necessary to get to this point.
- 4:20:35 – Know when to say when. At this point, my feet were getting a little sore and I was getting tired. I’ve discovered that it’s always a good idea to break for the day – or an extended rest – once I get to this point. This way, I can prevent goof-ups and – even worse – accidents.
- 4:26:48 – Crack open beer and relax on couch.
 Sure, the box isn’t done yet. However, with the wedding set for May 9, I still have a little over a week to complete. The remaining tasks include sanding down the dovetail splines to make them flush, working on the box handle, sanding and finishing.
I’ll pick up the count when I get back to the shop!