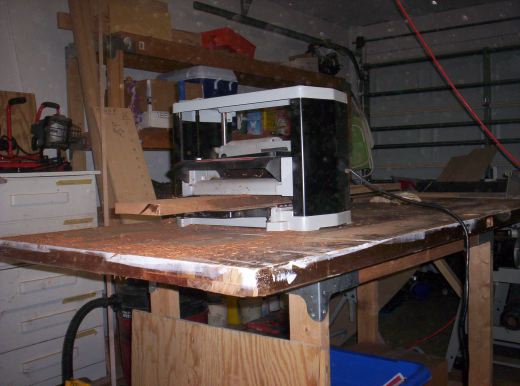
Delta 12″ Portable Planer 22-540
As with just about every woodworker, all of my first projects were built of 3/4″ material. The plywood, the lumber – everything was exactly as thick as it had come from the home center.

That’s when I went out and got a portable thickness planer.
Sure, I considered some very expensive models. But, since I thought I was only going to need it for a few projects and money was tight, I went with the ‘entry level’ Delta.
When I unpacked the unit, it looked very solid and straightforward. A simple crank handle to adjust depth, two sturdy tables for infeed and outfeed, a cord wrap. Even better was an access port to remove and replace the motor brushes to help with future maintenance. Obviously, Delta didn’t plan on this to be a disposable piece of equipment.
The first project I ‘fed’ this planer was a laminated picture frame stile – strips of walnut, mahogany and maple. The planer’s depth was easy to set, and it made short work of evening out the irregularities. I was stunned how quickly I could produce a really nice surface that only needed some sanding to perfect.
Unfortunately, there was quite a bit of snipe on the ends of the board. I planned for this and made my glue ups longer than I needed, so I was able to cut off the sniped ends and build around it. Since the project was made of free scrap, it didn’t affect me much.
Now that I’m building with more expensive wood, I’ve had to create a work around to reduce the amount of snipe I get. The solution was use a piece of melamine shelving with two cleats screwed to the underside to register it to the infeed and outfeed tables. I also lift up on the edge of the board as it comes out of the planer. These workarounds do OK for now.
I’ve reversed and changed the blades, and the process is relatively simple. It involves unscrewing two allen bolts from each end of the disposable blades. They were also easy to remove and replace. One word of caution, however. Planer blades – even dull ones – can cut you badly if you make contact with them. Always be careful when handling them!
Since this is the first planer I have ever bought or used, I’m sure my review isn’t as valuable as those who have used many others. But, hey, it works for me, and I’m really in no hurry to go out and replace it. My plan is to use it until the thing falls apart. Or, at least, until I hit the lottery!

Be carefull with that melamine shelf Tom. I did that at first and wound up picking melamine out of the surface of some pretty nice wood. After that I built a bead out of 3/4″ply with plastic laminate on boath sides. The ply is stiffer than MDF and the plastic is nice and slick.